Difference between revisions of "Fuel/Plugins"
Ogusarenko (talk | contribs) (→How to separate services from the Controller with a plugin) |
m |
||
| (114 intermediate revisions by 12 users not shown) | |||
| Line 1: | Line 1: | ||
| + | <big><span style="color:red">Fuel Plugin SDK Guide is on docs.openstack.org</span> | ||
| + | |||
| + | <span style="color:red">The most up-to-date version of this guide has moved to http://docs.openstack.org/developer/fuel-docs/plugindocs/fuel-plugin-sdk-guide.html</span> | ||
| + | |||
| + | <span style="color:red">This wiki page is left for historical reference.</span></big> | ||
| + | |||
== What is Pluggable Architecture == | == What is Pluggable Architecture == | ||
| − | Beginning with 6.0 | + | Beginning with version 6.0, Fuel features the ability to install plugins along with your environment. Fuel plugins are downloadable software components that enable you to add new capabilities to your environments in a flexible, repeatable and reliable manner. There is no need to install drivers and patches manually after Fuel deploys your cloud – plugins do this for you.<br /> |
Fuel plugins enable you to install and configure additional capabilities for your cloud, such as additional storage types and networking functionality. For example, a Load Balancing as a Service (LBaaS) plugin allows you to add network load balancing functionality to your cloud so that incoming traffic can be spread across multiple nodes. Or you might want to use the GlusterFS plugin so that you can use a Gluster file system as a backend for block storage (Cinder).<br /> | Fuel plugins enable you to install and configure additional capabilities for your cloud, such as additional storage types and networking functionality. For example, a Load Balancing as a Service (LBaaS) plugin allows you to add network load balancing functionality to your cloud so that incoming traffic can be spread across multiple nodes. Or you might want to use the GlusterFS plugin so that you can use a Gluster file system as a backend for block storage (Cinder).<br /> | ||
| Line 6: | Line 12: | ||
Fuel offers an open source framework for creating these plugins, so there’s a wide range of capabilities that you can enable Fuel to add to your OpenStack clouds. If you’re a hardware vendor that has created drivers that enable OpenStack to work with your product, you can create a plugin so Fuel can deploy those drivers when it’s standing up new clouds. Or you might simply want to enable OpenStack functionality that’s not readily available in Fuel. Because Fuel includes a pluggable framework, you’re not limited to what’s provided “out of the box”.<br/> | Fuel offers an open source framework for creating these plugins, so there’s a wide range of capabilities that you can enable Fuel to add to your OpenStack clouds. If you’re a hardware vendor that has created drivers that enable OpenStack to work with your product, you can create a plugin so Fuel can deploy those drivers when it’s standing up new clouds. Or you might simply want to enable OpenStack functionality that’s not readily available in Fuel. Because Fuel includes a pluggable framework, you’re not limited to what’s provided “out of the box”.<br/> | ||
| − | |||
You are also free to use [[DriverLog#How_To:_Add_a_new_Fuel_Plugin_to_DriverLog|DriverLog]] as the single registry for all Fuel Plugins. | You are also free to use [[DriverLog#How_To:_Add_a_new_Fuel_Plugin_to_DriverLog|DriverLog]] as the single registry for all Fuel Plugins. | ||
'''Architecture limitations''' <br/> | '''Architecture limitations''' <br/> | ||
| − | * Fuel plugins can only be installed before configuring and deploying the environment. Otherwise, you will have to redeploy the environment to enable the plugin. | + | * Core-functionality Fuel plugins can only be installed before configuring and deploying the environment. Otherwise, you will have to redeploy the environment to enable the core plugin. Apllication level plugins can be installed later on top of already deployed environments. |
* Fuel plugins cannot be upgraded from major to another major version. | * Fuel plugins cannot be upgraded from major to another major version. | ||
* Fuel plugins for SDN solutions cannot create a new networking option in the Fuel web UI/UI wizard. | * Fuel plugins for SDN solutions cannot create a new networking option in the Fuel web UI/UI wizard. | ||
| Line 25: | Line 30: | ||
* [https://blueprints.launchpad.net/fuel/+spec/vip-reservation reserve VIPs via Fuel plugin's metadata], see [https://wiki.openstack.org/wiki/Fuel/Plugins#Virtual_IP_reservation_via_Fuel_Plugin.27s_metadata| Virtual IP reservation via Fuel plugins's metadata]. | * [https://blueprints.launchpad.net/fuel/+spec/vip-reservation reserve VIPs via Fuel plugin's metadata], see [https://wiki.openstack.org/wiki/Fuel/Plugins#Virtual_IP_reservation_via_Fuel_Plugin.27s_metadata| Virtual IP reservation via Fuel plugins's metadata]. | ||
* [https://blueprints.launchpad.net/fuel/+spec/ui-plugins-list view installed plugins] | * [https://blueprints.launchpad.net/fuel/+spec/ui-plugins-list view installed plugins] | ||
| + | * [https://wiki.openstack.org/wiki/Fuel/Plugins#How_to_separate_services_from_Controller_with_a_plugin separate services from Controller with a plugin] | ||
| + | |||
| + | === 8.0 features === | ||
| + | |||
| + | * [https://blueprints.launchpad.net/fuel/+spec/plugin-after-deployment install a plugin after deployment] | ||
| + | * [https://blueprints.launchpad.net/fuel/+spec/external-dashboard-links-in-fuel-dashboard plugin links and metadata in environment dashboard] | ||
| + | * [https://blueprints.launchpad.net/fuel/+spec/component-registry component registry] | ||
| + | * [https://blueprints.launchpad.net/fuel/+spec/segment-settings-tab-logically settings tab plugin assignment] | ||
| + | |||
| + | ====Install a plugin after deployment==== | ||
| + | |||
| + | You can install application-level plugins (hot-pluggable), such as LMA or Zabbix, after you have deployed an OpenStack environment if the plugin: | ||
| + | * Provides new applications | ||
| + | * Installs applications on a new node | ||
| + | * Does not affect existing services or applications | ||
| + | * Does not override existing tasks | ||
| + | |||
| − | + | Plugins that affect Fuel core functionality, such as SDN or storage plugins, can only be installed before you deploy an OpenStack environment. | |
| − | + | An application-level plugin should have "is_hotpluggable" attribute set to "true" in metadata.yaml file. See [https://wiki.openstack.org/wiki/Fuel/Plugins#metadata.yaml metadata.yaml]. | |
| − | ==== | + | ====Plugin links and metadata in environment dashboard==== |
| − | + | You can make an API request via your Puppet manifests and register a non-standard dashboard. | |
| − | + | '''Examples''' | |
| − | |||
| − | + | * absolute-dashboard-link.pp: | |
| + | <pre><nowiki> | ||
| + | notice('PLUGIN: fuel_plugin_example_v4/absolute-dashboard-link.pp') | ||
| − | + | $cluster_id = hiera('deployment_id') | |
| − | + | $master_ip = hiera('master_ip') | |
| − | + | $network_metadata = hiera_hash('network_metadata', {}) | |
| − | + | $os_public_vip = $network_metadata['vips']['public']['ipaddr'] | |
| − | |||
| − | === | + | $dashboard_name = 'Demo Plugin Dashboard #1' |
| + | $dashboard_desc = 'A Sample Absolute Dashboard Link' | ||
| + | $dashboard_link = "http://${os_public_vip}/dashboard" | ||
| − | + | $json_hash = { title => $dashboard_name, | |
| + | description => $dashboard_desc, | ||
| + | url => $dashboard_link, } | ||
| − | + | $json_message = inline_template('<%= require "json"; JSON.dump(@json_hash) %>') | |
| − | |||
| − | + | exec { 'create_dashboard_link': | |
| − | + | command => "/usr/bin/curl -H 'Content-Type: application/json' -X POST \ | |
| + | -d '${json_message}' \ | ||
| + | http://${master_ip}:8000/api/clusters/${cluster_id}/plugin_links", | ||
| + | } | ||
| − | + | </nowiki></pre> | |
| − | |||
| − | |||
| − | |||
| − | |||
| − | |||
| − | < | + | * relative-dashboard-link.pp: |
| − | + | <pre><nowiki> | |
| − | + | notice('PLUGIN: fuel_plugin_example_v4/relative-dashboard-link.pp') | |
| − | + | $cluster_id = hiera('deployment_id') | |
| − | + | $master_ip = hiera('master_ip') | |
| − | |||
| − | + | $dashboard_name = 'Demo Plugin Dashboard #2' | |
| − | + | $dashboard_desc = 'A Sample Relative Dashboard Link' | |
| − | + | $dashboard_link = "/dashboard" | |
| − | |||
| − | |||
| − | |||
| − | |||
| − | |||
| − | ==== | + | $json_hash = { title => $dashboard_name, |
| + | description => $dashboard_desc, | ||
| + | url => $dashboard_link, } | ||
| − | + | $json_message = inline_template('<%= require "json"; JSON.dump(@json_hash) %>') | |
| − | |||
| − | |||
| − | + | exec { 'create_dashboard_link': | |
| − | + | command => "/usr/bin/curl -H 'Content-Type: application/json' -X POST \ | |
| − | + | -d '${json_message}' \ | |
| − | + | http://${master_ip}:8000/api/clusters/${cluster_id}/plugin_links", | |
| − | + | } | |
| − | |||
| − | |||
| − | |||
| − | |||
| − | |||
| − | |||
| − | |||
| − | |||
| − | |||
| − | |||
| − | |||
| − | |||
| − | |||
| − | |||
| − | |||
| − | |||
| − | |||
| − | |||
| − | + | </nowiki></pre> | |
| − | + | * deployment_tasks.yaml: | |
| − | * | ||
<pre><nowiki> | <pre><nowiki> | ||
| − | + | - id: fuel_plugin_example_v4 | |
| − | + | type: group | |
| + | role: [fuel_plugin_example_v4] | ||
| + | tasks: | ||
| + | - hiera | ||
| + | - globals | ||
| + | required_for: [deploy_end] | ||
| + | requires: [deploy_start] | ||
| + | parameters: | ||
| + | strategy: | ||
| + | type: parallel | ||
| − | + | - id: fuel_plugin_example_v4-controller-deployment | |
| − | + | type: puppet | |
| + | groups: [primary-controller, controller] | ||
| + | required_for: [connectivity_tests, deploy_end] | ||
| + | requires: [netconfig, deploy_start] | ||
| + | parameters: | ||
| + | puppet_manifest: "deploy.pp" | ||
| + | puppet_modules: "." | ||
| + | timeout: 3600 | ||
| − | + | - id: fuel_plugin_example_v4-deployment | |
| − | + | type: puppet | |
| − | + | groups: [fuel_plugin_example_v4] | |
| − | + | required_for: [deploy_end] | |
| − | [ | + | requires: [deploy_start] |
| + | parameters: | ||
| + | puppet_manifest: "deploy.pp" | ||
| + | puppet_modules: "." | ||
| + | timeout: 3600 | ||
| + | retries: 10 | ||
| − | + | - id: fuel_plugin_example_v4-post-deployment-sh | |
| + | type: shell | ||
| + | role: [fuel_plugin_example_v4] | ||
| + | required_for: [post_deployment_end] | ||
| + | requires: [post_deployment_start] | ||
| + | parameters: | ||
| + | cmd: bash deploy.sh | ||
| + | retries: 3 | ||
| + | interval: 20 | ||
| + | timeout: 180 | ||
| − | + | - id: fuel_plugin_example_v4-absolute-dashboard-link | |
| − | + | type: puppet | |
| − | + | role: [fuel_plugin_example_v4] | |
| − | + | required_for: [post_deployment_end] | |
| − | + | requires: [post_deployment_start] | |
| − | + | parameters: | |
| + | puppet_manifest: "absolute-dashboard-link.pp" | ||
| + | puppet_modules: "/etc/puppet/modules" | ||
| + | timeout: 180 | ||
| − | + | - id: fuel_plugin_example_v4-relative-dashboard-link | |
| + | type: puppet | ||
| + | role: [fuel_plugin_example_v4] | ||
| + | required_for: [post_deployment_end] | ||
| + | requires: [post_deployment_start] | ||
| + | parameters: | ||
| + | puppet_manifest: "relative-dashboard-link.pp" | ||
| + | puppet_modules: "/etc/puppet/modules" | ||
| + | timeout: 180cluster_id}/plugin_links", | ||
| + | } | ||
| − | + | </nowiki></pre> | |
| − | + | * node_roles.yaml: | |
| + | <pre><nowiki> | ||
| + | fuel_plugin_example_v4: | ||
| + | name: "Set here the name for the role. This name will be displayed in the Fuel web UI." | ||
| + | description: "Write description for your role" | ||
| + | has_primary: false # whether has primary role or not | ||
| + | public_ip_required: true # whether requires public net or not | ||
| + | weight: 100 # weight that will be used for ordering on fuel ui | ||
| + | </nowiki></pre> | ||
| + | |||
| + | * Example of a plugin API added to a post-install task — post_install.sh: | ||
| + | <pre><nowiki> | ||
| + | #!/bin/sh | ||
| − | + | PLUGIN_NAME=fuel_plugin_example_v4 | |
| + | DASHBOARD_TITLE=Dashboard | ||
| + | DASHBOARD_DESC="A Sample Dashboard Link" | ||
| + | DASHBOARD_URL="/dashboard" | ||
| − | { | + | function obtain_token { |
| − | |||
| − | |||
| − | |||
| − | |||
| − | |||
| − | |||
| − | |||
| − | |||
| − | |||
| − | |||
| − | |||
| − | |||
| − | |||
| − | |||
| − | |||
| − | |||
| − | |||
| − | |||
| − | |||
| − | |||
| − | |||
| − | |||
| − | |||
| − | + | # Request a token for admin user | |
| + | TENANT_NAME=admin | ||
| + | ADMIN_USERNAME=`python -c "import sys; import yaml; f = open('/etc/fuel/astute.yaml'); astute = yaml.load(f); print astute['FUEL_ACCESS']['user'];"` | ||
| + | ADMIN_PASSWORD=`python -c "import sys; import yaml; f = open('/etc/fuel/astute.yaml'); astute = yaml.load(f); print astute['FUEL_ACCESS']['password'];"` | ||
| + | TENANT_ID=admin | ||
| − | + | REQUEST="{\"auth\": {\"tenantName\":\"$TENANT_NAME\", \"passwordCredentials\": {\"username\": \"$ADMIN_USERNAME\", \"password\": \"$ADMIN_PASSWORD\"}}}" | |
| − | + | RAW_TOKEN=`curl -s -d "$REQUEST" -H "Content-type: application/json" "http://localhost:5000/v2.0/tokens"` | |
| − | + | TOKEN=`echo $RAW_TOKEN | python -c "import sys; import json; response = json.loads(sys.stdin.read()); print response['access']['token']['id'];"` | |
| + | |||
| + | } | ||
| + | |||
| + | function plugin_link { | ||
| + | |||
| + | which fuel > /dev/null | ||
| + | if [[ $? -eq 0 ]]; then | ||
| + | |||
| + | local num_retries=10 | ||
| + | local i=0 | ||
| + | |||
| + | while true; do | ||
| + | # Fail if number of retries exeeded | ||
| + | if [[ $i -gt $((num_retries + 1)) ]]; then | ||
| + | # Report that plugin not registered | ||
| + | echo "WARNING: Plugin failed to register before the timeout." | ||
| + | echo " Plugin dashboard link will not be added." | ||
| + | return 1 | ||
| + | fi | ||
| − | === | + | LAST_PLUGIN_ID=`fuel plugins -l | grep $PLUGIN_NAME | cut -d ' ' -f1` |
| − | + | if [ "$LAST_PLUGIN_ID" != "" ]; then | |
| − | + | PLUGIN_ID=$LAST_PLUGIN_ID | |
| − | + | echo "Plugin ID is: $PLUGIN_ID" | |
| − | + | curl -H 'Content-Type: application/json' -H "X-Auth-Token: $TOKEN" -X POST -d \ | |
| + | "{\"title\":\"$DASHBOARD_TITLE\",\"description\":\"$DASHBOARD_DESC\",\"url\":\"$DASHBOARD_URL\"}" \ | ||
| + | http://127.0.0.1:8000/api/v1/plugins/$PLUGIN_ID/links | ||
| + | return 0 | ||
| + | fi | ||
| − | = | + | sleep 1 |
| − | + | i=$((i++)) | |
| − | + | done | |
| − | + | fi | |
| − | + | ||
| − | + | } | |
| − | + | ||
| − | + | obtain_token | |
| − | + | echo $TOKEN | |
| − | + | ||
| + | plugin_link & | ||
| − | |||
| − | |||
| − | |||
| − | |||
| − | |||
| − | |||
| − | |||
| − | |||
| − | |||
| − | |||
| − | |||
| − | |||
| − | |||
| − | |||
| − | |||
</nowiki></pre> | </nowiki></pre> | ||
| + | ====Component compatibility registry==== | ||
| − | + | Component registry is a component compatibility mechanism in Fuel. See [https://specs.openstack.org/openstack/fuel-specs/specs/8.0/component-registry.html blueprint]. | |
| − | + | '''Specifying component requirements''' | |
| − | |||
| − | |||
| − | |||
| − | + | Consider two components: Component A and Component B. | |
| − | + | Component A requires Component B to function. | |
| − | |||
| − | |||
| − | |||
| − | + | In a DSL model this relation can be described explicitly: | |
| − | |||
| − | |||
<pre><nowiki> | <pre><nowiki> | ||
| − | + | - name: 'A' | |
| + | requires: | ||
| + | - name: 'B' | ||
| + | </nowiki></pre> | ||
| − | + | The DSL model can be described in the Fuel openstack.yaml file for core components and in the components.yaml file for components provided from a plugin. | |
| − | + | In the Fuel web UI, if Component B is not selected, then Component A will be disabled and respective message displayed. | |
| − | + | Consider three components: Component A, Component B, and Component C. | |
| + | Component A requires Component B and Component B to function. | ||
| − | + | This relation can be described explicitly: | |
| − | + | <pre><nowiki> | |
| − | + | - name: 'A' | |
| − | + | requires: | |
| − | + | - name: 'B' | |
| − | + | - name: 'C' | |
| − | + | message: 'C and B' | |
</nowiki></pre> | </nowiki></pre> | ||
| − | + | In this case Component A can be selected only when both Component B and Component C are selected. | |
| + | |||
| + | There is currently a limitation for cases when Component A requires Component B or Component C or more. | ||
| + | |||
| + | Example of requirements for the DVS plugin: | ||
| + | |||
<pre><nowiki> | <pre><nowiki> | ||
| − | + | - name: 'network:neutron:ml2:dvs' | |
| − | + | label: 'Neutron with VMware DVS' | |
| + | description: 'Neutron with VMware DVS ML2 plugin' | ||
| + | requires: | ||
| + | - name: 'network:neutron:core:ml2' | ||
| + | - name: 'hypervisor:vmware' | ||
| + | message: 'The VMware DVS plugin requires vCenter as the hypervisor option.' | ||
| + | </nowiki></pre> | ||
| + | |||
| + | '''Specifying component compatibility''' | ||
| + | |||
| + | Compatibility of Component A with Components B means that Component A has been tested and proved to function with Component B. | ||
| + | |||
| + | DSL model example: | ||
| − | + | <pre><nowiki> | |
| − | + | - name: 'A' | |
| − | + | compatible: | |
| − | + | - name: 'B' | |
| − | + | - name: 'C' | |
| − | + | </nowiki></pre> | |
| − | + | ||
| − | + | If either Component B or Component B is selected in the Fuel web UI, then the UI representation of Component A will have a green tooltip. | |
| − | + | ||
| − | + | '''Specifying component incompatibility''' | |
| − | + | ||
| − | + | Incompatibility of Component A with Component B means that Component A has been tested and proved to not function with Component B. | |
| − | + | ||
| + | DSL model example: | ||
| − | + | <pre><nowiki> | |
| − | + | - name: 'A' | |
| + | incompatible: | ||
| + | - name: 'B' | ||
| + | message: 'B incompatible with A' | ||
</nowiki></pre> | </nowiki></pre> | ||
| − | + | Selecting Component A or Component B will disable the other one in the Fuel web UI. You will be able to select only Component A or Component B, but not both. | |
| − | + | ||
| − | + | '''Components with unspecified compatibility''' | |
| − | + | ||
| − | + | The Fuel web UI shows a grey tooltip with a respective message for the components with unspecified compatibility. | |
| − | + | ||
| − | + | ====Settings tab plugins assignment==== | |
| − | + | ||
| − | + | There is a `groups` attribute in the ''environment_config.yaml'' file that you can use to assign your plugins to. | |
| − | + | ||
| − | + | Plugins can form any group in one of the default groups: General, Security, Compute, Storage, Logging, OpenStack Services. | |
| − | + | If your plugin uses a custom group name it will automatically go to the `Other` group. | |
| − | + | ||
| − | + | See [https://github.com/openstack/fuel-plugins/blob/master/fuel_plugin_builder/templates/v4/plugin_data/environment_config.yaml.mako#L2-L5 environment_config.yaml template]. | |
| − | + | ||
| + | |||
| + | === 9.0 features === | ||
| + | |||
| + | * Plugin developers can now dynamically add configuration fields to their plugins. See [https://blueprints.launchpad.net/fuel/+spec/dynamic-fields blueprint]. | ||
| + | |||
| + | * Improved Fuel plugin builder. The improvements are a number of fixed bugs; no new features. For information how to install the latest version of Fuel plugin builder see [[#install_latest]]. | ||
| + | |||
| + | == How to develop a plugin for Fuel == | ||
| + | |||
| + | === Planning to create a plugin for Fuel=== | ||
| − | + | ==== Entry development requirements ==== | |
| − | + | ||
| − | + | When planning to write up a plugin for Fuel, mind the following recommendations: | |
| − | + | ||
| − | + | * Provide deb and rpm packages together with their dependencies. For instructions on creating packages, see [https://www.google.com/url?q=https%3A%2F%2Ffedoraproject.org%2Fwiki%2FHow_to_create_an_RPM_package&sa=D&sntz=1&usg=AFQjCNGKbtd1Lk5xHa3voWMPBjnbspqOrg Fedora project] wiki and [http://packaging.ubuntu.com/html/ Ubuntu Packaging Guide]. | |
| − | + | * Create puppet manifests according to the Official OpenStack documentation. For nice code examples and workflow, see [[Puppet-openstack|Puppet in OpenStack]]. | |
| − | + | ||
| − | + | ===== Code style ===== | |
| − | + | ||
| − | + | The readability, reviewability and maintainability of Fuel Plugin code depends on use of standardized coding styles for [https://docs.puppet.com/guides/style_guide.html Puppet] and | |
| − | + | [https://www.python.org/dev/peps/pep-0008/ Python]. | |
| − | + | It’s strongly recommended to follow them.The best approach is to integrate codestyle checkers to you CI flow. Here are a few examples how to use [http://puppet-lint.com puppet-lint] and [https://pypi.python.org/pypi/pep8 pep8] manually. | |
| − | |||
| − | |||
| − | |||
| − | |||
| − | |||
| − | |||
| − | |||
| − | |||
| − | |||
| − | |||
| − | |||
| − | |||
| − | |||
| − | + | To install these checkers, please follow the instructions below: | |
| − | + | ||
| − | + | * Puppet: | |
| − | + | <pre><nowiki>gem install puppet-lint | |
| − | + | puppet-lint --with-context ./myplugin/deployment_scripts</nowiki></pre> | |
| − | + | ||
| − | + | * Python: | |
| − | + | <pre><nowiki> | |
| − | + | pip install pep8 | |
| − | + | pep8 --show-source --show-pep8 ./myplugin/deployment_scripts</nowiki></pre> | |
| − | + | ||
| − | + | ==== Repo ==== | |
| − | + | ||
| − | + | As a plugin developer, this is your workflow for plugin creation: | |
| − | + | ||
| − | + | # You should start your plugin development in your own repo open to public. The repo can be any public git hosting, e.g., github. | |
| − | + | # When you are ready to put your developed plugin project to the official repo in the OpenStack namespace, you need to do and ensure the following: | |
| − | + | #* Have your code verified by the [https://bugs.launchpad.net/fuel/ Fuel team]. | |
| − | + | #* You plan to set up a CI for the plugin. | |
| − | + | #* Confirm that you are going to support the plugin for more than one version of Fuel. | |
| − | + | #* Confirm that you are releasing your plugin code under an open-source license. | |
| − | + | #* Confirm your plugin code has no binary files. | |
| − | + | ||
| − | + | ====== How to create a project ====== | |
| − | + | ||
| − | + | # Make sure you're registered at the following resources: | |
| − | + | #* LaunchPad. If not, see [http://docs.openstack.org/infra/manual/developers.html the official OpenStack documentation]. | |
| − | + | #* review.openstack.org. It is required for developers to be included into core and release groups. | |
| − | + | # Request the repo creation in Fuel project. Enter [https://launchpad.net/fuel Fuel project at Launchpad] and click '''Report a bug''' link. [[File:report-a-bug.png]] | |
| − | + | # In '''Summary''', specify ''Create a Fuel Plugin project in /Openstack''. [[File:bug-report-sum.png]] | |
| − | + | # Bug description should consist of: | |
| − | + | #* Plugin name (for example, HA Fencing) | |
| − | + | #* Plugin functionality overview (for example, enables STONITH-based fencing in HA mode) | |
| − | + | #* Developer's contact information (email, skype, etc.) - please make sure core group members are registered at review.openstack.org. Otherwise they wont be added as a core members. | |
| − | + | #* List of developers with contact information (name, email on which review.openstack.org is registered) to enter core reviewers group ([https://review.openstack.org/#/admin/groups/691,members example])- used to merge changes | |
| − | + | #* List of developers with contact information ( (name, email on which review.openstack.org is registered)) to enter release group ([https://review.openstack.org/#/admin/groups/692,members example]) - used to create release branches and tags in the repo. You will need to review the commit for your project and make sure both lists of developers to enter core and release groups are correct. | |
| − | + | # Click '''Extra''' options. In the menu, specify ''devops'' tag. [[File:bug-report-devops.png|200px]] | |
| − | + | # After the repo is created (that means, your bug should be marked as ''Fix Committed'' or ''Fix Released'') you can start filling your repo with the required files: | |
| − | + | #* Plugin code itself | |
| − | + | #* Documentation - see [[Fuel/Plugins#Creating_documentation_for_Fuel_Plugins|the corresponding section]] for more details. | |
| + | |||
| + | ====== Requesting community help for code review ====== | ||
| + | |||
| + | Once your code is being prepared and uploaded into repo under ''/openstack'' project, you | ||
| + | are free to request the OpenStack community for review to make sure the code meets the development requirements | ||
| + | and common guidelines for Fuel Plugin Framework as listed below. <br> | ||
| + | This is aligned with the [http://docs.openstack.org/infra/manual/developers.html Gerrit workflow] used in the OpenStack community. | ||
| + | To request review, you can enter '''#fuel-dev''' channel in IRC. | ||
| + | |||
| + | ==== Launchpad project ==== | ||
| + | |||
| + | Please, consider creating Launchpad project, which will serve as the single entry point for reporting | ||
| + | issues on your plugin and tracking development progress. | ||
| + | Recommendations are listed below: | ||
| + | * name of the project should look like fuel-plugin-<your plugin's name> | ||
| + | * project creation procedure is a rather standard procedure, so you can learn more in [https://help.launchpad.net/Projects the official Launchpad documentation] | ||
| + | * project page should incorporate link to the source plugin repo and its entry in DriverLog | ||
| + | * [https://help.launchpad.net/Teams project teams] should incorporate all development team members | ||
| + | * [https://help.launchpad.net/FeatureHighlights/MilestoneUsage milestones] should repeat the plugin release specified in the metadata.yaml file (e.g. 1.0.0, 2.0.0) | ||
| + | |||
| + | You can find the list of existing LP project [[Fuel/Plugins/Launchpad_projects_list|here]]. | ||
| + | |||
| + | ==== Working with tags and branches ==== | ||
| + | |||
| + | To track the release cycle in a more efficient manner, you can use: | ||
| + | * release branches | ||
| + | * tags | ||
| − | + | Here is the difference between these 2 concepts: | |
| − | + | * A tag represents a version of a particular branch at a moment in time. | |
| − | + | * A branch represents a separate thread of development that may run concurrently with other development efforts on the same code base. Changes to a branch may eventually be merged back into another branch to unify them. | |
| − | + | <br/> | |
| − | + | It is recommended that you used branches to let end users build a your plugin themselves. | |
| − | + | <br/> | |
| − | + | For this, you need to: | |
| − | + | * create a corresponding branch. | |
| − | + | * edit README file to provide build instructions. For more details, see [[Fuel/Plugins#Creating_documentation_for_Fuel_Plugins|the corresponding section]]. | |
| − | + | <br/> | |
| − | + | ||
| − | + | You can also use tags for tracking progress within one branch. | |
| − | + | Here are 2 examples: | |
| − | + | * tagging the plugin repo - [https://github.com/stackforge/fuel-plugin-neutron-vpnaas VPNaaS plugin] repo: | |
| − | + | [[File:repo-tags-1.png]] | |
| − | + | * creating a separate branch - [https://github.com/stackforge/fuel-plugin-neutron-lbaas LBaaS plugin] repo: | |
| − | + | [[File:Plugin-branch.png]] | |
| − | + | ||
| − | + | ==== Branches naming convention ==== | |
| − | + | ||
| − | + | Since plugins are published in [[Fuel/Plugins#Add_your_plugin_to_DriverLog|DriverLog]], the only way for end users to get the plugin RPM is to build it themselves. | |
| − | + | '''Thus, you should take the following into consideration:''' | |
| − | + | * the branch name should coincide with the compatible Fuel version. | |
| − | + | <br/> | |
| − | + | '''SEE ALSO''' | |
| − | + | * To learn more about best practices in creating branches, see [http://nvie.com/posts/a-successful-git-branching-model A successful Git branching model] | |
| − | + | blogpost. | |
| − | + | * For instructions on creating a tag, see the official [http://docs.openstack.org/infra/manual/drivers.html#tagging-a-release Project Driver's Guide]. | |
| − | + | <br/> | |
| − | + | '''NOTE:''' | |
| − | + | * You should add a tag once you get all the required files added into the repo and checked | |
| − | + | if they contain copyrights. Otherwise, you will have to create new tags. | |
| − | + | * You should create tags with gpg key using console gnupg. '''Please, ensure it is present and not expired.''' | |
| − | + | <br/> | |
| − | + | ||
| − | + | ==== Creating branches ==== | |
| + | |||
| + | There are 2 ways of creating branches: | ||
| + | * from CLI: | ||
| + | <pre><nowiki> | ||
| + | git push <remote> <localref>:<remotebranch> | ||
</nowiki></pre> | </nowiki></pre> | ||
| − | + | where <remote> is the name of your gerrit remote or the full remote url, <localref> | |
| + | is the refname (could be a branch or something else) and <remotebranch> is the name of the branch you want created from it. | ||
| + | |||
| + | * from the web UI: | ||
| + | *# Make sure you are the core reviewer. | ||
| + | *# Enter review.openstack.org. | ||
| + | *# in Project menu, click Branches. After the project setup opens, enter a new branch name and click Create branch button. Note, that 'Initial revision' field can be left blank. | ||
| + | [[File:Plugin-create-branch-1.png]]. | ||
| − | + | ===== Deleting branches ===== | |
| + | If you would like to delete a branch, you have 2 different ways to do that: | ||
| + | # Contact openstack-infra core team via mailing list. See the [http://lists.openstack.org/pipermail/openstack-infra/2015-July/002921.html example request] here. | ||
| + | # Report a bug in Fuel project in Launchpad and assign it to Fuel DevOps team. The flow is similar to the one described [[Fuel/Plugins#How_to_create_a_project|here]] | ||
| + | # Request in #openstack-infra IRC channel on freenode.net. You can contact the following core members there: fungi, clarkb, jeblair, pleia2. | ||
| + | <br/> | ||
| + | Note, that there is no way to delete a branch manually. | ||
| − | + | ==== CI ==== | |
| − | |||
| − | + | It's recommended to set up CI for your Fuel plugin. The section below provides summary instructions on CI components and their roles. | |
| − | |||
| − | |||
| − | |||
| − | |||
| − | |||
| − | |||
| − | |||
| − | |||
| − | |||
| − | |||
| − | |||
| − | |||
| − | |||
| − | |||
| − | |||
| − | |||
| − | |||
| − | ===== | + | ===== Tools ===== |
| − | + | Here is the list of key issues, used in terms of Fuel Plugins CI: | |
| − | |||
| − | |||
| − | |||
| + | {| class="wikitable" | ||
| + | |- | ||
| + | | CI || [http://en.wikipedia.org/wiki/Continuous_integration Continuous Integration] | ||
| + | |- | ||
| + | | CD || [http://en.wikipedia.org/wiki/Continuous_delivery Continuous Delivery] | ||
| + | |- | ||
| + | | OSTF || [http://docs.mirantis.com/fuel-dev/develop/ostf_contributors_guide.html OpenStack Testing Framework] | ||
| + | |- | ||
| + | | BVT || Build Verification Tests | ||
| + | |- | ||
| + | | JJB || [http://ci.openstack.org/jenkins-job-builder/ Jenkins Job Builder] | ||
| + | |- | ||
| + | | VM || virtual machine | ||
| + | |- | ||
| + | | Fuel || [[Fuel]] | ||
| + | |- | ||
| + | | Fuel CI || [https://ci.fuel-infra.org/ Fuel CI] | ||
| + | |- | ||
| + | | GitHub || [https://github.com GitHub Server] | ||
| + | |- | ||
| + | | Openstack || [https://github.com/openstack Openstack] | ||
| + | |- | ||
| + | | Gerrit || [http://docs.openstack.org/infra/manual/developers.html OpenStack review tool] | ||
| + | |} | ||
| − | + | Easy way to build own CI https://github.com/openstack/fuel-plugin-ci | |
| − | |||
| − | |||
| − | |||
| − | |||
| − | |||
| − | |||
| − | |||
| − | |||
| − | |||
| − | |||
| − | |||
| − | |||
| − | |||
| − | |||
| − | |||
| − | |||
| − | |||
| − | |||
| − | |||
| − | |||
| − | |||
| − | |||
| − | |||
| − | |||
| − | |||
| − | |||
| − | |||
| − | |||
| − | |||
| − | |||
| − | |||
| − | + | As to the tools, the following ones are used: | |
| − | |||
| − | |||
| − | |||
| − | + | * GitHub repository with Gerrit code-review tool | |
| − | * | + | * Jenkins CI-server - provides full information about jobs status, scheduler, test results, etc. |
| − | + | * Jenkins Job Builder - tool for easy adding and managing Jenkins jobs. It provides functionality to store jobs’ configuration in a human-readable .yaml markup language and convert them to Jenkins-specific .xml. | |
| − | |||
| − | + | ===== Steps to configure Gerrit integration ===== | |
| + | # [http://docs.openstack.org/infra/system-config/third_party.html Create and configure] launchpad user for voting as third-party developer | ||
| + | # Add credentials (username, public key) for gerrit plugin configuration in Jenkins | ||
| + | # Send an email to the '''openstack-dev''' mailing list nominating your system for voting permissions | ||
| − | |||
| − | |||
| − | |||
| − | |||
| − | |||
| + | ===== Steps to prepare development & testing environments (mandatory) ===== | ||
| + | # OpenStack and/or Gerrit repository should be created. See [[#Repo|Repo]] section for more details. | ||
| + | # Preferable quantity of test labs should be allocated (plugin-specific). | ||
| + | # Specific Hardware resources should be installed and configured (plugin-specific). | ||
| + | # Test labs should be configured for setup environments and test running. See [https://docs.mirantis.com/fuel-dev/devops.html Fuel development documentation] | ||
| − | + | ===== Steps to configure CI server (optional) ===== | |
| − | + | # We recommend for all plugin developers to have their own CI server. It provides better versioning, collecting test-results, deduplicating the same jobs, easier configuration and managing. | |
| − | + | # We recommend using Jenkins with [http://ci.openstack.org/jenkins-job-builder/ Jenkins Job Builder plugin] which provides easy jobs management and their configuration storage. | |
| − | + | # We recommend to install JJB from git and take example jobs from [[Fuel/Plugins#Example_jobs|the section below]].You may find the main job helpful: this should be plugins.yaml and dependent builders: docs/builders/.sh. | |
| − | + | # We recommend creating a pre-commit-hook to check your code: | |
| − | + | <pre><nowiki> | |
| + | #!/bin/bash | ||
| + | # Save this script to <PROJECT>/.git/hooks/pre-review and make it executable | ||
| + | set -e | ||
| + | set -o pipefail | ||
| − | ''' | + | find . -name '*.pp' | xargs -P1 -L1 puppet parser validate --verbose |
| − | + | find . -name '*.pp' | xargs -P1 -L1 puppet-lint \ | |
| − | + | --fail-on-warnings \ | |
| − | + | --with-context \ | |
| − | + | --with-filename \ | |
| − | + | --no-80chars-check \ | |
| + | --no-variable_scope-check \ | ||
| + | --no-nested_classes_or_defines-check \ | ||
| + | --no-autoloader_layout-check \ | ||
| + | --no-class_inherits_from_params_class-check \ | ||
| + | --no-documentation-check \ | ||
| + | --no-arrow_alignment-check\ | ||
| + | --no-case_without_default-check | ||
| + | find . -name '*.erb' | xargs -P1 -L1 -I '%' erb -P -x -T '-' % | ruby -c | ||
| + | fpb --check ./ | ||
| + | </nowiki></pre> | ||
| − | + | ===== Example jobs ===== | |
| − | + | ||
| + | * deploy-plugin.sh: | ||
<pre><nowiki> | <pre><nowiki> | ||
| − | + | #!/bin/bash | |
| + | set -ex | ||
| + | |||
| + | export SYSTEM_TESTS="${WORKSPACE}/utils/jenkins/system_tests.sh" | ||
| + | export LOGS_DIR=${WORKSPACE}/logs/${BUILD_NUMBER} | ||
| + | export VENV_PATH='/home/jenkins/venv-nailgun-tests-2.9' | ||
| + | YOUR_PLUGIN_PATH="$(ls ./*rpm)" #Change this to appropriate fuel-qa variable for your plugin | ||
| + | export YOUR_PLUGIN_PATH # | ||
| + | |||
| + | sh -x "${SYSTEM_TESTS}" -w "${WORKSPACE}" -V "${VENV_PATH}" -i "${ISO_PATH}" -t test -o --group="${TEST_GROUP}" | ||
</nowiki></pre> | </nowiki></pre> | ||
| − | + | ||
| + | * prepare_env.sh: | ||
<pre><nowiki> | <pre><nowiki> | ||
| − | + | #!/bin/bash | |
| − | |||
| − | + | set -ex | |
| − | |||
| − | |||
| − | = | + | export VENV_PATH="/home/jenkins/venv-nailgun-tests-2.9" |
| − | + | rm -rf "${VENV_PATH}" | |
| − | + | REQS_PATH="${WORKSPACE}/fuel-qa/fuelweb_test/requirements.txt" | |
| − | + | virtualenv --system-site-packages "${VENV_PATH}" | |
| − | + | source "${VENV_PATH}/bin/activate" | |
| + | pip install -r "${REQS_PATH}" --upgrade | ||
| + | django-admin.py syncdb --settings=devops.settings --noinput | ||
| + | django-admin.py migrate devops --settings=devops.settings --noinput | ||
| + | deactivate | ||
| + | </nowiki></pre> | ||
| − | * | + | * syntax-build-plugin.sh |
| − | + | <pre><nowiki> | |
| + | #!/bin/bash | ||
| + | set -ex | ||
| − | + | find . -name '*.erb' -print 0 | xargs -0 -P1 -I '%' erb -P -x -T '-' % | ruby -c | |
| − | + | find . -name '*.pp' -print 0| xargs -0 -P1 puppet parser validate --verbose | |
| + | find . -name '*.pp' -print 0| xargs -0 -P1 puppet-lint \ | ||
| + | --fail-on-warnings \ | ||
| + | --with-context \ | ||
| + | --with-filename \ | ||
| + | --no-80chars-check \ | ||
| + | --no-variable_scope-check \ | ||
| + | --no-nested_classes_or_defines-check \ | ||
| + | --no-autoloader_layout-check \ | ||
| + | --no-class_inherits_from_params_class-check \ | ||
| + | --no-documentation-check \ | ||
| + | --no-arrow_alignment-check | ||
| − | + | fpb --check ./ | |
| − | + | fpb --build ./ | |
| + | </nowiki></pre> | ||
| − | + | * plugins.yaml: | |
| + | <pre><nowiki> | ||
| + | - project: | ||
| + | name: plugin_name #Your plugin mame | ||
| + | path_to_fuel_iso: $PWD #Path to FuelISO | ||
| + | plugin_repo: plugin_repo #Your plugin repo name at stackforge | ||
| + | email_to: emails_list #List of emails separated by comma | ||
| + | test_group: test_group #Test group in fuel-qa for deployment tests of your plugin | ||
| + | jobs: | ||
| + | - 'prepare_env' | ||
| + | - '{name}.build' | ||
| + | - '{name}.{dist}.deploy': | ||
| + | dist: 'centos' | ||
| + | - '{name}.{dist}.deploy': | ||
| + | dist: 'ubuntu' | ||
| − | + | - job-template: | |
| − | + | name: 'prepare_env' | |
| − | + | builders: | |
| − | + | - shell: | |
| − | + | !include-raw-escape './builders/prepare_env.sh' | |
| − | + | description: 'Prepare environment to testing' | |
| − | + | logrotate: | |
| − | + | numToKeep: 10 | |
| − | + | parameters: | |
| − | + | - string: | |
| + | name: 'GERRIT_REFSPEC' | ||
| + | default: 'refs/heads/master' | ||
| + | scm: | ||
| + | - git: | ||
| + | branches: | ||
| + | - $GERRIT_BRANCH | ||
| + | refspec: $GERRIT_REFSPEC | ||
| + | url: 'https://review.openstack.org/stackforge/fuel-qa' | ||
| + | choosing-strategy: gerrit | ||
| + | clean: | ||
| + | before: true | ||
| + | publishers: | ||
| + | - email: | ||
| + | notify-every-unstable-build: true | ||
| + | recipients: '{email_to}' | ||
| − | + | - job-template: | |
| − | + | name: '{name}.build' | |
| − | + | builders: | |
| − | + | - shell: | |
| − | + | !include-raw-escape './builders/syntax-build-plugin.sh' | |
| − | = | + | description: '<a href=https://github.com/stackforge/{plugin_repo}>Build {name} plugin from fuel-plugins project</a>' |
| − | + | logrotate: | |
| − | + | numToKeep: 10 | |
| − | + | parameters: | |
| − | '' | + | - string: |
| − | + | name: 'GERRIT_REFSPEC' | |
| − | + | default: 'refs/heads/master' | |
| − | '' | + | scm: |
| − | + | - git: | |
| − | + | branches: | |
| − | + | - $GERRIT_BRANCH | |
| − | + | name: '' | |
| − | + | refspec: $GERRIT_REFSPEC | |
| − | + | url: 'https://review.openstack.org/stackforge/{plugin_repo}' | |
| + | choosing-strategy: gerrit | ||
| + | clean: | ||
| + | before: true | ||
| + | triggers: | ||
| + | - gerrit: | ||
| + | trigger-on: | ||
| + | - patchset-created-event #Trigger plugin build for every gerrit patchset | ||
| + | projects: | ||
| + | - project-compare-type: 'PLAIN' | ||
| + | project-pattern: '{plugin_repo}' | ||
| + | branches: | ||
| + | - branch-compare-type: 'ANT' | ||
| + | branch-pattern: '**' | ||
| + | silent: true | ||
| + | server-name: 'review.openstack.org' | ||
| + | publishers: | ||
| + | - archive: | ||
| + | artifacts: '*.rpm' | ||
| + | - email: | ||
| + | notify-every-unstable-build: true | ||
| + | recipients: '{email_to}' | ||
| − | + | - job-template: | |
| − | + | name: '{name}.{dist}.deploy' | |
| − | + | builders: | |
| − | + | - copyartifact: | |
| − | + | project: '{name}.build' | |
| − | + | which-build: last-successful | |
| − | + | - inject: | |
| − | + | properties-content: | | |
| − | + | OPENSTACK_RELEASE={dist} | |
| − | + | TEST_GROUP={test_group} | |
| − | + | ISO_PATH={path_to_fuel_iso} | |
| − | == | + | - shell: |
| − | + | !include-raw-escape './builders/deploy-plugin.sh' | |
| − | + | description: 'fuel-qa system test for {name}' | |
| − | + | logrotate: | |
| − | + | numToKeep: 10 | |
| − | + | parameters: | |
| − | + | - string: | |
| − | + | name: 'GERRIT_REFSPEC' | |
| − | + | default: 'refs/heads/master' | |
| − | + | scm: | |
| − | + | - git: | |
| − | + | branches: | |
| − | + | - $GERRIT_BRANCH | |
| − | + | refspec: $GERRIT_REFSPEC | |
| − | + | url: 'https://review.openstack.org/stackforge/fuel-qa' | |
| − | + | choosing-strategy: gerrit | |
| − | + | clean: | |
| − | + | before: true | |
| − | + | wipe-workspace: false | |
| − | + | publishers: | |
| − | + | - archive: | |
| − | + | artifacts: 'logs/$BUILD_NUMBER/*' | |
| − | - | + | - email: |
| − | + | notify-every-unstable-build: true | |
| − | + | recipients: '{email_to}' | |
| − | |||
| − | |||
| − | |||
| − | |||
| − | |||
| − | |||
| − | |||
| − | |||
| − | |||
| − | |||
</nowiki></pre> | </nowiki></pre> | ||
| − | ==== | + | ===== CI/CD Workflow ===== |
| − | + | [[File:cicdwf.png]] | |
| − | |||
| − | |||
| − | + | <br> | |
| − | + | In terms of a specific plugin, we recommend to go through the following CI pipeline: | |
| − | < | + | # Prepare labs and start or update the lab (when a new Fuel ISO has been built): |
| − | # | + | #* a) Download current ISO from the [https://ci.fuel-infra.org/ Fuel CI]. Depending on Fuel version specified in plugin’s requirements, Jenkins downloads released ISO(s) and/or currently developed and passed BVT test on core CI. (for now, this should be done manually; in future, API should be provided to inform external CIs about a new stable ISO). You can also implement an internal storage with ability to download the latest stable ISO once it's out. |
| − | + | #* b) Deploy this ISO and prepare the required amount of labs for testing using '''fuel-dev''' and '''fuel-qa''' repositories and running it in console: <code>$ fuel-main/utils/jenkins/system_tests -t test -j dis_fuelweb_test -i (path to downloaded Fuel-ISO) -o --group=setup -V ${VIRTUAL_ENV} -k</code> You can find all the information about script installation and usage in [https://docs.mirantis.com/fuel-dev/devops.html Fuel development documentation]: | |
| − | + | #* c) Create/restore the required quantity of empty VMs from snapshots. <br>The script from the previous list item uses ''dos.py'' utility for managing VMs and their snapshots (it was configured and installed on the previous step). You can find all information about dos.py just running <code>dos.py -h</code>. | |
| − | + | # Gerrit review job will start to build plugin. See [http://docs.openstack.org/infra/manual/developers.html Gerrit workflow] for more details. | |
| − | + | #* a) use preconfigured [https://wiki.jenkins-ci.org/display/JENKINS/Gerrit+Trigger Gerrit Trigger] to start your job after new Gerrit Patch arrives | |
| − | + | #* b) run code syntax checker and unit tests according to the instructions from [[Testing]] | |
| − | + | #* c) run puppet linter (see [[Puppet-openstack/Development|Puppet OpenStack]] page for more details) | |
| − | + | #* d) build plugin (plugin should pass Fuel Plugin Builder requirements) | |
| − | < | + | #* e) trigger plugin testing |
| + | # Vote on Gerrit patch’s page and add review result in comment using [[GerritJenkinsGit|Gerrit Trigger]]. (optional) | ||
| + | # Plugin testing (all three steps are part of system_tests.sh runner from [https://review.openstack.org/#/admin/projects/stackforge/fuel-qa fuel-qa] repository) : | ||
| + | #* a) install a plugin | ||
| + | #* b) configure an environment | ||
| + | #* c) deploy environment with inactive plugin | ||
| + | #* d) run OSTF tests. | ||
| + | # Run plugin-specific functional tests to check that current plugin version provides expected functionality. | ||
| + | # Publish resulting aggregated logs to the log storage. You can do it with archiving logs. | ||
| + | |||
| + | ===== <big>Automation test cases and test framework</big> ===== | ||
| − | + | You should follow this recommendation on how to write automation tests and configure test framework. Follow the links below for more information: | |
| + | * [https://github.com/stackforge/fuel-qa tests] for 6.1 Fuel release | ||
| + | * [https://github.com/stackforge/fuel-qa/blob/master/fuelweb_test/tests/plugins/plugin_example/test_fuel_plugin_example.py example of writing plugin test cases] | ||
| + | * [http://docs.mirantis.com/fuel-dev/devops.html instructions on configuring an environment] | ||
| − | |||
| + | '''First of all, you should prepare environment and download Fuel ISO.''' | ||
| + | |||
| + | 1. Clone GIT repository: | ||
<pre><nowiki> | <pre><nowiki> | ||
| − | - | + | git clone https://github.com/stackforge/fuel-qa |
| − | + | </nowiki></pre> | |
| − | + | 2. Activate virtual env with running: | |
| − | + | <pre><nowiki> | |
| − | + | source ~/venv-nailgun-tests-2.9/bin/activate | |
</nowiki></pre> | </nowiki></pre> | ||
| − | + | 3. Export Fuel ISO path with running: | |
| − | |||
| − | |||
| − | |||
| − | |||
| − | |||
| − | |||
| − | |||
| − | |||
<pre><nowiki> | <pre><nowiki> | ||
| − | + | export ISO_PATH=path-to-iso | |
| − | |||
| − | |||
| − | |||
| − | |||
| − | |||
| − | |||
</nowiki></pre> | </nowiki></pre> | ||
| + | 4. Enter this folder: | ||
| + | <pre><nowiki> | ||
| + | cd fuel-qa/ | ||
| + | </nowiki></pre> | ||
| + | Start tests by running this command: | ||
| + | <pre><nowiki> | ||
| + | ./utils/jenkins/system_tests.sh -t test -w $(pwd) -j fuelweb_test -i $ISO_PATH -o --group=setup | ||
| + | </nowiki></pre> | ||
| + | Alternatively you can install empty setup with 1, 3, 5 or 9 slaves for the manual testing: | ||
| + | <pre><nowiki> | ||
| + | fuel-qa$ ./utils/jenkins/system_tests.sh -t test -w $(pwd) -j fuelweb_test -i $ISO_PATH -o --group=prepare_slaves_5 | ||
| + | </nowiki></pre> | ||
| + | system_tests file is used as a runner for tests from fuel-qa repository. | ||
| − | For more information on | + | 5. For more information on how tests work and additional options for test run, read the usage information with running: |
| − | + | <pre><nowiki> | |
| − | + | ./utils/jenkins/system_tests.sh -h | |
| − | + | </nowiki></pre> | |
| − | |||
| − | + | '''In the section below, you can find information about main files and modules:''' | |
| − | + | * system_tests.sh - a file where tests start execution. This file processes parameters specified from command line and invokes run_tests.py | |
| − | + | * run_tests.py - used to import your test files inside this file to run your test then. | |
| − | + | * settings.py - contains environment variables used for environment customization. With this file, you can set such variables like path to ISO, nodes quantity, etc. | |
| − | |||
| − | |||
| − | |||
| − | |||
| − | |||
| − | |||
| − | |||
| − | |||
| − | |||
| − | |||
| − | |||
| − | |||
| − | |||
| − | |||
| − | |||
| − | |||
| − | |||
| − | |||
| − | |||
| − | |||
| − | |||
| − | |||
| − | |||
| − | + | Models folder with files provides the main logic of the project: | |
| − | + | * environment.py - contains methods for environment deploying, virtual machines creation and networking for them, installing Fuel on the Fuel Master node, etc. | |
| − | + | Environment creation process uses devops manager fuel-devops/devops/manager.py. Devops manager is used for virtual machines creation and uses lower level libvirt driver. Also environment model contains methods for ssh interaction. | |
| − | + | * nailgun_client.py - contains functionality for nailgun handlers, methods and API that are supported by the nailgun client can be found [https://docs.mirantis.com/fuel-dev/develop/nailgun/development/api_doc.html here]. Nailgun client uses http client that is located in helpers folder. Nailgun client is used in fuel web client. | |
| − | |||
| − | |||
| − | |||
| − | |||
| − | |||
| − | |||
| − | |||
| − | |||
| − | |||
| − | |||
| − | |||
| − | |||
| − | |||
| − | |||
| − | |||
| − | |||
| − | |||
| − | |||
| − | |||
| − | |||
| − | |||
| − | |||
| − | |||
| − | |||
| − | |||
| − | + | Fuel web client contains such methods as:cluster creation, OSTF tests launch, adding nodes to the cluster, etc. | |
| − | + | Helpers folder contains the following files: | |
| − | + | * checkers.py - has methods for ssh client to verify nodes access and other. | |
| − | + | * common.py - has methods for OpenStack API access, instances creation, etc. | |
| − | + | * decorators.py - has different decorators, the most usable is ‘’log_snapshot_on_error’’; it's recommended to use this decorator for all tests, in case of any error diagnostic and environment snapshots will be created. | |
| − | + | * os_actions.py - has methods to work with OpenStack. | |
| − | |||
| − | |||
| − | |||
| − | |||
| − | |||
| − | |||
| − | |||
| − | |||
| − | |||
| − | |||
| − | + | '''When writing your first test case, please mind the following:''' | |
| − | + | * for writing your first test case, you can use ‘’test_fuel_plugin_example.py’’. | |
| − | + | * when creating your own test class, you have to inherit this test class from TestBasic class located in ‘’base_test_case.py’’ where fuel web client initialization is performed. | |
| − | + | * each test class and method have to be decorated with ‘’@test’’. | |
| − | + | * each class in test group has groups to run all test cases together and each test case has groups to separate run. | |
| − | + | * test cases have depends_on method or test and it means that this test case does not run until depends_on method or test will be done. | |
| − | + | ||
| − | + | '''Test execution order:''' | |
| − | + | # Base test cases are executed: these are the tests that set up environment and install the Fuel Master node. | |
| − | + | # After these tests are passed, snapshots are created which will be used by tests for creating clusters. | |
| − | + | # Revert to previously created snapshots. | |
| − | + | # Set up cluster and deploy it. | |
| − | will be | + | # Run Health check test (OSTF). |
| − | '' | ||
| − | |||
| − | |||
| − | |||
| − | + | For test execution debugging you can use dos.py | |
| − | + | You can create snapshot with the following command: | |
| − | + | <pre><nowiki> | |
| − | + | dos.py snapshot <myenv> --snapshot-name=<snapshot_name> | |
| − | + | </nowiki></pre> | |
| − | + | You can revert snapshot with: | |
| − | + | <pre><nowiki> | |
| − | + | dos.py revert <myenv> --snapshot-name=<snapshot_name> | |
| − | + | </nowiki></pre> | |
| − | + | ||
| − | + | ==== Fuel-qa and Fuel Plugins ==== | |
| − | + | Currently, the system tests for Fuel are kept in [https://github.com/stackforge/fuel-qa fuel-qa] repo. | |
| − | + | Note that for implementing Fuel Plugin CI, the fuel-qa can be used as the baseline framework. | |
| − | + | This means, you can use the framework without committing any tests directly to fuel-qa repo. | |
| − | |||
| − | |||
| − | |||
| − | |||
| − | |||
| − | |||
| − | === | + | === Preparing an environment for plugin development === |
| − | + | Prepare your environment for plugin development in three easy steps: | |
| − | |||
| − | |||
| − | |||
| − | |||
| − | |||
| − | |||
| − | |||
| − | |||
| − | |||
| − | |||
| − | |||
| − | + | 1. Install the standard Linux development tools. | |
| − | + | * For Ubuntu 14.04 LTS, run: | |
| − | + | ''sudo apt-get install createrepo rpm dpkg-dev'' | |
| − | |||
| − | |||
| − | |||
| − | + | * For Centos 6.5, run: | |
| − | + | ''yum install createrepo rpm rpm-build dpkg-devel'' | |
| − | * | ||
| − | |||
| − | |||
| − | |||
| − | + | 2. Install the Fuel Plugin Builder. To do that, you should first get pip: | |
| − | + | ''easy_install pip'' | |
| + | |||
| + | 3. Then, install Fuel Plugin Builder (fpb) itself: | ||
| + | ''pip install fuel-plugin-builder'' | ||
| + | |||
| + | <span id="install_latest"></span> If you need to install the latest version of the Fuel Plugin Builder, follow the instruction below: | ||
| − | + | 1. Clone the repository: | |
| + | git clone https://github.com/stackforge/fuel-plugins.git | ||
| − | + | 2. Go to the 'fuel_plugins' folder: | |
| − | + | cd fuel-plugins/ | |
| − | |||
| − | + | 3. Install the fpb: | |
| + | sudo python setup.py install | ||
| − | + | === Using Fuel Plugin Builder tool === | |
| − | |||
| − | |||
| − | |||
| − | |||
| − | |||
| − | |||
| − | |||
| − | |||
| − | + | ==== Plugin structure ==== | |
| − | + | To build your plugin, you should first generate its structure. It looks as follows: | |
| − | + | ||
| − | + | [[File:Untitled drawing-3.png|500px]] | |
| − | + | ||
| − | + | ===== Generating the structure and building the plugin ===== | |
| − | + | ||
| + | To generate the plugin structure as given above, you should run the following command: | ||
| + | |||
| + | ''fpb --create <fuel_plugin_name>'' | ||
| + | |||
| + | As the result, you will only have to build your plugin: | ||
| + | ''fpb --build <fuel_plugin_name>'' | ||
| + | |||
| + | After your plugin is built, you can see it in your plugin's directory; for example, ''fuel_plugin_name/fuel_plugin_name-1.0.0.noarch.rpm". | ||
| + | |||
| + | === How to use files from plugin structure === | ||
| + | |||
| + | ==== deployment_tasks.yaml==== | ||
| + | |||
| + | New "deployment_tasks.yaml" file was introduced to replace the "tasks.yaml". The new file can specify tasks dependencies using new parameters "required for" and "requires". | ||
<pre><nowiki> | <pre><nowiki> | ||
| − | + | type: puppet | |
| − | + | groups: [primary-controller] | |
| − | + | required_for: [keystone] | |
| − | + | requires: [database] | |
| + | parameters: | ||
| + | puppet_manifest: /etc/puppet/modules/osnailyfacter/modular/keystone/db.pp | ||
| + | puppet_modules: /etc/puppet/modules | ||
| + | timeout: 1800 | ||
</nowiki></pre> | </nowiki></pre> | ||
| − | + | The list of parameters for "deployment_tasks.yaml": | |
| + | |||
| + | ===== role ===== | ||
| + | The parameter describes a role of a node where tasks will be executed. The role parameter is used for pre/post deployment tasks or for declaring a group for main deployment. | ||
| + | ===== groups ===== | ||
| + | The parameter describes a group of nodes with the specified role where tasks will be executed and should be explicitly declared for the main deployment. | ||
<pre><nowiki> | <pre><nowiki> | ||
| − | + | - id: controller | |
| − | + | type: group | |
| − | + | role: [controller] | |
| + | requires: [primary-controller] | ||
| + | required_for: [deploy_end] | ||
| + | parameters: | ||
| + | strategy: | ||
| + | type: parallel | ||
| + | amount: 6 | ||
</nowiki></pre> | </nowiki></pre> | ||
| − | ===== | + | The “groups” parameter is used for the main deployment. It conflicts with the "role" parameter. The task must have either a “role” or “group” parameter, but not both of them at the same time. |
| + | |||
| + | ===== requires ===== | ||
| + | The parameter specifies the list of tasks needed by the current one. The list of tasks can be obtained by running the command: | ||
| + | <code>fuel graph --env 1 --download</code> | ||
| + | |||
| + | ===== required_for ===== | ||
| + | The parameter specifies the list of tasks for which the current one is needed. | ||
| + | |||
| + | ===== timeout ===== | ||
| + | You can also specify execution timeout in seconds. Once specified, the deployment will fail if timeout expires. By default, timeout is set to 300 seconds. | ||
| + | <br> | ||
| + | |||
| + | [fixme: Is this information still useful or should we just delete it?] | ||
| + | |||
| + | Previously, when plugin developer set timeout for operation, this timeout worked differently for specific operations. For example: | ||
| + | |||
| + | * shell task type timeout = timeout * retries (Mcollective retries, 2 by default) | ||
| + | * puppet task type timeout = global timeout (the one set by plugin developer). | ||
| + | <br> | ||
| + | Now it works properly in both cases: shell and puppet task types have global timeout. | ||
| + | |||
| + | [/fixme] | ||
| + | |||
| + | ===== type: shell ===== | ||
| + | The parameter runs the specified shell command | ||
| + | |||
| + | Here is the example of a "shell" task: | ||
| − | |||
| − | |||
<pre><nowiki> | <pre><nowiki> | ||
| − | + | # This tasks will be applied on controller nodes, | |
| − | + | # here you can also specify several roles, for example | |
| − | + | # ['cinder', 'compute'] will be applied only on | |
| − | + | # cinder and compute nodes | |
| − | + | - id: task-shell-deploy | |
| − | + | role: ['controller'] | |
| − | + | type: shell | |
| − | + | parameters: | |
| − | + | cmd: bash deploy.sh | |
| − | + | timeout: 42 | |
| − | |||
| − | |||
| − | |||
| − | |||
| − | |||
| − | |||
| − | |||
| − | |||
| − | |||
| − | |||
| − | |||
| − | |||
| − | |||
| − | |||
| − | |||
| − | |||
| − | |||
| − | |||
| − | + | - id: task-shell-deploy | |
| + | role: ['cinder','compute''] | ||
| + | type: shell | ||
| + | parameters: | ||
| + | cmd: bash deploy.sh | ||
| + | timeout: 42 | ||
| − | + | # Task is applied for all roles | |
| − | + | - id: task-shell-pluginlog | |
| − | + | role: '*' | |
| − | + | type: shell | |
| − | + | parameters: | |
| − | + | cmd: echo all > /tmp/plugin.all | |
| − | + | timeout: 42 | |
| − | |||
| − | |||
| − | |||
| − | |||
| − | |||
| − | |||
| − | |||
| − | |||
| − | |||
| − | |||
| − | |||
</nowiki></pre> | </nowiki></pre> | ||
| − | == | + | ===== type: puppet ===== |
| + | Puppet task type allows you to apply your own Puppet manifests on OpenStack nodes. For more information, see Puppet in Fuel section. | ||
| − | + | To enable this task type, add your ''site.pp'' file in ''deployment_scripts/puppet/manifests/'' directory. | |
| + | Then put all required modules in ''deployment_scripts/puppet/modules'' directory. | ||
| − | + | * puppet_manifest - specify directory path for your manifest relative to deployment_scripts. | |
| + | * puppet_modules - specify directory path for your modules relative to deployment_scripts. | ||
| − | |||
| − | |||
<pre><nowiki> | <pre><nowiki> | ||
| − | + | # Deployment will be applied on controllers only | |
| + | - role: ['controller'] | ||
| + | type: puppet | ||
| + | parameters: | ||
| + | puppet_manifest: puppet/manifests/site.pp | ||
| + | puppet_modules: puppet/modules | ||
| + | timeout: 360 | ||
</nowiki></pre> | </nowiki></pre> | ||
| − | |||
| − | |||
| − | |||
| − | |||
| − | === | + | ===== type: reboot ===== |
| + | Beginning with Fuel 6.1 release for plugins with '''package_version: 2.0.0''', reboot task type allows you to reboot your node with specifying the timeout. This can be useful to apply numerous changes at the node. | ||
| − | + | <pre><nowiki> | |
| − | + | - role: '*' | |
| − | + | type: reboot | |
| − | + | parameters: | |
| + | timeout: 300 | ||
| + | </nowiki></pre> | ||
| + | |||
| + | ===== type: group ===== | ||
| + | A group task consists of the list of tasks to be executed on the specified nodes. | ||
| + | |||
| + | <pre><nowiki> | ||
| + | - id: standalone-keystone | ||
| + | type: group | ||
| + | role: [standalone-keystone] | ||
| + | requires: [deploy_start, primary-standalone-keystone] | ||
| + | required_for: [deploy_end] | ||
| + | tasks: [fuel_pkgs, hiera, globals, tools, logging, netconfig, hosts, firewall, deploy_start, cluster, keystone-vip, cluster-haproxy, memcached, openstack-haproxy-stats, task-keystone] | ||
| + | parameters: | ||
| + | strategy: | ||
| + | type: parallel | ||
| + | </nowiki></pre> | ||
| − | + | When you set up a group of tasks you can also specify how they will be executed: in “parallel” or “one-by-one”. | |
| − | |||
| − | |||
| − | |||
| − | |||
| − | |||
| − | |||
| − | |||
| − | |||
| − | |||
| − | |||
| − | |||
| − | |||
| − | |||
| − | |||
| − | + | ===== strategy: type ===== | |
| − | |||
| − | |||
| − | + | * "parallel" - tasks will be executed in parallel | |
| + | * "one-by-one" - tasks will be executed one-by-one | ||
| − | + | Once you choose “parallel” you can specify the maximal number of tasks that can be run in parallel using the “amount” parameter. | |
| − | |||
| − | |||
| − | |||
| − | |||
| − | |||
| − | + | <pre><nowiki> | |
| − | + | - id: controller | |
| − | + | type: group | |
| − | + | role: [controller] | |
| − | + | requires: [primary-controller] | |
| − | + | required_for: [deploy_end] | |
| + | parameters: | ||
| + | strategy: | ||
| + | type: parallel | ||
| + | amount: 6 | ||
| + | </nowiki></pre> | ||
| − | + | ==== environment_config.yaml ==== | |
| − | |||
| − | |||
| − | + | This file describes additional attributes that will appear on the Settings tab of the Fuel web UI. | |
| − | + | When the environment is deployed, these attributes are passed to the task executor so that the data is available in the /etc/astute.yaml file | |
| − | + | on each target node and can be accessed from your bash or puppet scripts. | |
| − | |||
| − | |||
| − | |||
| − | |||
| − | |||
| − | |||
| − | + | By default, your environment_config.yaml file adds text field on Fuel web UI: | |
| − | |||
| − | |||
| − | |||
| − | + | <pre><nowiki> | |
| − | + | attributes: | |
| − | + | fuel_plugin_name_text: | |
| + | value: 'Set default value' | ||
| + | label: 'Text field' | ||
| + | description: 'Description for text field' | ||
| + | weight: 25 | ||
| + | type: "text" | ||
| + | </nowiki></pre> | ||
| − | + | For more information on Fuel web UI elements for a plugin, see Fuel plugin UI elements. | |
| − | == | + | ==== metadata.yaml ==== |
| − | + | This file contains the description of your plugin: | |
| − | + | <pre><nowiki> | |
| − | + | # Plugin name | |
| − | # | + | name: fuel_plugin_name |
| − | # | + | # Human-readable name for your plugin, it will be shown on UI |
| − | + | # as a name of plugin group | |
| − | + | title: Title for fuel_plugin_name plugin | |
| + | # Plugin version | ||
| + | version: 1.0.0 | ||
| + | # Description | ||
| + | description: Enable to use plugin X | ||
| + | # Required fuel version | ||
| + | fuel_version: ['6.0'] | ||
| + | # The plugin is compatible with releases in the list | ||
| + | releases: | ||
| + | - os: ubuntu | ||
| + | version: 2014.2-6.0 | ||
| + | mode: ['ha', 'multinode'] | ||
| + | deployment_scripts_path: deployment_scripts/ | ||
| + | repository_path: repositories/ubuntu | ||
| + | - os: centos | ||
| + | version: 2014.2-6.0 | ||
| + | mode: ['ha', 'multinode'] | ||
| + | deployment_scripts_path: deployment_scripts/ | ||
| + | repository_path: repositories/centos | ||
| + | # Version of plugin package | ||
| + | package_version: '1.0.0' | ||
| + | </nowiki></pre> | ||
| − | = | + | {| class="wikitable" |
| − | + | |- | |
| − | + | ! Parameter !! Usage !! Comments/Example | |
| − | + | |- | |
| − | + | | name || Internal name for your plugin. ||Name can consist of lowercase letters, '-' and '_' symbols. | |
| − | + | |- | |
| − | + | | title || Human-readable name for the plugin that will appear on the Fuel web UI. || | |
| − | + | |- | |
| − | + | | description || Description of your plugin. || For example: Enables X functionality for nodes with Controller role. | |
| − | + | |- | |
| − | + | | version || Plugin version. || For the guidelines, see [http://semver.org/ Semantic Versioning 2.0.0.] | |
| − | + | |- | |
| − | + | | fuel_version || A list of plugin-compatible versions of Fuel. || For example, 2014.2-6.0. | |
| − | + | |- | |
| − | + | | package_version || version of plugin; Fuel uses this version to choose the way a plugin should be installed. || Example | |
| − | + | |- | |
| − | + | | is_hotpluggable || Set this parameter to 'true' to enable installation of a plugin on top of already deployed environment. Use this parameter only with application level plugins that have no core functionality. Also, the plugin must define a role that Fuel can apply to a new node, which has not already been provisioned. This role can be co-located with another role as long as they are being provisioned onto a new node but not the one that was previously provisioned or deployed. || See the [https://github.com/openstack/fuel-plugins/blob/master/examples/fuel_plugin_example_v4/metadata.yaml#L22 template] with the parameter set to 'false' by default. | |
| − | + | |- | |
| − | + | | releases || a list of OpenStack releases compatible with the plugin. || For example, 2014.2-6.0. | |
| + | |- | ||
| + | | os || a name of supported Linux distribution || For example, Ubuntu or CentOSe | ||
| + | |- | ||
| + | | version || A version of OpenStack release || | ||
| + | |- | ||
| + | | mode || A list plugin-compatible modes. || 'ha' is used if plugin supports High Availability;’'multinode' - if it does not. | ||
| + | |- | ||
| + | | deployment_scripts_path || A path in your plugin directory where all deployment scripts for the release are located relative to the top of the plugin directory. || | ||
| + | |- | ||
| + | | repository_path || A path in your plugin directory where all packages for the release are located relative to the top of the plugin directory. || Example | ||
| + | |- | ||
| + | |} | ||
| − | + | === Plugins deployment order === | |
| − | + | Beginning with Fuel 6.1 release, you can specify the order in which plugins are deployed. | |
| − | + | This is especially useful if several plugins should be enabled in one environment. | |
| − | + | For example, plugins for network configuration should be run before plugins installing software services. | |
| + | For each stage name plugin developer adds a postfix, which defines the stage of | ||
| + | specific execution order of the task. | ||
| + | Let's have a look at the following sample: | ||
| − | + | The ''tasks.yam''l file of Fuel plugin '''A''': | |
| + | <br> | ||
| + | <pre><nowiki> | ||
| + | role: ['primary-controller', 'controller'] | ||
| + | stage: post_deployment/100 | ||
| + | type: shell | ||
| + | parameters: | ||
| + | cmd: bash deploy.sh | ||
| + | timeout: 42</nowiki></pre> | ||
| − | + | The ''tasks.yaml'' file of Fuel plugin '''B''': | |
| − | + | <br> | |
| − | |||
<pre><nowiki> | <pre><nowiki> | ||
| − | - | + | role: ['primary-controller', 'controller'] |
| − | + | stage: post_deployment/50 | |
| − | + | type: shell | |
| − | + | parameters: | |
| − | + | cmd: bash deploy.sh | |
| − | + | timeout: 42 | |
| − | |||
| − | |||
| − | |||
| − | |||
| − | |||
</nowiki></pre> | </nowiki></pre> | ||
| + | <br> | ||
| + | During post_deployment stage execution, the task of plugin '''B''' | ||
| + | will be run before plugin post task of plugin '''A''', because | ||
| + | ''post_deployment/50'' is lower than ''post_deployment/100''. | ||
| + | Nevertheless, in some cases plugins do not know about each other so the best | ||
| + | way to solve the problem is to define the convention of ranges which | ||
| + | plugin developers will be able to use: | ||
| − | + | {| class="wikitable" | |
| − | + | |- | |
| − | + | | 0 - 999 || hardware configuration, for example drivers configuration | |
| − | + | |- | |
| − | + | | 1000 - 1999 || reserved for future uses | |
| − | + | |- | |
| − | + | | 2000 - 2999 || disks partitioning and volumes configuration | |
| − | + | |- | |
| + | | 3000 - 3999 || reserved for future uses | ||
| + | |- | ||
| + | | 4000 - 4999 || network configuration | ||
| + | |- | ||
| + | | 5000 - 5999 || reserved for future uses | ||
| + | |- | ||
| + | | 6000 - 6999 || software deployment | ||
| + | |- | ||
| + | | 7000 - 7999 || reserved for future uses | ||
| + | |- | ||
| + | | 8000 - 8999 || monitoring services deployment | ||
| + | |} | ||
| − | + | ==== How the deployment order works in specific cases ==== | |
| − | |||
| − | * ' | + | * If one network plugin defines stage: ''post_deployment/100'' |
| − | + | and another one has stage: ''post_deployment/2000'', they will be | |
| − | + | installed in the right order without knowing about each other. | |
| − | + | * If there are two plugins which implement monitoring, plugin developers | |
| − | + | can figure out which plugin should be installed first and tune postfixes | |
| − | + | accordingly. | |
| − | + | * If two tasks have the same priority, they should be sorted in alphabetical | |
| + | order by name and the first in the list should be deployed first. | ||
| + | * If several tasks with the same postfix priority are present in a single plugin, | ||
| + | then they should be deployed in the same order in which they specified in the | ||
| + | file. | ||
| + | * Postfix can be negative or positive, floating or integer number. | ||
| − | ==== | + | ==== Additional stages ==== |
| − | + | Additional plugin-specific stages can be defined: | |
| + | * hw_configuration | ||
| + | * disk_partitioning | ||
| + | * network_configuration | ||
| + | * software_installation | ||
| − | + | With the already existing stages: | |
| + | * pre_deployment | ||
| + | * post_deployment | ||
| + | <br> | ||
| + | And, finally, a new stage: | ||
| + | * monitoring | ||
| − | + | In this case, plugin developer will be able to work with a single entity | |
| + | without some additional postfixes. | ||
| − | + | === How to display plugin restrictions to users === | |
| − | + | Sometimes you might need to provide restrictions for your plugin | |
| + | in the Fuel UI. That means, all incompatible options (e.g. Networking Setup) | ||
| + | should be somehow grayed out. | ||
| + | |||
| + | ==== What are restrictions? ==== | ||
| + | Restrictions define when settings and setting groups should be available. | ||
| + | Each restriction is defined as a condition with optional action and message: | ||
<pre><nowiki> | <pre><nowiki> | ||
| − | + | restrictions: | |
| − | + | - condition: "settings:common.libvirt_type.value != 'kvm'" | |
| − | + | message: "KVM only is supported" | |
| − | + | - condition: "not ('experimental' in version:feature_groups)" | |
| − | + | action: hide | |
| − | |||
| − | |||
| − | |||
| − | |||
| − | |||
</nowiki></pre> | </nowiki></pre> | ||
| − | + | * condition is an expression written in [https://github.com/openstack/fuel-docs/blob/master/devdocs/develop/nailgun/customization/settings.rst#restrictions Expression DSL]. If returned value is true, then action is performed and message is shown (if specified).<br/> | |
| − | + | * action defines what to do if condition is satisfied. Supported values are ''"disable"'', ''"hide"'' and ''"none"''. The ''"none"'' value can be used just to display message. This field is optional (the default value is ''"disable"''): <br/> | |
| + | ** disable - plugin checkbox (placed into the ''Settings'' tab of the Fuel web UI) turns inactive and has a yellow triangle with a pop-up warning (when hovering a mouse). | ||
| + | ** hide - when incorrect parameters are selected, the plugin checkbox will not appear in the ''Settings'' tab of the Fuel web UI at all. | ||
| + | ** none - plugin checkbox stays active and has a yellow triangle with a warning (when hovering a mouse). | ||
| + | * message is a message that is displayed if the condition is satisfied. This field is optional.<br/> | ||
| + | * strict is a boolean flag which specifies how to handle non-existent keys in expressions. If it is set to true (default value), exception is thrown in case of non-existent key. Otherwise values of such keys have null value. Setting this flag to false is useful for conditions which rely on settings provided by plugins: | ||
<pre><nowiki> | <pre><nowiki> | ||
| − | + | restrictions: | |
| − | + | - condition: "settings:other_plugin == null or settings:other_plugin.metadata.enabled != true" | |
| − | + | strict: false | |
| − | + | message: "Other plugin must be installed and enabled" | |
| − | |||
| − | |||
| − | |||
| − | |||
| − | |||
| − | |||
| − | |||
| − | |||
| − | |||
| − | |||
| − | |||
| − | |||
| − | |||
| − | |||
| − | |||
</nowiki></pre> | </nowiki></pre> | ||
| − | + | There are also short forms of restrictions: | |
| − | |||
| − | |||
<pre><nowiki> | <pre><nowiki> | ||
| − | + | restrictions: | |
| − | + | - "settings:common.libvirt_type.value != 'kvm'": "KVM only is supported" | |
| − | + | - "settings:storage.volumes_ceph.value == true" | |
| − | |||
| − | |||
| − | |||
| − | |||
| − | |||
</nowiki></pre> | </nowiki></pre> | ||
| − | + | ===== How to add restrictions to plugin-related fields and checkbox ===== | |
| − | |||
| − | |||
| − | |||
| − | |||
| − | |||
| − | |||
| − | |||
| − | |||
| − | |||
| + | Note, that you can not only add restrictions to the checkbox, but also to the plugin-related fields. | ||
| + | Here is the [https://github.com/stackforge/fuel-plugin-contrail/blob/master/environment_config.yaml#L3 example implementation]: | ||
<pre><nowiki> | <pre><nowiki> | ||
| − | + | attributes: | |
| − | + | # Show contrail only in supported network config | |
| − | + | metadata: | |
| − | + | restrictions: | |
| − | + | - condition: "not (cluster:net_provider == 'neutron' and networking_parameters:segmentation_type == 'vlan')" | |
| − | + | message: "Please use Neutron with VLAN segmentation, the only network type supported with Contrail plugin." | |
| − | + | contrail_asnum: | |
| − | + | value: '64512' | |
| − | + | label: 'AS Number' | |
| − | + | description: 'AS number for BGP communication' | |
| − | + | weight: 10 | |
| − | + | type: "text" | |
| − | + | regex: | |
| − | + | source: '^(?:(6553[0-5])|(655[0-2]\d)|(65[0-4]\d{2})|(6[0-4]\d{3})|([1-5]\d{4})|([1-9]\d{1,3})|([1-9]))$' | |
| − | + | error: "Invalid AS number" | |
| − | + | contrail_private_cidr: | |
| − | + | value: '10.109.3.0/24' | |
| − | + | label: 'Private network CIDR' | |
| − | " | + | description: 'CIDR for private network used in Contrail inter-node communication' |
| − | + | weight: 20 | |
| − | + | type: "text" | |
| − | + | regex: | |
| − | + | source: '^(?:\d|1?\d\d|2[0-4]\d|25[0-5])(?:\.(?:\d|1?\d\d|2[0-4]\d|25[0-5])){3}(?:\/(?:[1-2]\d|[8-9]))$' | |
| − | + | error: "Invalid network CIDR" | |
| − | + | </nowiki></pre> | |
| − | + | <br/> | |
| − | + | Such a restriction will be then displayed in the Fuel web UI as follows: | |
| − | + | [[File:Plugin-restriction.png]] | |
| − | + | ||
| − | + | ==== Example implementation ==== | |
| − | + | ||
| − | + | Here is the [https://github.com/stackforge/fuel-web/blob/master/nailgun/nailgun/fixtures/openstack.yaml#L511-L525 example implementation] of the restriction: | |
| − | + | ||
| − | + | <pre><nowiki> | |
| − | + | - data: "disabled" | |
| − | + | label: "Mellanox drivers and plugins disabled" | |
| − | + | description: "If selected, Mellanox drivers, Neutron and Cinder plugin will not be installed." | |
| − | + | restrictions: | |
| − | + | - "settings:storage.iser.value == true" | |
| − | + | - data: "drivers_only" | |
| − | + | label: "Install only Mellanox drivers" | |
| − | + | description: "If selected, Mellanox Ethernet drivers will be installed to support networking over Mellanox NIC. Mellanox Neutron plugin will not be installed." | |
| − | + | restrictions: | |
| − | + | - "settings:common.libvirt_type.value != 'kvm'" | |
| − | + | - data: "ethernet" | |
| − | + | label: "Install Mellanox drivers and SR-IOV plugin" | |
| − | + | description: "If selected, both Mellanox Ethernet drivers and Mellanox network acceleration (Neutron) plugin will be installed." | |
| − | + | restrictions: | |
| − | + | - "settings:common.libvirt_type.value != 'kvm' or not (cluster:net_provider == 'neutron' and networking_parameters:segmentation_type == 'vlan')" | |
| − | + | </nowiki></pre> | |
| − | + | ||
| − | + | == How to migrate plugins from 1.0.0 to 2.0.0 package version == | |
| − | + | ||
| − | + | Beginning with Fuel 6.1, new plugins format is supported. Note, that new format is not compatible with Fuel 6.0. | |
| − | + | ||
| − | + | For new plugins, Fuel Plugin Builder builds RPM packages instead of fuel plugin archives. | |
| − | + | ||
| − | + | In order to migrate from old format to new, follow these steps: | |
| − | + | * Get the latest fuel plugin builder version, 2.0.0 or higher. | |
| − | + | <pre><nowiki> | |
| − | + | pip install fuel-plugin-builder | |
| − | |||
| − | |||
| − | |||
| − | |||
| − | |||
| − | |||
| − | |||
| − | |||
| − | |||
| − | |||
</nowiki></pre> | </nowiki></pre> | ||
| + | * Change the value of '''package_version''' parameter in '''metadata.yaml''' file from '''1.0.0''' to '''2.0.0'''. | ||
| + | * Run the following command: | ||
| + | <pre><nowiki>fpb --check plugin_path</nowiki></pre> | ||
| + | and fix the errors one by one or follow the instructions below. | ||
| − | + | === Updates === | |
| − | |||
| − | |||
| − | |||
| − | |||
| − | |||
| − | |||
| − | |||
| − | |||
| − | + | If your plugin uses "controller" role in '''tasks.yaml''' file, make sure that you have also specified the "primary-controller". | |
| − | + | In new plugins, "controller" and "primary-controller" should be defined explicitly. In previous version, you could indicate "controller", and then the "primary-controller" was added at the backend automatically. | |
| − | |||
| − | |||
| − | |||
| − | |||
| − | == | + | === Brand new features === |
| − | + | Several obligatory fields are added to '''metadata.yaml''' file: | |
| − | + | * '''groups''' field is used to specify group which your plugin belongs to. Either of the options is available: | |
| + | ** network | ||
| + | ** storage | ||
| + | ** storage::cinder | ||
| + | ** storage::glance | ||
| + | ** hypervisor | ||
| + | ** monitoring. | ||
| + | If your plugin does not belong to any of these options, set an empty list as a value for "groups" parameter. | ||
| + | * '''authors''' field provides the list of authors. Here you should specify your or your company's name. | ||
| + | '''Note:''' No commas should be used in '''authors''' field | ||
| + | don't: | ||
| + | authors: ['Vyacheslav Struk, Mirantis', 'Oleksandr Martsyniuk, Mirantis'] | ||
| + | do: | ||
| + | authors: ['Vyacheslav Struk', 'Oleksandr Martsyniuk'] | ||
| + | * '''licenses''' field contains the list of licenses. | ||
| + | * '''homepage''' field sets a link to plugin's project. | ||
| + | <br/>See the [https://github.com/stackforge/fuel-plugin-contrail/blob/master/metadata.yaml#L25 Contrail plugin] ''metadata.yaml'' file for example. | ||
| − | + | <br> | |
| − | + | One more task type is introduced: the '''reboot''' task is useful if you perform node configuration which requires reboot; for example, in case of linux kernel parameters configuration. | |
| − | + | For information about reboot task type, see [[Fuel/Plugins#type:_reboot_parameter|the Plugins wiki]]. | |
| − | == | + | == Plugin versioning system == |
| − | + | When new functionality, minor updates or security fixes should be delivered, plugin developer creates a new version of the plugin; this can be major or minor one: | |
| + | * major - changes in API, functionality, major OpenStack release introduced. | ||
| + | * minor - security fixes only. | ||
| + | <br/> | ||
| + | In 6.0, plugins had .fp format only. It’s deprecated now. | ||
| + | In 6.1 and higher, only RPM plugins are used. Their versioning is performed as follows: | ||
| − | + | {| class="wikitable" | |
| − | + | |- | |
| − | + | ! !! Plugin file format !! fuel-plugin value !! metadata.yaml !! major !! minor | |
| − | + | |- | |
| − | + | | RPM || fuel-plugin-1.0-1.0.0 || 1.0 || 1.0.0 || 1.0.0 || 1.0.1 | |
| + | |} | ||
| − | + | Here is the example: | |
| − | + | Let's suppose that a plugin has 1.0.1 version in the metadata.yaml file. | |
| − | + | The plugin file should then have a different format: plugin-1.0-1.0.1.rpm. | |
| − | |||
| − | |||
| − | |||
| − | === | + | === Update procedure === |
| + | {| class="wikitable" | ||
| + | |- | ||
| + | ! !! Update !! Limitations | ||
| + | |- | ||
| + | | fp || NO || | ||
| + | |- | ||
| + | | RPM || YES || Can be updated to minor version only with <code>fuel plugins --update <fuel-plugin-file></code> command. To get a major one, user has to download it from Fuel Plugins Catalog and create a new environment from scratch. | ||
| + | |} | ||
| − | + | === Versioning scheme === | |
| − | * | + | * for .fp plugins versioning is not supported at all. That means, user has to download&install the plugin from scratch. |
| − | + | * for RPM plugins, it looks as follows: | |
| − | + | [[File:Rpm plugin versioning.png]] | |
| − | |||
| − | + | === Important note === | |
| − | + | Please, consider changing the versioning scheme for customized packages | |
| − | + | to have clear indicator which package is installed - the ones that enter Mirantis OpenStack or customized ones. | |
| − | + | Otherwise, there is need to check python files to understand which package is actually installed. | |
| − | |||
| − | |||
| − | |||
| − | + | == How it works from the inside == | |
| − | |||
| − | |||
| − | |||
| − | |||
| − | + | === Installation === | |
| − | |||
| − | |||
| − | |||
| − | |||
| − | |||
| − | + | Installation procedure consists of the following steps: | |
| − | |||
| − | |||
| − | + | # User copies fuel_plugin_name-1.0-1.0.0-1.noarch.rpm file on the Fuel Master node with secure copy. | |
| − | + | # Then, after it’s copied to the Fuel Master node, the user runs the following command:<br><code>fuel plugins --install fuel_plugin_name-1.0-1.0.0-1.noarch.rpm</code> | |
| − | + | # Fuel client installs the contents of the fuel_plugin_name-1.0-1.0.0-1.noarch.rpm package to the ''/var/www/nailgun/plugins/fuel_plugin_name-1.0''. | |
| + | # Fuel client registers the plugin using REST API Service (Nailgun); it sends a POST request with the contents of metadata.yaml file to /api/v1/plugins url. | ||
| − | === | + | === Configuration === |
| − | + | Configuration procedure consists of the following steps: | |
| − | # | + | |
| − | # | + | # When a new environment is created, Nailgun tries to find plugins which are compatible with the environment. |
| − | # | + | # Nailgun merges the contents of the environment_config.yaml files with the basic attributes of the environment and generates a separate group and the checkbox on the Fuel web UI for each plugin. |
| − | + | # The plugin is disabled until the user enables it. After user selected the plugin checkbox, the Fuel web UI sends the data to Nailgun. Nailgun parses the request and creates relations between Plugin and Cluster models. | |
| − | + | ||
| − | + | ====Prioritization of Repositories==== | |
| − | + | ||
| − | + | You can use priorities to configure plugin’s repositories instead of shutting them down completely, which may lead to the failed deployment. | |
| − | # | + | You can specify the priorities for plugin's repositories in Nailgun’s [https://github.com/stackforge/fuel-web/blob/master/nailgun/nailgun/settings.yaml#L88-L95 settings.yaml]. |
| − | + | Default priorities for Plugins' repos look like: | |
| − | + | <pre><nowiki> | |
| − | + | REPO_PRIORITIES: | |
| − | + | plugins: | |
| − | + | centos: 10 | |
| − | + | ubuntu: 1100 | |
| − | + | </nowiki></pre> | |
| − | |||
| − | |||
| − | |||
| − | |||
| − | |||
| − | |||
| − | |||
| − | |||
| − | |||
| − | |||
| − | |||
| − | |||
| − | |||
| − | |||
| − | |||
| − | |||
| − | |||
| − | + | These priorities should be higher than OS/Fuel one, because a user may want to override some package from OS/Fuel. | |
| − | |||
| − | |||
| − | === | + | ====Virtual IP reservation via Fuel Plugin's metadata==== |
| − | + | Some plugins require an additional VIP to enable proper configuration. Previously, VIP reservation was based on network metadata. Now, it is based on the network roles' description. This enables a plugin developer to create extra VIPs to be used in developer's deployment scripts. | |
| − | |||
| − | |||
| − | |||
| − | |||
| − | |||
| − | |||
| − | |||
| − | |||
| − | |||
| − | |||
| − | |||
| − | |||
| + | First, a user should define VIPs in the plugin metadata. Then, install a plugin before creating an environment. In upcoming releases, the requirement to install a plugin prior to environment creation will be removed. | ||
| − | + | For example, Zabbix can be configured in a way that it receives SNMP traffic on a dedicated VIP. In that case, a plugin developer can define extra VIPs in a plugin configuration file, and use it as a puppet resource. | |
| − | + | VIP reservation is possible only via plugin metadata. This is done by adding a new file ‘network_roles.yaml’, which looks like this: | |
| − | + | <pre><nowiki> | |
| − | + | - id: "name_of_network_role" | |
| − | + | default_mapping: "public" | |
| − | + | properties: | |
| − | + | subnet: true | |
| − | + | gateway: false | |
| − | + | vip: | |
| + | - name: "test_a" | ||
| + | alias: "alias_name" | ||
| + | namespace: "haproxy" | ||
| + | node_roles: ["primary-controller", "controller"] | ||
| + | - name: "test_b" | ||
| + | </nowiki></pre> | ||
| + | |||
| + | Note that 'alias', 'namespace', and 'node_roles' parameters are optional. | ||
| − | + | * 'default_mapping' - a name of a network to map the network role by default. So, VIP will be allocated on that network by default (that mapping can be changed in the network template). Thus, several network roles should be defined if VIPs should be allocated in different networks. | |
| − | |||
| − | |||
| − | |||
| − | |||
| − | + | * 'name' - a string that contains a unique name within the environment used in the Nailgun database and for serialization in the orchestrator. | |
| + | '''Note:''' Names for network interfaces are generated automatically using first 13 characters of a VIP’s name. Therefore, if several VIPs are introduced by the same plugin, their names must differ in first 13 characters. Also, do not use the word ‘vip’ in a VIP’s name, as it will be added automatically where necessary. | ||
| − | + | * 'alias' - a string used to solve a compatibility issue with REST API to run tests within the OpenStack Testing Framework that use the old notation. | |
| − | + | * 'namespace' - a string that points to a network namespace to be used for landing of the VIP, null if not defined. | |
| + | '''Note:''' You must specify a namespace for a VIP, otherwise it still will be put into network_metadata['vips'] in Hiera, where all available VIPs are stored, but not handled by Pacemaker. So, a plugin can use it in its own way. | ||
| − | + | * 'node_roles' - a list of node roles where VIPs should be set up. If not defined, its value will be set to ["primary-controller", "controller"]. | |
| + | '''Note:''' A node must have Pacemaker installed that automatically allocates resources for all VIPs. In Fuel 6.1, VIPs were processed manually. | ||
| − | |||
| − | + | '''Known issue:''' | |
| − | + | It should be mentioned, that only new network roles can be requested in a plugin. Previously defined core network roles cannot be redefined/extended in a plugin. | |
| + | For more information, see [https://bugs.launchpad.net/fuel/+bug/1487011 LP1487011]. | ||
| − | + | ====Configuration of Fuel Plugins with new roles==== | |
| − | + | Beginning with Fuel 7.0, after adding and enabling custom plugins a user can define a new role described in the plugins via Web UI as well as via Fuel CLI. In such case, in the '''Settings''' tab you can select a ''plugin'' role from a ''roles'' list in the '''Nodes''' tab and attach it to specific nodes. And vice versa, it should not be displayed in the roles list when the plugin is disabled for the cluster (environment). | |
| − | |||
| − | + | If you want to disable a plugin, but there are nodes with this plugin role in a cluster, then follow the existing mechanism: in the '''Nodes''' tab remove the plugin role from all the nodes and then disable the plugin in the '''Settings''' tab. | |
| − | + | '''NOTE:''' | |
| + | In previous versions of Fuel, when a cluster is deployed, you could not disable a plugin and, as a result, remove plugin role(s) from nodes. | ||
| + | Since Fuel 8.0, you can remove a custom role node and redeploy your environment. | ||
| + | To remove a custom role node correctly, add "reexecute_on" tasks: | ||
| + | <pre><nowiki> | ||
| + | - id: my-task | ||
| + | groups: [primary-controller, controller] | ||
| + | reexecute_on: [deploy_changes] | ||
| + | </nowiki></pre> | ||
| + | This configuration will run "my-task" task on all controllers every time you deploy changes. | ||
| + | You can handle scale-down case using this approach. | ||
| − | + | New node’s roles with a volume’s partition and tasks info can be described in config yaml files that will be integrated in Nailgun. The Fuel plugin builder should automatically create a new node role based on a plugin name in a yaml file. | |
| − | |||
| + | The basic skeleton describing a node’s role in the ‘node_roles’ yaml file: | ||
| − | + | <pre><nowiki> | |
| − | <pre><nowiki> | + | role_name: |
| − | + | name: "Some plugin role"tasks | |
| − | + | description: "Some description" | |
| + | conflicts: | ||
| + | - some_not_compatible_role | ||
| + | limits: | ||
| + | min: 1 | ||
| + | restrictions: | ||
| + | - condition: "some logic condition" | ||
| + | message: "Some message for restriction warning" | ||
| + | </nowiki></pre> | ||
| − | + | Description of the volumes’ partition in ‘volumes’ yaml file: | |
| − | |||
| − | + | <pre><nowiki> | |
| − | <pre><nowiki> | + | volumes: |
| − | + | - id: "role_volume_name" | |
| − | + | type: "vg" | |
| − | + | min_size: {generator: "calc_min_os_size"} | |
| − | + | label: "Role specific volume" | |
| − | + | items: | |
| − | + | - mount: "/" | |
| − | + | type: "lv" | |
| + | name: "root" | ||
| + | size: {generator: "calc_total_root_vg"} | ||
| + | file_system: "ext4" | ||
| + | - mount: "swap" | ||
| + | type: "lv" | ||
| + | name: "swap" | ||
| + | size: {generator: "calc_swap_size"} | ||
| + | file_system: "swap" | ||
| + | volumes_roles_mapping: | ||
| + | role_name: | ||
| + | - {allocate_size: "min", id: "os"} | ||
| + | - {allocate_size: "all", id: "role_volume_name"} | ||
| + | </nowiki></pre> | ||
| − | + | Previously, pre/post deployment tasks were kept only in tasks.yaml, which does not allow specification of tasks' dependencies. Now, we have a possibility to describe deployment tasks with tasks dependencies in the deployment_tasks.yaml file. The old tasks.yaml is still supported, however it is recommended to use the new deployment_tasks.yaml. | |
| − | + | Description of a new group in ‘deployment_tasks.yaml’: | |
| − | |||
| − | + | <pre><nowiki> | |
| + | - id: role-name | ||
| + | type: group | ||
| + | role: [role-name] | ||
| + | requires: [controller] | ||
| + | required_for: [deploy_end] | ||
| + | parameters: | ||
| + | strategy: | ||
| + | type: parallel | ||
| + | </nowiki></pre> | ||
| − | + | In metadata for a plugin’s role a developer can describe conflicts with other roles such as already present in ‘openstack.yaml’. Each plugin should describe the list of provided roles for proper name referencing. | |
| − | |||
| − | |||
| − | |||
| − | |||
| − | |||
| − | |||
| − | + | User can declare several new node roles in one plugin. It can be useful for tasks order and provide granular way for a plugin developer to build their own plugins on top of others. | |
| − | + | '''NOTE:''' | |
| + | Plugins with old format also will be supported. | ||
| − | + | '''NOTE:''' | |
| + | The role '*' is supported for deployment tasks. Also a list of tasks' names can be specified in a role's field. | ||
| − | + | === Deployment === | |
| − | |||
| − | + | After environment is created and configured, user starts a deployment. | |
| − | + | Meanwhile, Nailgun gets the list of enabled plugins from the database. For each plugin from the list, Nailgun parses tasks.yaml file: | |
| − | |||
<pre><nowiki> | <pre><nowiki> | ||
| − | + | - role: ['controller'] | |
| − | + | stage: post_deployment | |
| − | + | type: shell | |
| − | + | parameters: | |
| − | + | cmd: bash deploy.sh | |
| − | + | timeout: 42 | |
| − | + | - role: '*' | |
| − | + | stage: pre_deployment | |
| − | + | type: shell | |
| − | + | parameters: | |
| − | + | cmd: echo all > /tmp/plugin.all | |
| − | + | timeout: 42 | |
</nowiki></pre> | </nowiki></pre> | ||
| − | 8. | + | For example, we have a two-node environment deployed. A node has a Controller role with UID 7 and Compute role with UID 8. In this case, the task executor generates the following tasks: |
| − | |||
<pre><nowiki> | <pre><nowiki> | ||
| − | + | { | |
| − | + | "pre_deployment": [ | |
| − | + | { | |
| − | + | "uids": ["8", "7"], | |
| − | + | "parameters": { | |
| − | + | "path": "/etc/apt/sources.list.d/fuel_plugin_name-1.0.0.list", | |
| − | + | "data": "deb http://10.20.0.2:8080/plugins/ | |
| − | + | fuel_plugin_name-1.0.0/repositories/ubuntu /" | |
| − | + | }, | |
| − | + | "priority": 100, | |
| − | 10. | + | "fail_on_error": true, |
| − | + | "type": "upload_file", | |
| − | + | "diagnostic_name": "fuel_plugin_name-1.0.0" | |
| − | + | }, | |
| − | + | { | |
| − | + | "uids": ["8", "7"], | |
| − | + | "parameters": { | |
| − | + | "src": "rsync://10.20.0.2:/plugins/fuel_plugin_name-1.0.0/deployment_scripts/", | |
| − | + | "dst": "/etc/fuel/plugins/fuel_plugin_name-1.0.0/" | |
| − | [ | + | }, |
| − | [ | + | "priority": 200, |
| − | cwd: /etc/fuel/plugins/fuel_plugin_name-1.0.0/ | + | "fail_on_error": true, |
| − | + | "type": "sync", | |
| − | + | "diagnostic_name": "fuel_plugin_name-1.0.0" | |
| − | + | }, | |
| − | + | { | |
| − | + | "uids": ["8", "7"], | |
| − | + | "parameters": { | |
| − | < | + | "cmd": "echo all > /tmp/plugin.all", |
| − | + | "cwd": "/etc/fuel/plugins/fuel_plugin_name-1.0.0/", | |
| − | + | "timeout": 42 | |
| − | </nowiki></pre> | + | }, |
| + | "priority": 300, | ||
| + | "fail_on_error": true, | ||
| + | "type": "shell", | ||
| + | "diagnostic_name": "fuel_plugin_name-1.0.0" | ||
| + | } | ||
| + | ], | ||
| + | "post_deployment": [ | ||
| + | { | ||
| + | "uids": ["7"], | ||
| + | "parameters": { | ||
| + | "cmd": "bash deploy.sh", | ||
| + | "cwd": "/etc/fuel/plugins/fuel_plugin_name-1.0.0/", | ||
| + | "timeout": 42 | ||
| + | }, | ||
| + | "priority": 100, | ||
| + | "fail_on_error": true, | ||
| + | "type": "shell", | ||
| + | "diagnostic_name": "fuel_plugin_name-1.0.0" | ||
| + | } | ||
| + | ], | ||
| + | "deployment_info": "<Here is regular deployment info>" | ||
| + | } | ||
| + | </nowiki></pre> | ||
| − | + | {| class="wikitable" | |
| − | <pre><nowiki> | + | |- |
| − | + | ! Task !! Comment | |
| − | + | |- | |
| − | + | | pre_deployment || 1st subtask: Generated automatically by Nailgun. Adds a new repository for the node. Repository's path is built according to the following template: <pre><nowiki>http://{{master_ip}}:8080/plugins/{{plugin_name}}-{{plugin_version}}/{{repository_path}}</nowiki></pre> Where: | |
| − | + | * master_ip is an IP address of the Fuel Master node | |
| − | + | * plugin_name is a plugin name | |
| − | </nowiki></pre> | + | * plugin_version is the plugin version |
| + | * repository_path is a path for a specific release in metadata.yaml file. | ||
| − | + | 2nd subtask: Generated automatically by Nailgun.Using rsync, copies plugin deployment scripts on the target nodes. Path to these files is pretty similar to the repository path. The only difference is that the deployment scripts path is taken from deployment_scripts_path that is placed into metadata.yaml file. 3rd subtask: Initiated by user and taken from tasks.yaml file, converted to task executor format. | |
| − | + | |- | |
| − | + | | post_deployment ||Has only one task which is taken from tasks.yaml file; uids field contains a list of nodes on which user should run a particular task. In this example, tasks.yaml file has "role: ['controller']" and this role is assigned to controller | |
| + | |- | ||
| + | | deployment_info || Contains configuration information, required for deployment and not related to plugins. | ||
| + | |} | ||
| − | + | == Bugs == | |
| − | + | All bugs for specific plugins are reported in their projects. <br> | |
| − | + | The list of already existing LP projects can be found [[Fuel/Plugins/Launchpad_projects_list|here]].<br> | |
| − | + | Please note that if your bug is related to Fuel Plugin Framework, you should report it in [https://bugs.launchpad.net/fuel Fuel] project. | |
| − | |||
| − | |||
| − | + | === Importance criteria === | |
| − | |||
| − | |||
| − | + | ==== Development bugs ==== | |
| − | |||
| − | |||
| − | |||
| − | ''' | + | * Critical = can't deploy anything and there's no trivial workaround; data loss; or security vulnerability |
| − | + | * High = specific hardware, configurations, or components are unusable and there's no workaround; or everything is broken but there's a workaround | |
| − | + | * Medium = specific hardware, configurations, or components are working incorrectly; or is completely unusable but there's a workaround | |
| + | * Low = minor feature is broken and can be fixed with a trivial workaround; or a cosmetic defect | ||
| + | * Wishlist = Not really a bug, but a suggested improvement | ||
| − | + | ==== Documentation bugs ==== | |
| + | * Critical = following the instructions from documentation can cause outage or data loss | ||
| + | * High = documentation includes information that is not true, or instructions that do not yield the advertised outcome | ||
| + | * Medium = important information is missing from documentation (e.g. new feature description) | ||
| + | * Low = additional information would improve reader's understanding of a feature | ||
| + | * Wishlist = cosmetic formatting and grammar issues | ||
| − | + | === Status === | |
| − | |||
| − | |||
| − | + | All bugs, both development and documentation can have the following statuses: | |
| − | + | * '''New'''. When you find a bug, you should file it into your plugin-specific project in Launchpad (if related to Fuel Plugin Framework, please use [https://bugs.launchpad.net/fuel Fuel] instead). | |
| − | + | New is the default state assigned to the bug automatically when it was reported. | |
| − | + | Make sure there is no bug already filed for the same issue (use advanced search | |
| + | filters at LaunchPad), then enter the details of your report. | ||
| − | + | * '''Incomplete'''. The bug report is incomplete and needs more information before it can be triaged. | |
| + | If you lack information to properly reproduce or assess the importance of the | ||
| + | bug, you should ask the original reporter for more information. | ||
| − | + | * '''Confirmed'''. Someone besides the original reporter believes that this report describes a genuine | |
| − | + | bug in enough detail that a developer could start to work on a fix. | |
| − | + | The person must make sure that milestone, importance and assignee are | |
| + | present and set properly. Still the bug could not be reproducible or confirmed as genuine. | ||
| − | + | * '''Triaged (optional).''' The bug supervisor believes the bug report contains all information a developer | |
| − | + | needs to start work on a fix. It is clear how to fix the bug and solution can be posted | |
| − | + | in the comments. Sometimes the implementation of the fix will be straightforward and | |
| − | + | you would jump directly to bugfixing, but in some other cases, you would just post your | |
| − | + | complete debugging analysis and give someone else the opportunity of fixing the bug. | |
| − | |||
| − | |||
| − | |||
| − | |||
| − | |||
| − | + | * '''In progress'''. At this stage, a developer starts working on the fix. During that time, in order to avoid | |
| − | + | duplicating the work, this status should be set immediately when developer starts the work on the issue. Note, that when the commit is created (with sending the first patch | |
| − | + | set out to review) and Closes-Bug tag is put into the commit message, this status is | |
| − | + | assigned to the bug automatically. If the developer was not specified manually, then | |
| − | + | his/her name will appear in the bug report after sending out the first patch set for | |
| − | + | review. | |
| − | |||
| − | |||
| − | |||
| − | |||
| − | |||
| − | |||
| − | |||
| − | |||
| − | + | * '''Fix committed'''. Once the change is reviewed, accepted, approved by Core Reviewer (with the | |
| − | + | subsequent merge to the master branch), it will automatically move to Fix committed | |
| − | + | status. | |
| − | |||
| − | |||
| − | |||
| − | |||
| − | + | * '''Fix released'''. Someone besides the assignee has verified that the issue does not manifest after the fix is applied. | |
| − | + | The status is left for QA to mark bugs as verified after fix is merged to the master | |
| − | + | branch. | |
| − | |||
| − | |||
| − | |||
| − | |||
| − | |||
| − | |||
| − | |||
| − | |||
| − | |||
| − | |||
| − | |||
| − | |||
| − | |||
| − | |||
| − | + | === How to report a bug === | |
| − | |||
| − | [ | + | # Make sure you're registered at LaunchPad. If not, see the official [http://docs.openstack.org/infra/manual/developers.html OpenStack Developer's Guide]. |
| − | + | # Report a bug in Launchpad in the Fuel Plugins project: enter https://launchpad.net/fuel-plugins. | |
| − | + | # Click '''Report a bug''' link: <br/> [[File:Report-a-bug-lp.png]] | |
| − | + | # Fill in Summary field for a bug. It is going to be the headline. The headline must cointain plugin name (for example, EMC Plugin) in square brackets. Please be descriptive but short and to the point: | |
| − | + | #* Bad - "<plugin-name> doesn’t install" | |
| − | + | #* Good - "<plugin name> fails to install in HA mode when “Neutron with VLANs” network is selected" | |
| − | + | # Enter “Further information”. This is a bug description. Let's focus on every issue it has: | |
| − | + | # Description of the environment. Provide enough relevant information: | |
| − | + | #* Output of http://fuel-master-node:8000/api/version/ | |
| − | + | #* Operating System | |
| − | + | #* Reference Architecture (HA / non-HA) | |
| − | + | #* Network model (Nova-network, Neutron+VLAN, Neutron+GRE, etc.) | |
| − | + | #* Related Projects installed (Savanna, Murano, Ceilometer) | |
| − | + | # Steps to reproduce: | |
| + | #* Bad: Run the deployment in HA configuration | ||
| + | #* Good:Install the Fuel Master node. Copy the plugin to the Fuel Master node and install it. Create a new cluster. | ||
| + | # Expected result: | ||
| + | #* Good: The plugin is deployed, up and running. | ||
| + | # Actual result: | ||
| + | #* Bad: Plugin fails to install. | ||
| + | #* Good: Plugin installation fails with the error message “xxx”. Please see the attached screenshot which shows the errors on “Logs” tab. | ||
| + | # Workaround: | ||
| + | #* Bad: Don’t use “Neutron with VLANs” | ||
| + | #* Good: Apply patch/Change configuration from x to y. | ||
| + | # Impact: | ||
| + | #* Bad: Needs to be fixed. | ||
| + | #* Good: Deployment cannot be completed, because customer requires us to implement a use case for Savanna and “Neutron with VLANs”. Changing configuration to “Neutron with GRE” is not as acceptable option here so this has to be addressed as soon as possible. | ||
| + | # Select visibility for the bug under “This bug contains information that is” field. Either leave it as “Public” by default. | ||
| + | # Add attachments under “Extra Options” section | ||
| + | # Logs | ||
| + | # Diagnostic snapshot | ||
| + | # Screenshots | ||
| + | # Add <plugin-name> tag. | ||
| + | # After everything is entered, select the “Submit bug report” button. | ||
| − | ''' | + | <br/>'''Important note:''' |
| + | please, keep private bugs in internal bugtrackers. | ||
| + | Do not report any of those at LaunchPad. | ||
| − | + | === Common recommendations for bug triage workflow === | |
| − | + | When triaging bugs, please take into consideration the following: | |
| + | * Review all New bugs. Plugin development team is responsible for the review. To create a plugin’s team, follow [[Fuel/Plugins#How_to_create_plugin_development_team_in_Launchpad|How to create plugin development team in Launchpad]]. | ||
| + | * Target each '''New''' bug to the release milestone under development and set the corresponding bug status. | ||
| + | * Consider changing the bug title to be more specific: replace generic statements like "deployment timeout exceeded" with description of the root cause (if identified) or symptoms that are unique for that bug. Feel free to use tags in the bug title and the report with creating new tags manually when required. | ||
| + | * Assuming all bugs reported in Fuel Plugins project are public, request the missing information, and set the bug status to Incomplete. Add a comment using the following template: ''We didn't receive required details in order to correctly troubleshoot the problem, so we are setting this bug into Incomplete state. Please provide the requested information and we will investigate this issue further.'' If you think it was set to Incomplete by mistake, please comment in the bug. | ||
| + | * If there is sufficient information on how to reproduce the bug and milestone, importance and assignee are properly set, set the status to '''Confirmed'''. | ||
| + | * If there is sufficient information to start implementing a fix, set the status to '''Triaged.''' | ||
| + | * If the root cause of the bug is identified, include it in the bug description. | ||
| + | * Review all '''Incomplete''' bugs. | ||
| + | * If an I'''ncomplete''' bug has new updates, use the same steps as described above for '''New''' bugs. | ||
| + | * If an '''Incomplete''' bug did not have any updates for 4 weeks, close it as '''Invalid'''. Add a comment using the following template: ''This bug was incomplete for more than 4 weeks. We cannot investigate it further so we are setting the status to Invalid. If you think it is not correct, please feel free to provide more information and reopen the bug, and we will look into it further''. | ||
| + | * During new release scoping, review all bugs targeted at that release milestone, make sure it is updated daily by the assignee (or bug reporter if the bug is not assigned to a person). | ||
| + | * Every status change of a bug should be accompanied by a comment explaining the reason why the change was made. | ||
| − | |||
| − | === | + | ==== Bug report tags ==== |
| − | + | For tracking bugs better, please, use different tags: | |
| + | * every plugin should have its own tag that has <plugin name> format. | ||
| + | * every documentation issue should be marged as ''docs''. | ||
| − | === | + | === How to create plugin development team in Launchpad === |
| − | + | To make the bug tracking process for plugins as simple as possible, plugin developers should | |
| + | create their own teams in Launchpad. Here are the step-by-step instructions: | ||
| − | + | # Enter [https://launchpad.net Launchpad] site. | |
| − | + | # Click '''Register a team''' link: <br/> [[File:Registerteam.png]] | |
| − | + | # Fill in the fields. You should also provide the following links to the plugin repo, README.md file and Fuel Plugins Catalog: <br/> [[File:Fillin.png]] | |
| + | # Select Membership policy: <br/> [[File:Membership-pol.png]] | ||
| + | # Click '''Create Team''' button to finish. | ||
| + | |||
| + | For information on adding members and running your team, see the official [https://help.launchpad.net/Teams Launchpad] guidelines. | ||
| − | == | + | == Tutorials == |
| − | === | + | === How To: Build and install a plugin from source === |
| − | + | These instructions explain how to build a plugin package from the source repository. This is useful when you want to install a plugin's version that isn't available on the [https://software.mirantis.com/download-mirantis-openstack-fuel-plug-ins/ Fuel plugins catalog] yet. | |
| − | + | 1. [[Fuel/Plugins#Preparing_an_environment_for_plugin_development|Install]] the ''fuel-plugin-builder'' script. | |
| − | + | 2. Clone the plugin's repository. | |
| − | + | <pre><nowiki>git clone https://git.openstack.org/stackforge/fuel-plugin-neutron-fwaas</nowiki></pre> | |
| − | + | 3. Go to the plugin's directory and switch to the desired Git branch or tag (optional). | |
| − | + | 4. Build the plugin's package. | |
| − | < | + | <pre><nowiki>fpb --build ./fuel-plugin-neutron-fwaas</nowiki></pre> |
| − | |||
| − | |||
| − | |||
| − | < | ||
| − | + | 5. The resulting RPM package should be available in the current directory. Follow the rest of the installation procedure as described in the README.md file of the plugin. | |
| − | |||
| − | === | + | === How To: Debug UI === |
| − | + | UI elements are described in environment_config.yaml file. | |
| − | + | To check how your built plugin looks on the Fuel web UI, install and create an environment: | |
| − | + | ||
| − | + | ||
| − | + | 1. Enter plugin directory | |
| − | < | + | <pre><nowiki>cd fuel_plugin_name</nowiki></pre> |
| − | + | ||
| − | + | 2. Edit environment_config.yaml file | |
| + | |||
| + | 3. Build a plugin | ||
| + | <pre><nowiki>fpb --build <plugin_name></nowiki></pre> | ||
| + | |||
| + | 4. Install plugin, use "--force" parameter to replace the plugin if you have it installed: | ||
| + | <pre><nowiki>fuel plugins --install fuel_plugin_name-1.0.0.fp --force</nowiki></pre> | ||
| + | |||
| + | 5. Create new environment | ||
| + | <pre><nowiki>fuel env --create --release 1 --name test</nowiki></pre> | ||
| + | |||
| + | 6. Check that UI correctly shows elements from environment_config.yaml file | ||
| + | |||
| + | === How To: Debug deployment === | ||
| − | + | To show how it works, let's create a simple plugin with an error in the deployment script. | |
| − | The high- | + | 1. Create a plugin: |
| − | [[ | + | <pre><nowiki>fpb --create fuel_plugin_name</nowiki></pre> |
| − | + | ||
| − | + | 2. Add an error in the default deployment script (fuel_plugin_name/deployment_scripts/deploy.sh): | |
| − | [[ | + | |
| − | + | <pre><nowiki> | |
| − | + | #!/bin/bash | |
| − | + | # It's a script which deploys your plugin | |
| − | ==== Documentation files structure ==== | + | echo fuel_plugin_name > /tmp/fuel_plugin_name |
| − | + | # Non-zero exit code means, that a script executed with error | |
| − | + | exit 1 | |
| − | + | </nowiki></pre> | |
| − | [[File: | + | |
| − | + | 3. If you do not want to run plugin build, but you want to check that plugin format is correct, you can use --check parameter with the following command: | |
| − | === Style recommendations === | + | |
| − | + | <pre><nowiki>fpb --check fuel_plugin_name</nowiki></pre> | |
| − | # Spell out acronyms and abbreviations when they are first used and avoid using abbreviations that are ambiguous. For example, "OS" could mean either "Operating System" or "OpenStack". | + | |
| − | # Do not add many links to external resources in main sections. It is recommended that you put them into Appendix section. | + | 4. Build and install the plugin: |
| − | # Each link should have a brief description.Be sure to define any complex concepts and terms that are required to install/use/test the plugin. | + | |
| − | # Use step-by-step instructions, structured with an introductory sentence followed by a numbered list of steps to take. | + | <pre><nowiki>fpb --build fuel_plugin_name/ |
| − | <br/> | + | fuel plugins --install fuel_plugin_name/fuel_plugin_name-1.0.0.fp</nowiki></pre> |
| − | + | ||
| − | + | 5. Use the Fuel web UI or CLI to create an environment: | |
| − | === | + | <pre><nowiki>fuel env create --name test --rel 1 --mode multinode --network-mode nova</nowiki></pre> |
| − | + | ||
| − | ==== Plugin | + | 6. Enable the plugin on Fuel web UI Settings tab and then add several nodes. The first node has Controller role, the second node has Cinder and Computes roles. |
| + | <pre><nowiki> | ||
| + | fuel node set --node 1 --env 1 --role controller | ||
| + | fuel node set --node 2 --env 1 --role compute,cinder | ||
| + | </nowiki></pre> | ||
| + | |||
| + | 7. Check that Nailgun generates correct configuration data that a user can set on Fuel web UI: | ||
| + | <pre><nowiki> | ||
| + | fuel deployment --default --env 1 | ||
| + | cat deployment_1/controller_1.yaml | ||
| + | ... | ||
| + | fuel_plugin_name: | ||
| + | fuel_plugin_name_text: Set default value | ||
| + | ... | ||
| + | </nowiki></pre> | ||
| + | |||
| + | 8. Now can see that the file for target node contains plugin data. | ||
| + | |||
| + | '''NOTE:''' | ||
| + | <pre><nowiki> | ||
| + | The command mentioned above is useful when you do not know how your configuration data from Fuel web UI Settings tab will look like in /etc/astute.yaml file on target nodes. | ||
| + | </nowiki></pre> | ||
| + | |||
| + | 9. Perform provisioning without deployment for two nodes: | ||
| + | <pre><nowiki>fuel --env 1 node --provision --node 1,2</nowiki></pre> | ||
| + | '''NOTE:''' | ||
| + | <pre><nowiki> | ||
| + | To reduce the time required for testing, make a snapshot after nodes are provisioned. Note that if you use virtual machines, make snapshots of your target nodes. | ||
| + | </nowiki></pre> | ||
| + | |||
| + | 10. Now you can run deployment: | ||
| + | <pre><nowiki>fuel --env 1 node --deploy --node 1,2</nowiki></pre> | ||
| + | |||
| + | 11. The deployment fails with the following message: | ||
| + | <pre><nowiki>Deployment has failed. Method deploy. Failed to deploy plugin fuel_plugin_name-1.0.0 </nowiki></pre> | ||
| + | |||
| + | 12. You can see an error in /var/log/docker-logs/astute/astute.log task executor logs: | ||
| + | |||
| + | <pre><nowiki> | ||
| + | [394] Shell command failed. Check debug output for details | ||
| + | [394] 13edd324-6a11-4342-bc04-66c659e75e35: cmd: bash deploy.sh | ||
| + | cwd: /etc/fuel/plugins/fuel_plugin_name-1.0.0/ | ||
| + | stdout: | ||
| + | stderr: | ||
| + | exit code: 1 | ||
| + | </nowiki></pre> | ||
| + | |||
| + | 13. It fails due to the changes in deploy.sh script that you made in step 2. Let's assume that we do not know what happened and try to debug the problem: | ||
| + | <pre><nowiki> | ||
| + | # Go to the first node | ||
| + | ssh node-1 | ||
| + | </nowiki></pre> | ||
| + | |||
| + | 14. All plugin deployment scripts are copied to the separate directory on the target node; in this case, it is /etc/fuel/plugins/fuel_plugin_name-1.0.0/: | ||
| + | <pre><nowiki> | ||
| + | cd /etc/fuel/plugins/fuel_plugin_name-1.0.0/ | ||
| + | # The directory contains our deploy.sh script, lets run it | ||
| + | bash deploy.sh | ||
| + | # And check exit code | ||
| + | echo $? # Returns 1 | ||
| + | </nowiki></pre> | ||
| + | |||
| + | '''NOTE:''' | ||
| + | <pre><nowiki> | ||
| + | If you use puppet for your plugin deployment, run the following command on the target node to check if your puppet manifests work correctly: | ||
| + | |||
| + | puppet apply --debug --modulepath=/etc/fuel/plugins/fuel_plugin_name-1.0.0/puppet/modules:/etc/puppet/modules /etc/fuel/plugins/fuel_plugin_name-1.0.0/puppet/manifests/site.pp</nowiki></pre> | ||
| + | |||
| + | 15. Now we can see that deployment fails due to non-zero exit code error. To fix the problem and check that the proposed solution works, edit the /var/www/nailgun/plugins/fuel_plugin_name-1.0.0/deployment_scripts/deploy.sh script on the Fuel Master node. Note that there is no need to rebuild and reinstall a plugin: | ||
| + | <pre><nowiki> | ||
| + | #!/bin/bash | ||
| + | |||
| + | # It's a script which deploys your plugin | ||
| + | echo fuel_plugin_name > /tmp/fuel_plugin_name | ||
| + | |||
| + | # Now our deployment script returns 0 instead of 1 | ||
| + | exit 0 | ||
| + | </nowiki></pre> | ||
| + | |||
| + | 16. If you run the deployment again, it goes successfully: | ||
| + | <pre><nowiki> | ||
| + | fuel --env 1 node --deploy --node 1,2 | ||
| + | </nowiki></pre> | ||
| + | |||
| + | '''WARNING:''' | ||
| + | <pre><nowiki> | ||
| + | During the testing of your deployment scripts, make sure that your scripts are idempotent: they should work correctly when applied several times. Run environment deployment at least twice and check that your plugin works properly. The reason for this workflow is the following: Fuel can run deployment of your plugin several times in case the first deployment try failed. Also, your deployment scripts can be executed during OpenStack patching.</nowiki></pre> | ||
| + | |||
| + | 17. To make sure that plugin works without errors, revert snapshots which you made in step 6, and run deployment again: | ||
| + | |||
| + | <pre><nowiki> | ||
| + | fuel --env 1 node --deploy --node 1,2 | ||
| + | </nowiki></pre> | ||
| + | |||
| + | 18. In the same way with no plugin reinstallation, you can edit /var/www/nailgun/plugins/<fuel_plugin_name>-1.0.0/tasks.yaml file. Note that in this case to make sure that your tasks have a valid format, you should at least run the following command: | ||
| + | <pre><nowiki> | ||
| + | fpb --check /var/www/nailgun/plugins/fuel_plugin_name-1.0.0/ | ||
| + | </nowiki></pre> | ||
| + | |||
| + | == Plugin elements in the Fuel web UI == | ||
| + | |||
| + | Here is an example of the environment_config.yaml file that contains all possible Fuel web UI elements: | ||
| + | <pre><nowiki> | ||
| + | attributes: | ||
| + | |||
| + | # Text field | ||
| + | fuel_plugin_name_text: | ||
| + | type: "text" | ||
| + | weight: 10 | ||
| + | value: "Default text" | ||
| + | label: "Text field label" | ||
| + | description: "Field description" | ||
| + | regex: | ||
| + | source: '\S' | ||
| + | error: "Error field cannot be empty" | ||
| + | |||
| + | # Select | ||
| + | fuel_plugin_name_select: | ||
| + | type: "select" | ||
| + | weight: 20 | ||
| + | value: "value2" | ||
| + | label: "Select label" | ||
| + | description: "Select description" | ||
| + | values: | ||
| + | - data: "value1" | ||
| + | label: "Value 1 label" | ||
| + | - data: "value2" | ||
| + | label: "Value 2 label" | ||
| + | - data: "value3" | ||
| + | label: "Value 3 label" | ||
| + | |||
| + | # Checkbox | ||
| + | fuel_plugin_name_checkbox: | ||
| + | type: "checkbox" | ||
| + | weight: 30 | ||
| + | value: false | ||
| + | label: "Checkbox label" | ||
| + | description: "Checkbox description" | ||
| + | |||
| + | # Radio button | ||
| + | fuel_plugin_name_radio: | ||
| + | type: "radio" | ||
| + | weight: 40 | ||
| + | value: "disabled" | ||
| + | label: "Radio buttons label" | ||
| + | values: | ||
| + | - data: "data1" | ||
| + | label: "Label data1" | ||
| + | description: "Description data1" | ||
| + | - data: "data2" | ||
| + | label: "Label data2" | ||
| + | description: "Description data2" | ||
| + | - data: "data3" | ||
| + | label: "Label data3" | ||
| + | description: "Description data3" | ||
| + | </nowiki></pre> | ||
| + | |||
| + | After plugin is installed, additional elements will appear on the Settings tab of the Fuel web UI. | ||
| + | Here are UI elemens for Elasticsearch-Kibana plugin: | ||
| + | |||
| + | [[File: Ui-elements.png]] | ||
| + | |||
| + | == Puppet in Fuel == | ||
| + | |||
| + | Fuel does not use [https://docs.puppetlabs.com/learning/agent_master_basic.html#what-do-agents-do-and-what-do-masters-do master Puppet]. Task executor copies manifest from the Fuel Master node and runs puppet apply command on each target node. | ||
| + | It is recommended that you use puppet tasks in your plugin instead of running puppet in shell tasks. | ||
| + | Task executor has [https://github.com/stackforge/fuel-astute/blob/122cdaab/mcagents/puppetd.rb code with special logic] which handles errors, if puppet apply command returns zero/non-zero exit code. Note that it does not mean that command is succeed or failed. That means, it returns '2' if there were changes during the execution: task executor parses /var/lib/puppet/state/last_run_summary.yaml file to determine the status of puppet run. | ||
| + | |||
| + | |||
| + | == How to separate services from Controller with a plugin == | ||
| + | |||
| + | Starting with Fuel 7.0, you can create and implement a plugin that allows any role or task to be broken up into sections and deployed on a custom role. This includes the high availability feature enabling as well. | ||
| + | |||
| + | Fuel includes a granular deployment framework that relies on a task based-deployment schema defining how each node role is deployed. To modify the granular deployment framework, you can create a plugin that inserts, overrides, or skips any given task. In addition, you can add any custom role that fulfils a task normally tied to the Controller role. Generally speaking, all Controller services are deployed on the Controller nodes directly. | ||
| + | |||
| + | : '''Note:''' In the granular deployment, all dependencies are preserved when skipping a task. A custom role must deploy either before or after the Controller role. For example, you cannot deploy tasks A, B, C, and D on the Controller, pause it, deploy the custom ''MyRole'' role, then finish tasks E through Z on the Controller role. For this reason, it is best to deploy your plugin in a self-sufficient way that does not rely on controller services. | ||
| + | |||
| + | If you want to change the deployment configuration, override the default setting using the '''Hiera''' tool. | ||
| + | |||
| + | === Hiera overview === | ||
| + | |||
| + | In spite of Puppet is static in configuration, it can customize deployment based on the metadata fed in from an external data source. In this case, Fuel uses Hiera to define node configuration. | ||
| + | |||
| + | [http://docs.puppetlabs.com/hiera/ Hiera] is a key/value lookup tool for configuration data, but you can configure it to define the priority of the data sources. | ||
| + | |||
| + | Configuration items are stored in 3 different data structures: | ||
| + | |||
| + | * simple key/value, | ||
| + | * arrays, | ||
| + | * hashes. | ||
| + | |||
| + | '''Examples:''' | ||
| + | |||
| + | Key/value | ||
| + | role: “controller” | ||
| + | primary_controller: true<br /> | ||
| + | Array: | ||
| + | amqp_hosts: [“192.168.0.3:5673”,”192.168.0.4:5673”,”192.168.0.5:5673”]<br /> | ||
| + | Hash: | ||
| + | mysql: | ||
| + | root_password: “OvEuZFyt” | ||
| + | wsrep_password: “Secr3t” | ||
| + | |||
| + | Hiera also offers a hierarchy of configuration data. It has several layers of precedence in its hierarchy by default. The default ''/etc/hiera.yaml'' looks as follows: | ||
| + | |||
| + | --- | ||
| + | :backends: | ||
| + | - yaml<br /> | ||
| + | :hierarchy: | ||
| + | - override/node/%{::fqdn} | ||
| + | - override/class/%{calling_class} | ||
| + | - override/module/%{calling_module} | ||
| + | - override/plugins | ||
| + | - override/common | ||
| + | - class/%{calling_class} | ||
| + | - module/%{calling_module} | ||
| + | - nodes | ||
| + | - globals | ||
| + | - astute<br /> | ||
| + | :yaml: | ||
| + | :datadir: /etc/hiera | ||
| + | :merge_behavior: deeper | ||
| + | :logger: noop | ||
| + | |||
| + | Any values defined in ''/etc/hiera/globals.yaml'' takes precedence over values defined in ''/etc/hiera/astute.yaml''. The same is true for any value defined higher up. If a plugin defines a new YAML file and inserts itself in the hierarchy, it can override a given value as well. | ||
| + | |||
| + | Queries to hiera come in three forms: | ||
| + | |||
| + | * priority, | ||
| + | * array merge, | ||
| + | * hash merge. | ||
| + | |||
| + | The defined values can either override or be merged with other values. As an example, you can either merge the array of ''memcache_roles'' from ''astute.yaml'' and a custom plugin YAML or take the highest priority. The difference is in how puppet calls it: | ||
| + | Merged lookup: | ||
| + | hiera_array(‘memcache_roles’) | ||
| + | Priority lookup: | ||
| + | hiera(‘memcache_roles’) | ||
| + | |||
| + | In most cases, array lookups should be done with a priority lookup. In contrast, hash lookups in Hiera should always be done using the <code>hiera_hash</code> function. | ||
| + | |||
| + | '''Example:''' | ||
| + | |||
| + | astute.yaml contains: | ||
| + | mysql: | ||
| + | root_password: “OvEuZFyt” | ||
| + | wsrep_password: “Secr3t” | ||
| + | plugins.yaml contains: | ||
| + | mysql: | ||
| + | enabled: false | ||
| + | |||
| + | The results are vastly different if you do a priority lookup versus a hash lookup: | ||
| + | |||
| + | Priority lookup: | ||
| + | $ hiera mysql | ||
| + | {“enabled”=>false} | ||
| + | Hash lookup: | ||
| + | $ hiera -h mysql | ||
| + | {“enabled”=>false,“root_password”=>“OvEuZFyt”,”wsrep_password”=>“Secr3t”} | ||
| + | |||
| + | Hash merging in Hiera allows a plugin developer to tweak an individual setting in the configuration without duplicating all of the other values in a hash. | ||
| + | |||
| + | ==== How a plugin can use Hiera ==== | ||
| + | |||
| + | A plugin can modify any Hiera configuration data for a deployment to inform existing tasks how to deploy. For example, if you want to run ''memcached'' on a separate ''my-role'' role , you can override the ''memcache_roles'' array to say ''my-role'' instead of ''primary-controller, controller''. | ||
| + | |||
| + | === Deploying services into separate nodes === | ||
| + | |||
| + | Rabbit and MySQL can be easily turned off on the Controller role by overriding the metadata in Hiera, as described above. This can be accomplished by disabling a service inside its respective service hash, indicated by a value ''enabled: false''. However, some services such as Keystone is not so simple and require more configuration. For the specific details proceed with the sections below. | ||
| + | |||
| + | ==== Defining a custom role in a plugin ==== | ||
| + | |||
| + | If you want to deploy separate services on a different node from the Controller, you need to define a custom role first. | ||
| + | |||
| + | To define custom node roles in a plugin, fill out the ''node_roles.yaml'' file in your plugin’s base directory. A custom role that replaces an existing task must contain some particular fields to achieve this objective. | ||
| + | |||
| + | In addition to the default attributes, you need to include the following attributes in the plugin: | ||
| + | |||
| + | ; <code>update_required</code> | ||
| + | : Corosync hosts, memcached hosts, and AMQP hosts are enumerated explicitly in configuration. All existing nodes for the specified roles will be refreshed before adding/removing a given node. This list should include all consumers of the service you are deploying. | ||
| + | |||
| + | ; <code>public_ip_required</code> | ||
| + | : Internal-only services (like RabbitMQ) should not have a public IP. | ||
| + | |||
| + | ; <code>has_primary</code> | ||
| + | : Required for any deployment that includes corosync. | ||
| + | |||
| + | ; <code>conflicts</code> | ||
| + | : Roles containing sensitive data should not be combined with Compute. In our example, we also conflict with the Controller role because it could break if there is not a 1:1 mapping of controller and ''custom_role'' roles to all other nodes. | ||
| + | |||
| + | '''See Also:''' | ||
| + | |||
| + | * [https://wiki.openstack.org/wiki/Fuel/Plugins#Configuration_of_Fuel_Plugins_with_new_roles custom node roles details] | ||
| + | * [https://github.com/stackforge/fuel-plugin-detach-database/blob/master/node_roles.yaml node_roles.yaml example] | ||
| + | |||
| + | ==== Configuring Hiera ==== | ||
| + | |||
| + | ===== Database separation ===== | ||
| + | |||
| + | Database separation is intended to be as flexible as possible for various deployment configurations including remote database creation, user creation, and different database servers for different services. | ||
| + | |||
| + | The list of the parameters configurable for MySQL and its metadata is as follows: | ||
| + | * MySQL root password (default is auto-generated) | ||
| + | * db_host or Database VIP | ||
| + | * db_create (defaults to true) | ||
| + | * db_user (defaults to service name) | ||
| + | * db_password (defaults to auto-generated value) | ||
| + | |||
| + | Additionally, for the MySQL hash on the Controller roles, you need to set mysql to ''enabled: false''. | ||
| + | |||
| + | ===== Adding in HA ===== | ||
| + | |||
| + | High availability is key to any production deployment. Each service has HA configured through corosync or haproxy. | ||
| + | |||
| + | The following services are managed by corosync: | ||
| + | |||
| + | * Virtual IP addresses | ||
| + | * haproxy | ||
| + | * MySQL/Galera | ||
| + | * RabbitMQ | ||
| + | * Heat | ||
| + | * Neutron agents | ||
| + | |||
| + | This means that you need to include one or more of the following tasks in your custom role: | ||
| + | |||
| + | * cluster | ||
| + | * cluster-haproxy | ||
| + | * virtual_ips | ||
| + | * openstack-haproxy-SERVICENAME | ||
| + | |||
| + | : '''Note:''' Since RabbitMQ only requires corosync and not haproxy or a virtual IP, it only requires the cluster task for high availability. On the other hand, MySQL and Keystone would require all four of these. | ||
| + | |||
| + | The metadata requirements for corosync and haproxy are prepared to accept custom values through Hiera. For corosync itself, you need one key value that is ''corosync_roles''. This is necessary because UDP configuration of Corosync requires all nodes to explicitly allow communication with each other. The value should equal the role name for your plugin as follows: | ||
| + | |||
| + | corosync_roles: | ||
| + | - primary-standalone-keystone | ||
| + | - standalone-keystone | ||
| + | |||
| + | : '''Note:''' This should only apply when evaluating your custom role. Refer to the [https://github.com/stackforge/fuel-plugin-detach-keystone/blob/master/deployment_scripts/hiera-override.pp#L54-L65 detach-keystone plugin] as an example. | ||
| + | |||
| + | If the service you want to detach requires HAProxy, include the following arrays to your plugin: | ||
| + | * servicename_nodes | ||
| + | * servicename_ipaddresses | ||
| + | * servicename_nodes_names | ||
| + | |||
| + | See [https://github.com/stackforge/fuel-plugin-detach-keystone/blob/master/deployment_scripts/hiera-override.pp#L45-L52 detach-keystone plugin] as an example. | ||
| + | |||
| + | If the service being separated requires memcached, specify ''memcache_roles'' in your override hiera YAML. This is necessary if your role is evaluated before the Controller role. However, in case your role is deployed after the Controller role, you can use memcached from the Controller role leaving this value unchanged. | ||
| + | |||
| + | ===== RabbitMQ separation ===== | ||
| + | |||
| + | Configure Hiera as follows: | ||
| + | |||
| + | # Set the ''amqp_hosts'' array on all nodes. Since the original list of hosts is generated in the globals task of the granular deployment, you need to override this value without merging. As there is no virtual IP to manage, it is the only value to control. | ||
| + | # Set ''rabbit_hash'' to ''enabled: false'' for the Controller roles. | ||
| + | |||
| + | ===== Keystone separation ===== | ||
| + | |||
| + | To meet a specific use case, decoupling the Keystone service from the Controller role, proceed with the following steps: | ||
| + | |||
| + | : 1. On the Controller node, view the task list for a created environment: | ||
| + | |||
| + | fuel graph --env 1 --download | ||
| + | |||
| + | The tasks we are concerned with for keystone are: | ||
| + | |||
| + | ; ''keystone'' | ||
| + | : creates the keystone service | ||
| + | |||
| + | ; ''keystone-db'' | ||
| + | : prepares the DB for keystone | ||
| + | |||
| + | ; ''openstack-haproxy-keystone'' | ||
| + | : enables haproxy for keystone | ||
| + | |||
| + | ; ''disable_keystone_service_token'' | ||
| + | : cleanup task for ''admin_token'' | ||
| + | |||
| + | : 2. Shift the tasks listed above to a custom keystone role (it is the “standalone-keystone” role in our example): | ||
| + | |||
| + | * Disable original keystone tasks creating a YAML file called ''deployment_tasks.yaml'' and defining new tasks with the type <code>skipped</code> preventing these tasks from running on the Controller role: | ||
| + | |||
| + | id: original_task_name | ||
| + | type: skipped | ||
| + | |||
| + | * Create a new task that reproduces the original one, but replace the requirements and role for the original task:<br /> | ||
| + | |||
| + | '''Original task''' | ||
| + | |||
| + | - id: keystone-db | ||
| + | type: puppet | ||
| + | groups: [primary-controller] | ||
| + | required_for: [keystone] | ||
| + | requires: [database] | ||
| + | parameters: | ||
| + | puppet_manifest: /etc/puppet/modules/osnailyfacter/modular/keystone/db.pp | ||
| + | puppet_modules: /etc/puppet/modules | ||
| + | timeout: 1800 | ||
| + | |||
| + | '''New tasks''' | ||
| + | |||
| + | - id: keystone-db | ||
| + | type: skipped<br /> | ||
| + | - id: task-keystone-db | ||
| + | type: puppet | ||
| + | role: [primary-standalone-keystone, standalone-keystone] | ||
| + | required_for: [task-keystone] | ||
| + | requires: [deploy_start, keystone-hiera-override, netconfig] | ||
| + | parameters: | ||
| + | puppet_manifest: /etc/puppet/modules/osnailyfacter/modular/keystone/db.pp | ||
| + | puppet_modules: /etc/puppet/modules | ||
| + | timeout: 1800 | ||
| + | |||
| + | : 3. Ensure all new tasks depend on each other. | ||
| + | |||
| + | For each new task you create, ensure its dependencies line up with the tasks you marked as skipped. In the example above, ''task-keystone-db'' is a dependent task for ''task-keystone'', which is another custom task that performs the same function. | ||
| + | |||
| + | '''See also:''' | ||
| + | |||
| + | * [https://github.com/stackforge/fuel-plugin-detach-keystone/blob/master/deployment_tasks.yaml#L60 deployment_tasks.yaml sample] | ||
| + | |||
| + | ==== Verifying changes ==== | ||
| + | |||
| + | # Create an environment to test your task graph with 1 Controller node and 1 node with your custom role. | ||
| + | # Run <code>fuel plugins --sync</code> | ||
| + | # Run <code>fuel graph --env 1 --download</code> | ||
| + | |||
| + | If successful, these should run without errors. | ||
| + | If there is a syntax mistake, it returns a 500 error. For the proper YAML syntax, see the [https://github.com/stackforge/fuel-plugins example plugins]. | ||
| + | |||
| + | === Procedures and limitations === | ||
| + | |||
| + | ==== Procedure for RabbitMQ ==== | ||
| + | |||
| + | # Create a new custom role. | ||
| + | # Enable corosync (for HA). | ||
| + | # Override the ''amqp_hosts'' array on all hosts that consume AMQP. | ||
| + | # Disable rabbitmq on the Controller role. | ||
| + | |||
| + | ==== Procedure for Galera ==== | ||
| + | |||
| + | # Create a new custom role. | ||
| + | # Enable corosync (for HA). | ||
| + | # Override mysql hash: enable it for the custom role, disable it for the Controller role. | ||
| + | # Provide ''database_vip'' and ''haproxy'' for your role. | ||
| + | |||
| + | ==== Procedure for Keystone ==== | ||
| + | |||
| + | # Disable Keystone base task, haproxy task, and DB task on the Controller node. | ||
| + | # Create a new custom role. | ||
| + | # Add ''service_endpoint'' and ''public_service_endpoint'' VIPs in the custom role. | ||
| + | # Enable corosync (for the VIP, but keystone itself is stateless). | ||
| + | # Enable memcached. | ||
| + | # Enable dependency on database plugin. | ||
| + | # For SSL deployments, enable haproxy for Keystone on public VIP | ||
| + | |||
| + | ==== Limitations for Keystone separation ==== | ||
| + | |||
| + | * Keystone cannot run without MySQL and memcached. | ||
| + | * The Controller role provides these roles, but you cannot do a partial Controller deployment, stop, deploy keystone, and continue. | ||
| + | * Keystone public SSL is limited to one hostname. | ||
| + | |||
| + | === Useful links === | ||
| + | |||
| + | * Examples of plugins: | ||
| + | ** [https://github.com/stackforge/fuel-plugin-detach-database detach-database plugin] | ||
| + | ** [https://github.com/stackforge/fuel-plugin-detach-rabbitmq detach-rabbitmq plugin] | ||
| + | ** [https://github.com/stackforge/fuel-plugin-detach-keystone detach-keystone plugin] | ||
| + | |||
| + | * [http://docs.puppetlabs.com/hiera/1/ Hiera] | ||
| + | |||
| + | * [https://wiki.openstack.org/wiki/Fuel/Plugins#Virtual_IP_reservation_via_Fuel_Plugin.27s_metadata VIP reservation in plugin] | ||
| + | |||
| + | * [https://wiki.openstack.org/wiki/Fuel/Plugins#Configuration_of_Fuel_Plugins_with_new_roles Role definition in plugin] | ||
| + | |||
| + | == Creating documentation for Fuel Plugins == | ||
| + | |||
| + | Fuel Plugins can provide brand different functionality, that's why you should not only develop a plugin itself, | ||
| + | but also write documentation clear to end users. | ||
| + | |||
| + | === Documentation package === | ||
| + | |||
| + | To give all users the understanding of what you plugins does and how it was tested, | ||
| + | you need to have the following files in the plugin's repo '''under /doc folder''': | ||
| + | <br/> | ||
| + | * Test Plan - contains information on planned testing activities | ||
| + | * Test Report - contains information obtained during testing | ||
| + | * Plugin Guide - contains installation, configuration and usage instructions. | ||
| + | |||
| + | <br/> | ||
| + | Please, note that your plugin's repo should also contain: | ||
| + | * LICENSE file with license specified correctly. | ||
| + | * copyright for specific repo files added at the file header. For details, see [[Fuel/Plugins#License_and_copyright|the corresponding section]]. | ||
| + | * README file with instructions on how to build your plugin, see [https://github.com/stackforge/fuel-plugin-contrail/blob/master/README.md the examples here]. | ||
| + | * developer's specification - contains design and implementation details and explains which problem can be solved with the plugin. It is put into '''/specs''' folder. | ||
| + | <br/> | ||
| + | When writing, please take [[Fuel/Plugins#Style_recommendations|style recommendations]] into consideration. | ||
| + | |||
| + | === Following Gerrit workflow === | ||
| + | |||
| + | [http://docs.openstack.org/infra/manual/developers.html Gerrit workflow] provides the following advantages for Fuel Plugin documentation: | ||
| + | * aligns development and documentation writing cycles. | ||
| + | * provides shipping both specific plugin and related documentation at once. | ||
| + | * provides writing in RST (as already works for the specs). | ||
| + | * enables flexible updates for developers. | ||
| + | <br/> | ||
| + | |||
| + | ==== Documentation files structure and Sphinx usage ==== | ||
| + | |||
| + | To simplify the build procedure, you can use Sphinx. | ||
| + | |||
| + | To enable it in your plugin's repo, follow these steps: | ||
| + | # Make sure you've got a '''/doc''' folder in your repo (according to diagram below). | ||
| + | # Consider splitting your Plugin Guide into smaller RST pieces. Sample can be found [https://github.com/openstack/fuel-plugin-openbook/tree/7.0/doc here]. | ||
| + | # Check if you have '''index''' file in place. It will serve as the source to build the document. It also needs to be edited to include the RST pieces (check the sample). | ||
| + | # Add a Makefile using the sample. Makefiles are usually left as-is to enable PDF and html build (check the [https://github.com/openstack/fuel-plugin-openbook/blob/7.0/doc/source/conf.py sample]). | ||
| + | # Edit [https://github.com/openstack/fuel-plugin-openbook/blob/7.0/doc/source/conf.py '''conf.py'''] file. This file is in charge of the document's appearance and you can modify it according to your own needs: | ||
| + | #* [https://github.com/openstack/fuel-plugin-openbook/blob/7.0/doc/source/conf.py#L267 Enable page numbering] in a proper manner. | ||
| + | #* [https://github.com/openstack/fuel-plugin-openbook/blob/7.0/doc/source/conf.py#L226 Get rid of blank pages] before and after contents page. | ||
| + | # Commit your change. | ||
| + | # Try getting into '''/doc''' folder and running 'make latexpdf' out of it. | ||
| + | As the deliverable of this exercise, you should get a PDF version of your document in the /build folder. | ||
| + | |||
| + | Please, see the recommended file structure for Plugin Guide (as sample): | ||
| + | [[File: Doc-scheme-repo.png]] | ||
| + | |||
| + | === Style recommendations === | ||
| + | |||
| + | # Spell out acronyms and abbreviations when they are first used and avoid using abbreviations that are ambiguous. For example, "OS" could mean either "Operating System" or "OpenStack". | ||
| + | # Do not add many links to external resources in main sections. It is recommended that you put them into Appendix section. | ||
| + | # Each link should have a brief description.Be sure to define any complex concepts and terms that are required to install/use/test the plugin. | ||
| + | # Use step-by-step instructions, structured with an introductory sentence followed by a numbered list of steps to take. | ||
| + | <br/> | ||
| + | |||
| + | === Acceptance criteria === | ||
| + | |||
| + | Plugin-related documentation (Test Plan, Test Report, Plugin Guide, specification) should meet the following acceptance criteria:<br> | ||
| + | * the documentation is written in RST and put into the plugin's repo | ||
| + | * the plugin version is specified correctly;it must resemble the one reflected in the plugin's metadata.yaml file | ||
| + | * all links to external documentation/resources should be present and put into Appendix | ||
| + | * all complex concepts are explained in a detailed and clear manner | ||
| + | <br/> | ||
| + | Please, mind some specific recommendations for the following documentation: | ||
| + | # '''Plugin Guide''' should contain 2 main sections for installation and usage. | ||
| + | #* The former should focus on 1) how/where to download a plugin 2) how to install a plugin 3) any additional prerequisite procedures (e.g. backend configuration). | ||
| + | #* The latter should cover 1) how to use the plugin (e.g. a set of commands) with an example (commands usage with specific values is strongly required) 2) links to external documentation. | ||
| + | #* If plugin has its own UI or supposes some actions to take in Horizon, the Plugin Guide must have screenshots with clearly seen UI elements. | ||
| + | # '''Test Plan and Test Report''' must have clearly specified prerequisites to make the plugin up and running. | ||
| + | # '''Plugin's specification''' must cover design and implementation peculiarities. See the [https://github.com/stackforge/fuel-specs/blob/master/specs/template.rst template]. | ||
| + | |||
| + | ==== Checklist ==== | ||
| + | {| class="wikitable" | ||
| + | |- | ||
| + | ! Issue !! Tick if done | ||
| + | |- | ||
| + | | Plugin version is the one specified in the plugin's metadata.yaml file (see [https://github.com/stackforge/fuel-plugin-neutron-vpnaas/blob/master/metadata.yaml#L6 the example]). || | ||
| + | |- | ||
| + | | All key terms/acronyms/abbreviations are put into the corresponding table and clearly explained or at least refer to other resources with detailed description. || | ||
| + | |- | ||
| + | | Plugin name doesn't somehow change within the document (like VPNaaS and vpnaas). Stick to one variant and use it along the text.|| | ||
| + | |- | ||
| + | | If configuration of specific components (if any) is not covered within the document, then there must be a link pointing to the detailed step-by-step instructions.|| | ||
| + | |- | ||
| + | | All UI elements are properly seen in the screenshots and or even highlighted to point at a specific action/element. || | ||
| + | |- | ||
| + | | All instructions are put into numbered lists to track the task accomplishment and navigate along the document. || | ||
| + | |- | ||
| + | | All instructions concerning Fuel UI wizard or Fuel web UI refer to the official documentation. || | ||
| + | |} | ||
| − | + | == Add your plugin to DriverLog == | |
| − | |||
| − | |||
| − | |||
| − | |||
| − | |||
| − | |||
| − | |||
| − | |||
| − | |||
| − | |||
| − | |||
| − | |||
| − | + | Once you plugin is ready, you can add it to DriverLog, following instructions from [[DriverLog#How_To:_Add_a_new_Fuel_Plugin_to_DriverLog|DriverLog wiki page]]. | |
| + | Before adding, please make sure that: | ||
{| class="wikitable" | {| class="wikitable" | ||
|- | |- | ||
| − | ! Issue !! Tick if done | + | ! Issue !! Example !! Tick if done |
| − | |||
| − | |||
| − | |||
| − | |||
|- | |- | ||
| − | | Plugin | + | | [[Fuel/Plugins#Acceptance_criteria|Plugin's documentation is added to /doc folder.]] || [https://github.com/stackforge/fuel-plugin-midonet/tree/master/doc Midonet plugin] || |
|- | |- | ||
| − | | | + | | [[Fuel/Plugins#Documentation_files_structure|Plugin's specification is added to /specs folder]]. || [https://github.com/stackforge/fuel-plugin-solidfire-cinder/blob/master/specs/solidfire-plugin-specs.rst Solidfire plugin] || |
|- | |- | ||
| − | | | + | | [[Fuel/Plugins#Creating_documentation_for_Fuel_Plugins|Plugin's README file contains instructions on how to build the plugin.]] || [https://github.com/stackforge/fuel-plugin-contrail/blob/master/README.md Contrail plugin] || |
|- | |- | ||
| − | | | + | | [[Fuel/Plugins#License_and_copyright|Plugin's LICENSE file contains the relevant license.]] || [https://github.com/stackforge/fuel-plugin-swiftstack/blob/master/LICENSE Swiftstack plugin] || |
|- | |- | ||
| − | |||
|} | |} | ||
Latest revision as of 16:03, 19 September 2016
Fuel Plugin SDK Guide is on docs.openstack.org
The most up-to-date version of this guide has moved to http://docs.openstack.org/developer/fuel-docs/plugindocs/fuel-plugin-sdk-guide.html
This wiki page is left for historical reference.
Contents
- 1 What is Pluggable Architecture
- 2 How to develop a plugin for Fuel
- 2.1 Planning to create a plugin for Fuel
- 2.2 Preparing an environment for plugin development
- 2.3 Using Fuel Plugin Builder tool
- 2.4 How to use files from plugin structure
- 2.5 Plugins deployment order
- 2.6 How to display plugin restrictions to users
- 3 How to migrate plugins from 1.0.0 to 2.0.0 package version
- 4 Plugin versioning system
- 5 How it works from the inside
- 6 Bugs
- 7 Tutorials
- 8 Plugin elements in the Fuel web UI
- 9 Puppet in Fuel
- 10 How to separate services from Controller with a plugin
- 11 Creating documentation for Fuel Plugins
- 12 Add your plugin to DriverLog
- 13 License and copyright
- 14 FAQ
- 15 Channels of communication
What is Pluggable Architecture
Beginning with version 6.0, Fuel features the ability to install plugins along with your environment. Fuel plugins are downloadable software components that enable you to add new capabilities to your environments in a flexible, repeatable and reliable manner. There is no need to install drivers and patches manually after Fuel deploys your cloud – plugins do this for you.
Fuel plugins enable you to install and configure additional capabilities for your cloud, such as additional storage types and networking functionality. For example, a Load Balancing as a Service (LBaaS) plugin allows you to add network load balancing functionality to your cloud so that incoming traffic can be spread across multiple nodes. Or you might want to use the GlusterFS plugin so that you can use a Gluster file system as a backend for block storage (Cinder).
Fuel offers an open source framework for creating these plugins, so there’s a wide range of capabilities that you can enable Fuel to add to your OpenStack clouds. If you’re a hardware vendor that has created drivers that enable OpenStack to work with your product, you can create a plugin so Fuel can deploy those drivers when it’s standing up new clouds. Or you might simply want to enable OpenStack functionality that’s not readily available in Fuel. Because Fuel includes a pluggable framework, you’re not limited to what’s provided “out of the box”.
You are also free to use DriverLog as the single registry for all Fuel Plugins.
Architecture limitations
- Core-functionality Fuel plugins can only be installed before configuring and deploying the environment. Otherwise, you will have to redeploy the environment to enable the core plugin. Apllication level plugins can be installed later on top of already deployed environments.
- Fuel plugins cannot be upgraded from major to another major version.
- Fuel plugins for SDN solutions cannot create a new networking option in the Fuel web UI/UI wizard.
6.1 features
- plugins are shipped in RPMs
- plugins support updates from major to minor version (1.0.0 to 1.0.1)
7.0 features
- define a new role in Fuel via a plugin see Configuration of Fuel Plugins with new roles.
- reserve VIPs via Fuel plugin's metadata, see Virtual IP reservation via Fuel plugins's metadata.
- view installed plugins
- separate services from Controller with a plugin
8.0 features
- install a plugin after deployment
- plugin links and metadata in environment dashboard
- component registry
- settings tab plugin assignment
Install a plugin after deployment
You can install application-level plugins (hot-pluggable), such as LMA or Zabbix, after you have deployed an OpenStack environment if the plugin:
- Provides new applications
- Installs applications on a new node
- Does not affect existing services or applications
- Does not override existing tasks
Plugins that affect Fuel core functionality, such as SDN or storage plugins, can only be installed before you deploy an OpenStack environment.
An application-level plugin should have "is_hotpluggable" attribute set to "true" in metadata.yaml file. See metadata.yaml.
Plugin links and metadata in environment dashboard
You can make an API request via your Puppet manifests and register a non-standard dashboard.
Examples
- absolute-dashboard-link.pp:
notice('PLUGIN: fuel_plugin_example_v4/absolute-dashboard-link.pp')

$cluster_id = hiera('deployment_id')
$master_ip = hiera('master_ip')
$network_metadata = hiera_hash('network_metadata', {})
$os_public_vip = $network_metadata['vips']['public']['ipaddr']

$dashboard_name = 'Demo Plugin Dashboard #1'
$dashboard_desc = 'A Sample Absolute Dashboard Link'
$dashboard_link = "http://${os_public_vip}/dashboard"

$json_hash = { title       => $dashboard_name,
               description => $dashboard_desc,
               url         => $dashboard_link, }

$json_message = inline_template('<%= require "json"; JSON.dump(@json_hash) %>')

exec { 'create_dashboard_link':
  command => "/usr/bin/curl -H 'Content-Type: application/json' -X POST \
-d '${json_message}' \
http://${master_ip}:8000/api/clusters/${cluster_id}/plugin_links",
}
- relative-dashboard-link.pp:
notice('PLUGIN: fuel_plugin_example_v4/relative-dashboard-link.pp')

$cluster_id = hiera('deployment_id')
$master_ip = hiera('master_ip')

$dashboard_name = 'Demo Plugin Dashboard #2'
$dashboard_desc = 'A Sample Relative Dashboard Link'
$dashboard_link = "/dashboard"

$json_hash = { title       => $dashboard_name,
               description => $dashboard_desc,
               url         => $dashboard_link, }

$json_message = inline_template('<%= require "json"; JSON.dump(@json_hash) %>')

exec { 'create_dashboard_link':
  command => "/usr/bin/curl -H 'Content-Type: application/json' -X POST \
-d '${json_message}' \
http://${master_ip}:8000/api/clusters/${cluster_id}/plugin_links",
}
- deployment_tasks.yaml:
- id: fuel_plugin_example_v4
  type: group
  role: [fuel_plugin_example_v4]
  tasks:
    - hiera
    - globals
  required_for: [deploy_end]
  requires: [deploy_start]
  parameters:
    strategy:
      type: parallel

- id: fuel_plugin_example_v4-controller-deployment
  type: puppet
  groups: [primary-controller, controller]
  required_for: [connectivity_tests, deploy_end]
  requires: [netconfig, deploy_start]
  parameters:
    puppet_manifest: "deploy.pp"
    puppet_modules: "."
    timeout: 3600

- id: fuel_plugin_example_v4-deployment
  type: puppet
  groups: [fuel_plugin_example_v4]
  required_for: [deploy_end]
  requires: [deploy_start]
  parameters:
    puppet_manifest: "deploy.pp"
    puppet_modules: "."
    timeout: 3600
    retries: 10

- id: fuel_plugin_example_v4-post-deployment-sh
  type: shell
  role: [fuel_plugin_example_v4]
  required_for: [post_deployment_end]
  requires: [post_deployment_start]
  parameters:
    cmd: bash deploy.sh
    retries: 3
    interval: 20
    timeout: 180

- id: fuel_plugin_example_v4-absolute-dashboard-link
  type: puppet
  role: [fuel_plugin_example_v4]
  required_for: [post_deployment_end]
  requires: [post_deployment_start]
  parameters:
    puppet_manifest: "absolute-dashboard-link.pp"
    puppet_modules: "/etc/puppet/modules"
    timeout: 180

- id: fuel_plugin_example_v4-relative-dashboard-link
  type: puppet
  role: [fuel_plugin_example_v4]
  required_for: [post_deployment_end]
  requires: [post_deployment_start]
  parameters:
    puppet_manifest: "relative-dashboard-link.pp"
    puppet_modules: "/etc/puppet/modules"
    timeout: 180cluster_id}/plugin_links",
}
- node_roles.yaml:
fuel_plugin_example_v4:
  name: "Set here the name for the role. This name will be displayed in the Fuel web UI."
  description: "Write description for your role"
  has_primary: false                # whether has primary role or not
  public_ip_required: true          # whether requires public net or not
  weight: 100                       # weight that will be used for ordering on fuel ui
- Example of a plugin API added to a post-install task — post_install.sh:
#!/bin/sh

PLUGIN_NAME=fuel_plugin_example_v4
DASHBOARD_TITLE=Dashboard
DASHBOARD_DESC="A Sample Dashboard Link"
DASHBOARD_URL="/dashboard"

function obtain_token {

# Request a token for admin user
TENANT_NAME=admin
ADMIN_USERNAME=`python -c "import sys; import yaml; f = open('/etc/fuel/astute.yaml'); astute = yaml.load(f); print astute['FUEL_ACCESS']['user'];"`
ADMIN_PASSWORD=`python -c "import sys; import yaml; f = open('/etc/fuel/astute.yaml'); astute = yaml.load(f); print astute['FUEL_ACCESS']['password'];"`
TENANT_ID=admin

REQUEST="{\"auth\": {\"tenantName\":\"$TENANT_NAME\", \"passwordCredentials\": {\"username\": \"$ADMIN_USERNAME\", \"password\": \"$ADMIN_PASSWORD\"}}}"
RAW_TOKEN=`curl -s -d "$REQUEST" -H "Content-type: application/json" "http://localhost:5000/v2.0/tokens"`
TOKEN=`echo $RAW_TOKEN | python -c "import sys; import json; response = json.loads(sys.stdin.read()); print response['access']['token']['id'];"`

}

function plugin_link {

which fuel > /dev/null
if [[ $? -eq 0 ]]; then

local num_retries=10
local i=0

while true; do
    # Fail if number of retries exeeded
    if [[ $i -gt $((num_retries + 1)) ]]; then
        # Report that plugin not registered
        echo "WARNING: Plugin failed to register before the timeout."
        echo "         Plugin dashboard link will not be added."
        return 1
    fi

    LAST_PLUGIN_ID=`fuel plugins -l | grep $PLUGIN_NAME | cut -d ' ' -f1`
    if [ "$LAST_PLUGIN_ID" != "" ]; then
        PLUGIN_ID=$LAST_PLUGIN_ID
        echo "Plugin ID is: $PLUGIN_ID"
        curl -H 'Content-Type: application/json' -H "X-Auth-Token: $TOKEN" -X POST -d \
"{\"title\":\"$DASHBOARD_TITLE\",\"description\":\"$DASHBOARD_DESC\",\"url\":\"$DASHBOARD_URL\"}" \
http://127.0.0.1:8000/api/v1/plugins/$PLUGIN_ID/links
        return 0
    fi

    sleep 1
    i=$((i++))
done
fi

}

obtain_token
echo $TOKEN

plugin_link &
Component compatibility registry
Component registry is a component compatibility mechanism in Fuel. See blueprint.
Specifying component requirements
Consider two components: Component A and Component B. Component A requires Component B to function.
In a DSL model this relation can be described explicitly:
        - name: 'A'
            requires:
                - name: 'B'
The DSL model can be described in the Fuel openstack.yaml file for core components and in the components.yaml file for components provided from a plugin.
In the Fuel web UI, if Component B is not selected, then Component A will be disabled and respective message displayed.
Consider three components: Component A, Component B, and Component C. Component A requires Component B and Component B to function.
This relation can be described explicitly:
        - name: 'A'
            requires:
                - name: 'B'
                - name: 'C'
                message: 'C and B'
In this case Component A can be selected only when both Component B and Component C are selected.
There is currently a limitation for cases when Component A requires Component B or Component C or more.
Example of requirements for the DVS plugin:
        - name: 'network:neutron:ml2:dvs'
          label: 'Neutron with VMware DVS'
          description: 'Neutron with VMware DVS ML2 plugin'
          requires:
            - name: 'network:neutron:core:ml2'
            - name: 'hypervisor:vmware'
            message: 'The VMware DVS plugin requires vCenter as the hypervisor option.'
Specifying component compatibility
Compatibility of Component A with Components B means that Component A has been tested and proved to function with Component B.
DSL model example:
        - name: 'A'
            compatible:
                - name: 'B'
                - name: 'C'
If either Component B or Component B is selected in the Fuel web UI, then the UI representation of Component A will have a green tooltip.
Specifying component incompatibility
Incompatibility of Component A with Component B means that Component A has been tested and proved to not function with Component B.
DSL model example:
        - name: 'A'
            incompatible:
                - name: 'B'
                message: 'B incompatible with A'
Selecting Component A or Component B will disable the other one in the Fuel web UI. You will be able to select only Component A or Component B, but not both.
Components with unspecified compatibility
The Fuel web UI shows a grey tooltip with a respective message for the components with unspecified compatibility.
Settings tab plugins assignment
There is a `groups` attribute in the environment_config.yaml file that you can use to assign your plugins to.
Plugins can form any group in one of the default groups: General, Security, Compute, Storage, Logging, OpenStack Services. If your plugin uses a custom group name it will automatically go to the `Other` group.
See environment_config.yaml template.
9.0 features
- Plugin developers can now dynamically add configuration fields to their plugins. See blueprint.
- Improved Fuel plugin builder. The improvements are a number of fixed bugs; no new features. For information how to install the latest version of Fuel plugin builder see #install_latest.
How to develop a plugin for Fuel
Planning to create a plugin for Fuel
Entry development requirements
When planning to write up a plugin for Fuel, mind the following recommendations:
- Provide deb and rpm packages together with their dependencies. For instructions on creating packages, see Fedora project wiki and Ubuntu Packaging Guide.
- Create puppet manifests according to the Official OpenStack documentation. For nice code examples and workflow, see Puppet in OpenStack.
Code style
The readability, reviewability and maintainability of Fuel Plugin code depends on use of standardized coding styles for Puppet and Python. It’s strongly recommended to follow them.The best approach is to integrate codestyle checkers to you CI flow. Here are a few examples how to use puppet-lint and pep8 manually.
To install these checkers, please follow the instructions below:
- Puppet:
gem install puppet-lint
puppet-lint  --with-context ./myplugin/deployment_scripts
- Python:
pip install pep8
pep8 --show-source --show-pep8 ./myplugin/deployment_scripts
Repo
As a plugin developer, this is your workflow for plugin creation:
- You should start your plugin development in your own repo open to public. The repo can be any public git hosting, e.g., github.
- When you are ready to put your developed plugin project to the official repo in the OpenStack namespace, you need to do and ensure the following:
- Have your code verified by the Fuel team.
- You plan to set up a CI for the plugin.
- Confirm that you are going to support the plugin for more than one version of Fuel.
- Confirm that you are releasing your plugin code under an open-source license.
- Confirm your plugin code has no binary files.
How to create a project
- Make sure you're registered at the following resources:
- LaunchPad. If not, see the official OpenStack documentation.
- review.openstack.org. It is required for developers to be included into core and release groups.
- Request the repo creation in Fuel project. Enter Fuel project at Launchpad and click Report a bug link.
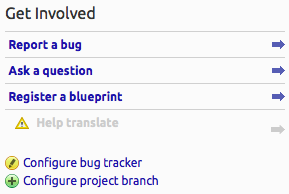
- In Summary, specify Create a Fuel Plugin project in /Openstack.

- Bug description should consist of:
- Plugin name (for example, HA Fencing)
- Plugin functionality overview (for example, enables STONITH-based fencing in HA mode)
- Developer's contact information (email, skype, etc.) - please make sure core group members are registered at review.openstack.org. Otherwise they wont be added as a core members.
- List of developers with contact information (name, email on which review.openstack.org is registered) to enter core reviewers group (example)- used to merge changes
- List of developers with contact information ( (name, email on which review.openstack.org is registered)) to enter release group (example) - used to create release branches and tags in the repo. You will need to review the commit for your project and make sure both lists of developers to enter core and release groups are correct.
- Click Extra options. In the menu, specify devops tag.
- After the repo is created (that means, your bug should be marked as Fix Committed or Fix Released) you can start filling your repo with the required files:
- Plugin code itself
- Documentation - see the corresponding section for more details.


Requesting community help for code review
Once your code is being prepared and uploaded into repo under /openstack project, you
are free to request the OpenStack community for review to make sure the code meets the development requirements
and common guidelines for Fuel Plugin Framework as listed below.
This is aligned with the Gerrit workflow used in the OpenStack community.
To request review, you can enter #fuel-dev channel in IRC.
Launchpad project
Please, consider creating Launchpad project, which will serve as the single entry point for reporting issues on your plugin and tracking development progress. Recommendations are listed below:
- name of the project should look like fuel-plugin-<your plugin's name>
- project creation procedure is a rather standard procedure, so you can learn more in the official Launchpad documentation
- project page should incorporate link to the source plugin repo and its entry in DriverLog
- project teams should incorporate all development team members
- milestones should repeat the plugin release specified in the metadata.yaml file (e.g. 1.0.0, 2.0.0)
You can find the list of existing LP project here.
Working with tags and branches
To track the release cycle in a more efficient manner, you can use:
- release branches
- tags
Here is the difference between these 2 concepts:
- A tag represents a version of a particular branch at a moment in time.
- A branch represents a separate thread of development that may run concurrently with other development efforts on the same code base. Changes to a branch may eventually be merged back into another branch to unify them.
It is recommended that you used branches to let end users build a your plugin themselves.
For this, you need to:
- create a corresponding branch.
- edit README file to provide build instructions. For more details, see the corresponding section.
You can also use tags for tracking progress within one branch. Here are 2 examples:
- tagging the plugin repo - VPNaaS plugin repo:
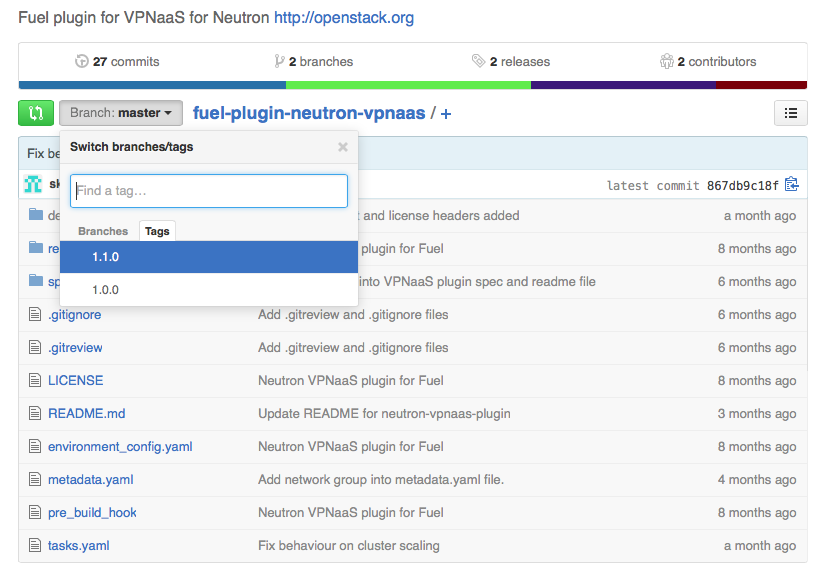

- creating a separate branch - LBaaS plugin repo:
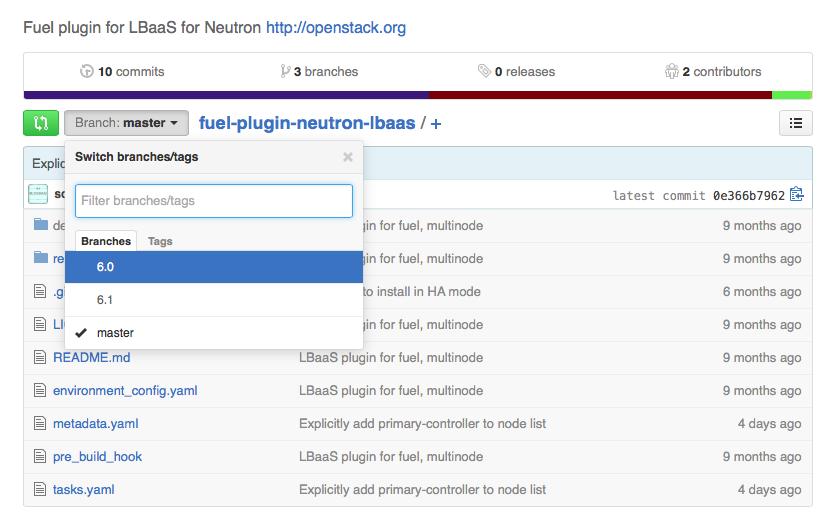

Branches naming convention
Since plugins are published in DriverLog, the only way for end users to get the plugin RPM is to build it themselves. Thus, you should take the following into consideration:
- the branch name should coincide with the compatible Fuel version.
SEE ALSO
- To learn more about best practices in creating branches, see A successful Git branching model
blogpost.
- For instructions on creating a tag, see the official Project Driver's Guide.
NOTE:
- You should add a tag once you get all the required files added into the repo and checked
if they contain copyrights. Otherwise, you will have to create new tags.
- You should create tags with gpg key using console gnupg. Please, ensure it is present and not expired.
Creating branches
There are 2 ways of creating branches:
- from CLI:
git push <remote> <localref>:<remotebranch>
where <remote> is the name of your gerrit remote or the full remote url, <localref> is the refname (could be a branch or something else) and <remotebranch> is the name of the branch you want created from it.
- from the web UI:
- Make sure you are the core reviewer.
- Enter review.openstack.org.
- in Project menu, click Branches. After the project setup opens, enter a new branch name and click Create branch button. Note, that 'Initial revision' field can be left blank.
 .
.
Deleting branches
If you would like to delete a branch, you have 2 different ways to do that:
- Contact openstack-infra core team via mailing list. See the example request here.
- Report a bug in Fuel project in Launchpad and assign it to Fuel DevOps team. The flow is similar to the one described here
- Request in #openstack-infra IRC channel on freenode.net. You can contact the following core members there: fungi, clarkb, jeblair, pleia2.
Note, that there is no way to delete a branch manually.
CI
It's recommended to set up CI for your Fuel plugin. The section below provides summary instructions on CI components and their roles.
Tools
Here is the list of key issues, used in terms of Fuel Plugins CI:
| CI | Continuous Integration |
| CD | Continuous Delivery |
| OSTF | OpenStack Testing Framework |
| BVT | Build Verification Tests |
| JJB | Jenkins Job Builder |
| VM | virtual machine |
| Fuel | Fuel |
| Fuel CI | Fuel CI |
| GitHub | GitHub Server |
| Openstack | Openstack |
| Gerrit | OpenStack review tool |
Easy way to build own CI https://github.com/openstack/fuel-plugin-ci
As to the tools, the following ones are used:
- GitHub repository with Gerrit code-review tool
- Jenkins CI-server - provides full information about jobs status, scheduler, test results, etc.
- Jenkins Job Builder - tool for easy adding and managing Jenkins jobs. It provides functionality to store jobs’ configuration in a human-readable .yaml markup language and convert them to Jenkins-specific .xml.
Steps to configure Gerrit integration
- Create and configure launchpad user for voting as third-party developer
- Add credentials (username, public key) for gerrit plugin configuration in Jenkins
- Send an email to the openstack-dev mailing list nominating your system for voting permissions
Steps to prepare development & testing environments (mandatory)
- OpenStack and/or Gerrit repository should be created. See Repo section for more details.
- Preferable quantity of test labs should be allocated (plugin-specific).
- Specific Hardware resources should be installed and configured (plugin-specific).
- Test labs should be configured for setup environments and test running. See Fuel development documentation
Steps to configure CI server (optional)
- We recommend for all plugin developers to have their own CI server. It provides better versioning, collecting test-results, deduplicating the same jobs, easier configuration and managing.
- We recommend using Jenkins with Jenkins Job Builder plugin which provides easy jobs management and their configuration storage.
- We recommend to install JJB from git and take example jobs from the section below.You may find the main job helpful: this should be plugins.yaml and dependent builders: docs/builders/.sh.
- We recommend creating a pre-commit-hook to check your code:
#!/bin/bash
# Save this script to <PROJECT>/.git/hooks/pre-review and make it executable
set -e
set -o pipefail

find . -name '*.pp' | xargs -P1 -L1 puppet parser validate --verbose
find . -name '*.pp' | xargs -P1 -L1 puppet-lint \
          --fail-on-warnings \
          --with-context \
          --with-filename \
          --no-80chars-check \
          --no-variable_scope-check \
          --no-nested_classes_or_defines-check \
          --no-autoloader_layout-check \
          --no-class_inherits_from_params_class-check \
          --no-documentation-check \
          --no-arrow_alignment-check\
          --no-case_without_default-check
find . -name '*.erb' | xargs -P1 -L1 -I '%' erb -P -x -T '-' % | ruby -c
fpb --check  ./
Example jobs
- deploy-plugin.sh:
#!/bin/bash
set -ex

export SYSTEM_TESTS="${WORKSPACE}/utils/jenkins/system_tests.sh"
export LOGS_DIR=${WORKSPACE}/logs/${BUILD_NUMBER}
export VENV_PATH='/home/jenkins/venv-nailgun-tests-2.9'
YOUR_PLUGIN_PATH="$(ls ./*rpm)" #Change this to appropriate fuel-qa variable for your plugin
export YOUR_PLUGIN_PATH         #

sh -x "${SYSTEM_TESTS}" -w "${WORKSPACE}" -V "${VENV_PATH}" -i "${ISO_PATH}" -t test -o --group="${TEST_GROUP}"
- prepare_env.sh:
#!/bin/bash

set -ex

export VENV_PATH="/home/jenkins/venv-nailgun-tests-2.9"

rm -rf "${VENV_PATH}"

REQS_PATH="${WORKSPACE}/fuel-qa/fuelweb_test/requirements.txt"

virtualenv --system-site-packages "${VENV_PATH}"
source "${VENV_PATH}/bin/activate"
pip install -r "${REQS_PATH}" --upgrade
django-admin.py syncdb --settings=devops.settings --noinput
django-admin.py migrate devops --settings=devops.settings --noinput
deactivate
- syntax-build-plugin.sh
#!/bin/bash
set -ex

find . -name '*.erb' -print 0 | xargs -0 -P1 -I '%' erb -P -x -T '-' % | ruby -c
find . -name '*.pp' -print 0| xargs -0 -P1 puppet parser validate --verbose
find . -name '*.pp' -print 0| xargs -0 -P1 puppet-lint \
          --fail-on-warnings \
          --with-context \
          --with-filename \
          --no-80chars-check \
          --no-variable_scope-check \
          --no-nested_classes_or_defines-check \
          --no-autoloader_layout-check \
          --no-class_inherits_from_params_class-check \
          --no-documentation-check \
          --no-arrow_alignment-check

fpb --check  ./
fpb --build  ./
- plugins.yaml:
- project:
    name: plugin_name #Your plugin mame
    path_to_fuel_iso: $PWD #Path to FuelISO
    plugin_repo: plugin_repo #Your plugin repo name at stackforge
    email_to: emails_list #List of emails separated by comma
    test_group: test_group #Test group in fuel-qa for deployment tests of your plugin
    jobs:
      - 'prepare_env'
      - '{name}.build'
      - '{name}.{dist}.deploy':
          dist: 'centos'
      - '{name}.{dist}.deploy':
          dist: 'ubuntu'

- job-template:
    name: 'prepare_env'
    builders:
      - shell:
          !include-raw-escape './builders/prepare_env.sh'
    description: 'Prepare environment to testing'
    logrotate:
      numToKeep: 10
    parameters:
      - string:
          name: 'GERRIT_REFSPEC'
          default: 'refs/heads/master'
    scm:
      - git:
          branches:
            - $GERRIT_BRANCH
          refspec: $GERRIT_REFSPEC
          url: 'https://review.openstack.org/stackforge/fuel-qa'
          choosing-strategy: gerrit
          clean:
            before: true
    publishers:
      - email:
          notify-every-unstable-build: true
          recipients: '{email_to}'

- job-template:
    name: '{name}.build'
    builders:
      - shell:
          !include-raw-escape './builders/syntax-build-plugin.sh'
    description: '<a href=https://github.com/stackforge/{plugin_repo}>Build {name} plugin from fuel-plugins project</a>'
    logrotate:
      numToKeep: 10
    parameters:
      - string:
          name: 'GERRIT_REFSPEC'
          default: 'refs/heads/master'
    scm:
      - git:
          branches:
            - $GERRIT_BRANCH
          name: ''
          refspec: $GERRIT_REFSPEC
          url: 'https://review.openstack.org/stackforge/{plugin_repo}'
          choosing-strategy: gerrit
          clean:
            before: true
    triggers:
      - gerrit:
          trigger-on:
            - patchset-created-event #Trigger plugin build for every gerrit patchset
          projects:
            - project-compare-type: 'PLAIN'
              project-pattern: '{plugin_repo}'
              branches:
                - branch-compare-type: 'ANT'
                  branch-pattern: '**'
          silent: true
          server-name: 'review.openstack.org'
    publishers:
      - archive:
          artifacts: '*.rpm'
      - email:
          notify-every-unstable-build: true
          recipients: '{email_to}'

- job-template:
    name: '{name}.{dist}.deploy'
    builders:
      - copyartifact:
          project: '{name}.build'
          which-build: last-successful
      - inject:
          properties-content: |
            OPENSTACK_RELEASE={dist}
            TEST_GROUP={test_group}
            ISO_PATH={path_to_fuel_iso}
      - shell:
          !include-raw-escape './builders/deploy-plugin.sh'
    description: 'fuel-qa system test for {name}'
    logrotate:
      numToKeep: 10
    parameters:
      - string:
          name: 'GERRIT_REFSPEC'
          default: 'refs/heads/master'
    scm:
      - git:
          branches:
            - $GERRIT_BRANCH
          refspec: $GERRIT_REFSPEC
          url: 'https://review.openstack.org/stackforge/fuel-qa'
          choosing-strategy: gerrit
          clean:
            before: true
          wipe-workspace: false
    publishers:
      - archive:
          artifacts: 'logs/$BUILD_NUMBER/*'
      - email:
          notify-every-unstable-build: true
          recipients: '{email_to}'
CI/CD Workflow

In terms of a specific plugin, we recommend to go through the following CI pipeline:
- Prepare labs and start or update the lab (when a new Fuel ISO has been built):
- a) Download current ISO from the Fuel CI. Depending on Fuel version specified in plugin’s requirements, Jenkins downloads released ISO(s) and/or currently developed and passed BVT test on core CI. (for now, this should be done manually; in future, API should be provided to inform external CIs about a new stable ISO). You can also implement an internal storage with ability to download the latest stable ISO once it's out.
- b) Deploy this ISO and prepare the required amount of labs for testing using fuel-dev and fuel-qa repositories and running it in console:
$ fuel-main/utils/jenkins/system_tests -t test -j dis_fuelweb_test -i (path to downloaded Fuel-ISO) -o --group=setup -V ${VIRTUAL_ENV} -kYou can find all the information about script installation and usage in Fuel development documentation: - c) Create/restore the required quantity of empty VMs from snapshots.
The script from the previous list item uses dos.py utility for managing VMs and their snapshots (it was configured and installed on the previous step). You can find all information about dos.py just runningdos.py -h.
- Gerrit review job will start to build plugin. See Gerrit workflow for more details.
- a) use preconfigured Gerrit Trigger to start your job after new Gerrit Patch arrives
- b) run code syntax checker and unit tests according to the instructions from Testing
- c) run puppet linter (see Puppet OpenStack page for more details)
- d) build plugin (plugin should pass Fuel Plugin Builder requirements)
- e) trigger plugin testing
- Vote on Gerrit patch’s page and add review result in comment using Gerrit Trigger. (optional)
- Plugin testing (all three steps are part of system_tests.sh runner from fuel-qa repository) :
- a) install a plugin
- b) configure an environment
- c) deploy environment with inactive plugin
- d) run OSTF tests.
- Run plugin-specific functional tests to check that current plugin version provides expected functionality.
- Publish resulting aggregated logs to the log storage. You can do it with archiving logs.
Automation test cases and test framework
You should follow this recommendation on how to write automation tests and configure test framework. Follow the links below for more information:
- tests for 6.1 Fuel release
- example of writing plugin test cases
- instructions on configuring an environment
First of all, you should prepare environment and download Fuel ISO.
1. Clone GIT repository:
git clone https://github.com/stackforge/fuel-qa
2. Activate virtual env with running:
source ~/venv-nailgun-tests-2.9/bin/activate
3. Export Fuel ISO path with running:
export ISO_PATH=path-to-iso
4. Enter this folder:
cd fuel-qa/
Start tests by running this command:
./utils/jenkins/system_tests.sh -t test -w $(pwd) -j fuelweb_test -i $ISO_PATH -o --group=setup
Alternatively you can install empty setup with 1, 3, 5 or 9 slaves for the manual testing:
fuel-qa$ ./utils/jenkins/system_tests.sh -t test -w $(pwd) -j fuelweb_test -i $ISO_PATH -o --group=prepare_slaves_5
system_tests file is used as a runner for tests from fuel-qa repository.
5. For more information on how tests work and additional options for test run, read the usage information with running:
./utils/jenkins/system_tests.sh -h
In the section below, you can find information about main files and modules:
- system_tests.sh - a file where tests start execution. This file processes parameters specified from command line and invokes run_tests.py
- run_tests.py - used to import your test files inside this file to run your test then.
- settings.py - contains environment variables used for environment customization. With this file, you can set such variables like path to ISO, nodes quantity, etc.
Models folder with files provides the main logic of the project:
- environment.py - contains methods for environment deploying, virtual machines creation and networking for them, installing Fuel on the Fuel Master node, etc.
Environment creation process uses devops manager fuel-devops/devops/manager.py. Devops manager is used for virtual machines creation and uses lower level libvirt driver. Also environment model contains methods for ssh interaction.
- nailgun_client.py - contains functionality for nailgun handlers, methods and API that are supported by the nailgun client can be found here. Nailgun client uses http client that is located in helpers folder. Nailgun client is used in fuel web client.
Fuel web client contains such methods as:cluster creation, OSTF tests launch, adding nodes to the cluster, etc.
Helpers folder contains the following files:
- checkers.py - has methods for ssh client to verify nodes access and other.
- common.py - has methods for OpenStack API access, instances creation, etc.
- decorators.py - has different decorators, the most usable is ‘’log_snapshot_on_error’’; it's recommended to use this decorator for all tests, in case of any error diagnostic and environment snapshots will be created.
- os_actions.py - has methods to work with OpenStack.
When writing your first test case, please mind the following:
- for writing your first test case, you can use ‘’test_fuel_plugin_example.py’’.
- when creating your own test class, you have to inherit this test class from TestBasic class located in ‘’base_test_case.py’’ where fuel web client initialization is performed.
- each test class and method have to be decorated with ‘’@test’’.
- each class in test group has groups to run all test cases together and each test case has groups to separate run.
- test cases have depends_on method or test and it means that this test case does not run until depends_on method or test will be done.
Test execution order:
- Base test cases are executed: these are the tests that set up environment and install the Fuel Master node.
- After these tests are passed, snapshots are created which will be used by tests for creating clusters.
- Revert to previously created snapshots.
- Set up cluster and deploy it.
- Run Health check test (OSTF).
For test execution debugging you can use dos.py You can create snapshot with the following command:
dos.py snapshot <myenv> --snapshot-name=<snapshot_name>
You can revert snapshot with:
dos.py revert <myenv> --snapshot-name=<snapshot_name>
Fuel-qa and Fuel Plugins
Currently, the system tests for Fuel are kept in fuel-qa repo. Note that for implementing Fuel Plugin CI, the fuel-qa can be used as the baseline framework. This means, you can use the framework without committing any tests directly to fuel-qa repo.
Preparing an environment for plugin development
Prepare your environment for plugin development in three easy steps:
1. Install the standard Linux development tools.
- For Ubuntu 14.04 LTS, run:
sudo apt-get install createrepo rpm dpkg-dev
- For Centos 6.5, run:
yum install createrepo rpm rpm-build dpkg-devel
2. Install the Fuel Plugin Builder. To do that, you should first get pip:
easy_install pip
3. Then, install Fuel Plugin Builder (fpb) itself:
pip install fuel-plugin-builder
If you need to install the latest version of the Fuel Plugin Builder, follow the instruction below:
1. Clone the repository:
git clone https://github.com/stackforge/fuel-plugins.git
2. Go to the 'fuel_plugins' folder:
cd fuel-plugins/
3. Install the fpb:
sudo python setup.py install
Using Fuel Plugin Builder tool
Plugin structure
To build your plugin, you should first generate its structure. It looks as follows:

Generating the structure and building the plugin
To generate the plugin structure as given above, you should run the following command:
fpb --create <fuel_plugin_name>
As the result, you will only have to build your plugin: fpb --build <fuel_plugin_name>
After your plugin is built, you can see it in your plugin's directory; for example, fuel_plugin_name/fuel_plugin_name-1.0.0.noarch.rpm".
How to use files from plugin structure
deployment_tasks.yaml
New "deployment_tasks.yaml" file was introduced to replace the "tasks.yaml". The new file can specify tasks dependencies using new parameters "required for" and "requires".
type: puppet
 groups: [primary-controller]
 required_for: [keystone]
 requires: [database]
 parameters:
    puppet_manifest: /etc/puppet/modules/osnailyfacter/modular/keystone/db.pp
    puppet_modules: /etc/puppet/modules
    timeout: 1800
The list of parameters for "deployment_tasks.yaml":
role
The parameter describes a role of a node where tasks will be executed. The role parameter is used for pre/post deployment tasks or for declaring a group for main deployment.
groups
The parameter describes a group of nodes with the specified role where tasks will be executed and should be explicitly declared for the main deployment.
- id: controller
type: group
role: [controller]
requires: [primary-controller]
required_for: [deploy_end]
parameters:
strategy:
type: parallel
amount: 6
The “groups” parameter is used for the main deployment. It conflicts with the "role" parameter. The task must have either a “role” or “group” parameter, but not both of them at the same time.
requires
The parameter specifies the list of tasks needed by the current one. The list of tasks can be obtained by running the command:
fuel graph --env 1 --download
required_for
The parameter specifies the list of tasks for which the current one is needed.
timeout
You can also specify execution timeout in seconds. Once specified, the deployment will fail if timeout expires. By default, timeout is set to 300 seconds.
[fixme: Is this information still useful or should we just delete it?]
Previously, when plugin developer set timeout for operation, this timeout worked differently for specific operations. For example:
- shell task type timeout = timeout * retries (Mcollective retries, 2 by default)
- puppet task type timeout = global timeout (the one set by plugin developer).
Now it works properly in both cases: shell and puppet task types have global timeout.
[/fixme]
type: shell
The parameter runs the specified shell command
Here is the example of a "shell" task:
# This tasks will be applied on controller nodes,
# here you can also specify several roles, for example
# ['cinder', 'compute'] will be applied only on
# cinder and compute nodes
- id: task-shell-deploy
  role: ['controller']
  type: shell
  parameters:
    cmd: bash deploy.sh
    timeout: 42

- id: task-shell-deploy
  role: ['cinder','compute'']
  type: shell
  parameters:
    cmd: bash deploy.sh
    timeout: 42

# Task is applied for all roles
- id: task-shell-pluginlog
  role: '*'
  type: shell
  parameters:
    cmd: echo all > /tmp/plugin.all
    timeout: 42
type: puppet
Puppet task type allows you to apply your own Puppet manifests on OpenStack nodes. For more information, see Puppet in Fuel section.
To enable this task type, add your site.pp file in deployment_scripts/puppet/manifests/ directory. Then put all required modules in deployment_scripts/puppet/modules directory.
- puppet_manifest - specify directory path for your manifest relative to deployment_scripts.
- puppet_modules - specify directory path for your modules relative to deployment_scripts.
# Deployment will be applied on controllers only
- role: ['controller']
  type: puppet
  parameters:
    puppet_manifest: puppet/manifests/site.pp
    puppet_modules: puppet/modules
    timeout: 360
type: reboot
Beginning with Fuel 6.1 release for plugins with package_version: 2.0.0, reboot task type allows you to reboot your node with specifying the timeout. This can be useful to apply numerous changes at the node.
- role: '*'
  type: reboot
  parameters:
    timeout: 300
type: group
A group task consists of the list of tasks to be executed on the specified nodes.
- id: standalone-keystone
  type: group
  role: [standalone-keystone]
  requires: [deploy_start, primary-standalone-keystone]
  required_for: [deploy_end]
  tasks: [fuel_pkgs, hiera, globals, tools, logging, netconfig, hosts, firewall, deploy_start, cluster, keystone-vip, cluster-haproxy, memcached, openstack-haproxy-stats, task-keystone]
  parameters:
     strategy:
        type: parallel
When you set up a group of tasks you can also specify how they will be executed: in “parallel” or “one-by-one”.
strategy: type
* "parallel" - tasks will be executed in parallel
* "one-by-one" - tasks will be executed one-by-one
Once you choose “parallel” you can specify the maximal number of tasks that can be run in parallel using the “amount” parameter.
- id: controller
 type: group
 role: [controller]
 requires: [primary-controller]
 required_for: [deploy_end]
 parameters:
   strategy:
     type: parallel
     amount: 6
environment_config.yaml
This file describes additional attributes that will appear on the Settings tab of the Fuel web UI. When the environment is deployed, these attributes are passed to the task executor so that the data is available in the /etc/astute.yaml file on each target node and can be accessed from your bash or puppet scripts.
By default, your environment_config.yaml file adds text field on Fuel web UI:
attributes:
  fuel_plugin_name_text:
    value: 'Set default value'
    label: 'Text field'
    description: 'Description for text field'
    weight: 25
    type: "text"
For more information on Fuel web UI elements for a plugin, see Fuel plugin UI elements.
metadata.yaml
This file contains the description of your plugin:
# Plugin name
name: fuel_plugin_name
# Human-readable name for your plugin, it will be shown on UI
# as a name of plugin group
title: Title for fuel_plugin_name plugin
# Plugin version
version: 1.0.0
# Description
description: Enable to use plugin X
# Required fuel version
fuel_version: ['6.0']
# The plugin is compatible with releases in the list
releases:
  - os: ubuntu
    version: 2014.2-6.0
    mode: ['ha', 'multinode']
    deployment_scripts_path: deployment_scripts/
    repository_path: repositories/ubuntu
  - os: centos
    version: 2014.2-6.0
    mode: ['ha', 'multinode']
    deployment_scripts_path: deployment_scripts/
    repository_path: repositories/centos
# Version of plugin package
package_version: '1.0.0'
| Parameter | Usage | Comments/Example |
|---|---|---|
| name | Internal name for your plugin. | Name can consist of lowercase letters, '-' and '_' symbols. |
| title | Human-readable name for the plugin that will appear on the Fuel web UI. | |
| description | Description of your plugin. | For example: Enables X functionality for nodes with Controller role. |
| version | Plugin version. | For the guidelines, see Semantic Versioning 2.0.0. |
| fuel_version | A list of plugin-compatible versions of Fuel. | For example, 2014.2-6.0. |
| package_version | version of plugin; Fuel uses this version to choose the way a plugin should be installed. | Example |
| is_hotpluggable | Set this parameter to 'true' to enable installation of a plugin on top of already deployed environment. Use this parameter only with application level plugins that have no core functionality. Also, the plugin must define a role that Fuel can apply to a new node, which has not already been provisioned. This role can be co-located with another role as long as they are being provisioned onto a new node but not the one that was previously provisioned or deployed. | See the template with the parameter set to 'false' by default. |
| releases | a list of OpenStack releases compatible with the plugin. | For example, 2014.2-6.0. |
| os | a name of supported Linux distribution | For example, Ubuntu or CentOSe |
| version | A version of OpenStack release | |
| mode | A list plugin-compatible modes. | 'ha' is used if plugin supports High Availability;’'multinode' - if it does not. |
| deployment_scripts_path | A path in your plugin directory where all deployment scripts for the release are located relative to the top of the plugin directory. | |
| repository_path | A path in your plugin directory where all packages for the release are located relative to the top of the plugin directory. | Example |
Plugins deployment order
Beginning with Fuel 6.1 release, you can specify the order in which plugins are deployed. This is especially useful if several plugins should be enabled in one environment. For example, plugins for network configuration should be run before plugins installing software services. For each stage name plugin developer adds a postfix, which defines the stage of specific execution order of the task. Let's have a look at the following sample:
The tasks.yaml file of Fuel plugin A:
role: ['primary-controller', 'controller']
stage: post_deployment/100
type: shell
parameters:
    cmd: bash deploy.sh
    timeout: 42
The tasks.yaml file of Fuel plugin B:
role: ['primary-controller', 'controller']
stage: post_deployment/50
type: shell
parameters:
    cmd: bash deploy.sh
    timeout: 42
During post_deployment stage execution, the task of plugin B
will be run before plugin post task of plugin A, because
post_deployment/50 is lower than post_deployment/100.
Nevertheless, in some cases plugins do not know about each other so the best
way to solve the problem is to define the convention of ranges which
plugin developers will be able to use:
| 0 - 999 | hardware configuration, for example drivers configuration |
| 1000 - 1999 | reserved for future uses |
| 2000 - 2999 | disks partitioning and volumes configuration |
| 3000 - 3999 | reserved for future uses |
| 4000 - 4999 | network configuration |
| 5000 - 5999 | reserved for future uses |
| 6000 - 6999 | software deployment |
| 7000 - 7999 | reserved for future uses |
| 8000 - 8999 | monitoring services deployment |
How the deployment order works in specific cases
- If one network plugin defines stage: post_deployment/100
and another one has stage: post_deployment/2000, they will be installed in the right order without knowing about each other.
- If there are two plugins which implement monitoring, plugin developers
can figure out which plugin should be installed first and tune postfixes accordingly.
- If two tasks have the same priority, they should be sorted in alphabetical
order by name and the first in the list should be deployed first.
- If several tasks with the same postfix priority are present in a single plugin,
then they should be deployed in the same order in which they specified in the file.
- Postfix can be negative or positive, floating or integer number.
Additional stages
Additional plugin-specific stages can be defined:
- hw_configuration
- disk_partitioning
- network_configuration
- software_installation
With the already existing stages:
- pre_deployment
- post_deployment
And, finally, a new stage:
- monitoring
In this case, plugin developer will be able to work with a single entity without some additional postfixes.
How to display plugin restrictions to users
Sometimes you might need to provide restrictions for your plugin in the Fuel UI. That means, all incompatible options (e.g. Networking Setup) should be somehow grayed out.
What are restrictions?
Restrictions define when settings and setting groups should be available. Each restriction is defined as a condition with optional action and message:
restrictions:
  - condition: "settings:common.libvirt_type.value != 'kvm'"
    message: "KVM only is supported"
  - condition: "not ('experimental' in version:feature_groups)"
    action: hide
- condition is an expression written in Expression DSL. If returned value is true, then action is performed and message is shown (if specified).
- action defines what to do if condition is satisfied. Supported values are "disable", "hide" and "none". The "none" value can be used just to display message. This field is optional (the default value is "disable"):
- disable - plugin checkbox (placed into the Settings tab of the Fuel web UI) turns inactive and has a yellow triangle with a pop-up warning (when hovering a mouse).
- hide - when incorrect parameters are selected, the plugin checkbox will not appear in the Settings tab of the Fuel web UI at all.
- none - plugin checkbox stays active and has a yellow triangle with a warning (when hovering a mouse).
- message is a message that is displayed if the condition is satisfied. This field is optional.
- strict is a boolean flag which specifies how to handle non-existent keys in expressions. If it is set to true (default value), exception is thrown in case of non-existent key. Otherwise values of such keys have null value. Setting this flag to false is useful for conditions which rely on settings provided by plugins:
restrictions:
  - condition: "settings:other_plugin == null or settings:other_plugin.metadata.enabled != true"
    strict: false
    message: "Other plugin must be installed and enabled"
There are also short forms of restrictions:
restrictions:
  - "settings:common.libvirt_type.value != 'kvm'": "KVM only is supported"
  - "settings:storage.volumes_ceph.value == true"
Note, that you can not only add restrictions to the checkbox, but also to the plugin-related fields. Here is the example implementation:
attributes:
  # Show contrail only in supported network config
  metadata:
    restrictions:
      - condition: "not (cluster:net_provider == 'neutron' and networking_parameters:segmentation_type == 'vlan')"
        message: "Please use Neutron with VLAN segmentation, the only network type supported with Contrail plugin."
  contrail_asnum:
    value: '64512'
    label: 'AS Number'
    description: 'AS number for BGP communication'
    weight: 10
    type: "text"
    regex:
      source: '^(?:(6553[0-5])|(655[0-2]\d)|(65[0-4]\d{2})|(6[0-4]\d{3})|([1-5]\d{4})|([1-9]\d{1,3})|([1-9]))$'
      error: "Invalid AS number"
  contrail_private_cidr:
    value: '10.109.3.0/24'
    label: 'Private network CIDR'
    description: 'CIDR for private network used in Contrail inter-node communication'
    weight: 20
    type: "text"
    regex:
      source: '^(?:\d|1?\d\d|2[0-4]\d|25[0-5])(?:\.(?:\d|1?\d\d|2[0-4]\d|25[0-5])){3}(?:\/(?:[1-2]\d|[8-9]))$'
      error: "Invalid network CIDR"
Such a restriction will be then displayed in the Fuel web UI as follows:

Example implementation
Here is the example implementation of the restriction:
              - data: "disabled"
                label: "Mellanox drivers and plugins disabled"
                description: "If selected, Mellanox drivers, Neutron and Cinder plugin will not be installed."
                restrictions:
                  - "settings:storage.iser.value == true"
              - data: "drivers_only"
                label: "Install only Mellanox drivers"
                description: "If selected, Mellanox Ethernet drivers will be installed to support networking over Mellanox NIC. Mellanox Neutron plugin will not be installed."
                restrictions:
                  - "settings:common.libvirt_type.value != 'kvm'"
              - data: "ethernet"
                label: "Install Mellanox drivers and SR-IOV plugin"
                description: "If selected, both Mellanox Ethernet drivers and Mellanox network acceleration (Neutron) plugin will be installed."
                restrictions:
                  - "settings:common.libvirt_type.value != 'kvm' or not (cluster:net_provider == 'neutron' and networking_parameters:segmentation_type == 'vlan')"
How to migrate plugins from 1.0.0 to 2.0.0 package version
Beginning with Fuel 6.1, new plugins format is supported. Note, that new format is not compatible with Fuel 6.0.
For new plugins, Fuel Plugin Builder builds RPM packages instead of fuel plugin archives.
In order to migrate from old format to new, follow these steps:
- Get the latest fuel plugin builder version, 2.0.0 or higher.
pip install fuel-plugin-builder
- Change the value of package_version parameter in metadata.yaml file from 1.0.0 to 2.0.0.
- Run the following command:
fpb --check plugin_path
and fix the errors one by one or follow the instructions below.
Updates
If your plugin uses "controller" role in tasks.yaml file, make sure that you have also specified the "primary-controller". In new plugins, "controller" and "primary-controller" should be defined explicitly. In previous version, you could indicate "controller", and then the "primary-controller" was added at the backend automatically.
Brand new features
Several obligatory fields are added to metadata.yaml file:
- groups field is used to specify group which your plugin belongs to. Either of the options is available:
- network
- storage
- storage::cinder
- storage::glance
- hypervisor
- monitoring.
If your plugin does not belong to any of these options, set an empty list as a value for "groups" parameter.
- authors field provides the list of authors. Here you should specify your or your company's name.
 Note: No commas should be used in authors field
       don't:
       authors: ['Vyacheslav Struk, Mirantis', 'Oleksandr Martsyniuk, Mirantis']
       do:
       authors: ['Vyacheslav Struk', 'Oleksandr Martsyniuk']
- licenses field contains the list of licenses.
- homepage field sets a link to plugin's project.
See the Contrail plugin metadata.yaml file for example.
One more task type is introduced: the reboot task is useful if you perform node configuration which requires reboot; for example, in case of linux kernel parameters configuration.
For information about reboot task type, see the Plugins wiki.
Plugin versioning system
When new functionality, minor updates or security fixes should be delivered, plugin developer creates a new version of the plugin; this can be major or minor one:
- major - changes in API, functionality, major OpenStack release introduced.
- minor - security fixes only.
In 6.0, plugins had .fp format only. It’s deprecated now.
In 6.1 and higher, only RPM plugins are used. Their versioning is performed as follows:
| Plugin file format | fuel-plugin value | metadata.yaml | major | minor | |
|---|---|---|---|---|---|
| RPM | fuel-plugin-1.0-1.0.0 | 1.0 | 1.0.0 | 1.0.0 | 1.0.1 |
Here is the example: Let's suppose that a plugin has 1.0.1 version in the metadata.yaml file. The plugin file should then have a different format: plugin-1.0-1.0.1.rpm.
Update procedure
| Update | Limitations | |
|---|---|---|
| fp | NO | |
| RPM | YES | Can be updated to minor version only with fuel plugins --update <fuel-plugin-file> command. To get a major one, user has to download it from Fuel Plugins Catalog and create a new environment from scratch.
|
Versioning scheme
- for .fp plugins versioning is not supported at all. That means, user has to download&install the plugin from scratch.
- for RPM plugins, it looks as follows:

Important note
Please, consider changing the versioning scheme for customized packages to have clear indicator which package is installed - the ones that enter Mirantis OpenStack or customized ones.
Otherwise, there is need to check python files to understand which package is actually installed.
How it works from the inside
Installation
Installation procedure consists of the following steps:
- User copies fuel_plugin_name-1.0-1.0.0-1.noarch.rpm file on the Fuel Master node with secure copy.
- Then, after it’s copied to the Fuel Master node, the user runs the following command:
fuel plugins --install fuel_plugin_name-1.0-1.0.0-1.noarch.rpm - Fuel client installs the contents of the fuel_plugin_name-1.0-1.0.0-1.noarch.rpm package to the /var/www/nailgun/plugins/fuel_plugin_name-1.0.
- Fuel client registers the plugin using REST API Service (Nailgun); it sends a POST request with the contents of metadata.yaml file to /api/v1/plugins url.
Configuration
Configuration procedure consists of the following steps:
- When a new environment is created, Nailgun tries to find plugins which are compatible with the environment.
- Nailgun merges the contents of the environment_config.yaml files with the basic attributes of the environment and generates a separate group and the checkbox on the Fuel web UI for each plugin.
- The plugin is disabled until the user enables it. After user selected the plugin checkbox, the Fuel web UI sends the data to Nailgun. Nailgun parses the request and creates relations between Plugin and Cluster models.
Prioritization of Repositories
You can use priorities to configure plugin’s repositories instead of shutting them down completely, which may lead to the failed deployment. You can specify the priorities for plugin's repositories in Nailgun’s settings.yaml. Default priorities for Plugins' repos look like:
REPO_PRIORITIES:
  plugins:
    centos: 10
    ubuntu: 1100
These priorities should be higher than OS/Fuel one, because a user may want to override some package from OS/Fuel.
Virtual IP reservation via Fuel Plugin's metadata
Some plugins require an additional VIP to enable proper configuration. Previously, VIP reservation was based on network metadata. Now, it is based on the network roles' description. This enables a plugin developer to create extra VIPs to be used in developer's deployment scripts.
First, a user should define VIPs in the plugin metadata. Then, install a plugin before creating an environment. In upcoming releases, the requirement to install a plugin prior to environment creation will be removed.
For example, Zabbix can be configured in a way that it receives SNMP traffic on a dedicated VIP. In that case, a plugin developer can define extra VIPs in a plugin configuration file, and use it as a puppet resource.
VIP reservation is possible only via plugin metadata. This is done by adding a new file ‘network_roles.yaml’, which looks like this:
- id: "name_of_network_role"
  default_mapping: "public"
  properties:
    subnet: true
    gateway: false
    vip:
      - name: "test_a"
        alias: "alias_name"
	namespace: "haproxy"
        node_roles: ["primary-controller", "controller"]
      - name: "test_b"
Note that 'alias', 'namespace', and 'node_roles' parameters are optional.
- 'default_mapping' - a name of a network to map the network role by default. So, VIP will be allocated on that network by default (that mapping can be changed in the network template). Thus, several network roles should be defined if VIPs should be allocated in different networks.
- 'name' - a string that contains a unique name within the environment used in the Nailgun database and for serialization in the orchestrator.
Note: Names for network interfaces are generated automatically using first 13 characters of a VIP’s name. Therefore, if several VIPs are introduced by the same plugin, their names must differ in first 13 characters. Also, do not use the word ‘vip’ in a VIP’s name, as it will be added automatically where necessary.
- 'alias' - a string used to solve a compatibility issue with REST API to run tests within the OpenStack Testing Framework that use the old notation.
- 'namespace' - a string that points to a network namespace to be used for landing of the VIP, null if not defined.
Note: You must specify a namespace for a VIP, otherwise it still will be put into network_metadata['vips'] in Hiera, where all available VIPs are stored, but not handled by Pacemaker. So, a plugin can use it in its own way.
- 'node_roles' - a list of node roles where VIPs should be set up. If not defined, its value will be set to ["primary-controller", "controller"].
Note: A node must have Pacemaker installed that automatically allocates resources for all VIPs. In Fuel 6.1, VIPs were processed manually.
Known issue:
It should be mentioned, that only new network roles can be requested in a plugin. Previously defined core network roles cannot be redefined/extended in a plugin.
For more information, see LP1487011.
Configuration of Fuel Plugins with new roles
Beginning with Fuel 7.0, after adding and enabling custom plugins a user can define a new role described in the plugins via Web UI as well as via Fuel CLI. In such case, in the Settings tab you can select a plugin role from a roles list in the Nodes tab and attach it to specific nodes. And vice versa, it should not be displayed in the roles list when the plugin is disabled for the cluster (environment).
If you want to disable a plugin, but there are nodes with this plugin role in a cluster, then follow the existing mechanism: in the Nodes tab remove the plugin role from all the nodes and then disable the plugin in the Settings tab.
NOTE: In previous versions of Fuel, when a cluster is deployed, you could not disable a plugin and, as a result, remove plugin role(s) from nodes. Since Fuel 8.0, you can remove a custom role node and redeploy your environment. To remove a custom role node correctly, add "reexecute_on" tasks:
  - id: my-task
    groups: [primary-controller, controller]
    reexecute_on: [deploy_changes]
This configuration will run "my-task" task on all controllers every time you deploy changes. You can handle scale-down case using this approach.
New node’s roles with a volume’s partition and tasks info can be described in config yaml files that will be integrated in Nailgun. The Fuel plugin builder should automatically create a new node role based on a plugin name in a yaml file.
The basic skeleton describing a node’s role in the ‘node_roles’ yaml file:
role_name:
  name: "Some plugin role"tasks
  description: "Some description"
  conflicts:
    - some_not_compatible_role
  limits:
    min: 1
  restrictions:
    - condition: "some logic condition"
      message: "Some message for restriction warning"
Description of the volumes’ partition in ‘volumes’ yaml file:
volumes:
  - id: "role_volume_name"
    type: "vg"
    min_size: {generator: "calc_min_os_size"}
    label: "Role specific volume"
    items:
      - mount: "/"
        type: "lv"
        name: "root"
        size: {generator: "calc_total_root_vg"}
        file_system: "ext4"
      - mount: "swap"
        type: "lv"
        name: "swap"
        size: {generator: "calc_swap_size"}
        file_system: "swap"
volumes_roles_mapping:
  role_name:
    - {allocate_size: "min", id: "os"}
    - {allocate_size: "all", id: "role_volume_name"}
Previously, pre/post deployment tasks were kept only in tasks.yaml, which does not allow specification of tasks' dependencies. Now, we have a possibility to describe deployment tasks with tasks dependencies in the deployment_tasks.yaml file. The old tasks.yaml is still supported, however it is recommended to use the new deployment_tasks.yaml.
Description of a new group in ‘deployment_tasks.yaml’:
- id: role-name
  type: group
  role: [role-name]
  requires: [controller]
  required_for: [deploy_end]
  parameters:
    strategy:
      type: parallel
In metadata for a plugin’s role a developer can describe conflicts with other roles such as already present in ‘openstack.yaml’. Each plugin should describe the list of provided roles for proper name referencing.
User can declare several new node roles in one plugin. It can be useful for tasks order and provide granular way for a plugin developer to build their own plugins on top of others.
NOTE: Plugins with old format also will be supported.
NOTE: The role '*' is supported for deployment tasks. Also a list of tasks' names can be specified in a role's field.
Deployment
After environment is created and configured, user starts a deployment. Meanwhile, Nailgun gets the list of enabled plugins from the database. For each plugin from the list, Nailgun parses tasks.yaml file:
- role: ['controller']
  stage: post_deployment
  type: shell
  parameters:
    cmd: bash deploy.sh
    timeout: 42
- role: '*'
  stage: pre_deployment
  type: shell
  parameters:
    cmd: echo all > /tmp/plugin.all
    timeout: 42
For example, we have a two-node environment deployed. A node has a Controller role with UID 7 and Compute role with UID 8. In this case, the task executor generates the following tasks:
{
    "pre_deployment": [
        {
            "uids": ["8", "7"],
            "parameters": {
                "path": "/etc/apt/sources.list.d/fuel_plugin_name-1.0.0.list",
                "data": "deb http://10.20.0.2:8080/plugins/
                fuel_plugin_name-1.0.0/repositories/ubuntu /"
            },
            "priority": 100,
            "fail_on_error": true,
            "type": "upload_file",
            "diagnostic_name": "fuel_plugin_name-1.0.0"
        },
        {
            "uids": ["8", "7"],
            "parameters": {
                "src": "rsync://10.20.0.2:/plugins/fuel_plugin_name-1.0.0/deployment_scripts/",
                "dst": "/etc/fuel/plugins/fuel_plugin_name-1.0.0/"
            },
            "priority": 200,
            "fail_on_error": true,
            "type": "sync",
            "diagnostic_name": "fuel_plugin_name-1.0.0"
        },
        {
            "uids": ["8", "7"],
            "parameters": {
                "cmd": "echo all > /tmp/plugin.all",
                "cwd": "/etc/fuel/plugins/fuel_plugin_name-1.0.0/",
                "timeout": 42
            },
            "priority": 300,
            "fail_on_error": true,
            "type": "shell",
            "diagnostic_name": "fuel_plugin_name-1.0.0"
        }
    ],
    "post_deployment": [
        {
            "uids": ["7"],
            "parameters": {
                "cmd": "bash deploy.sh",
                "cwd": "/etc/fuel/plugins/fuel_plugin_name-1.0.0/",
                "timeout": 42
            },
            "priority": 100,
            "fail_on_error": true,
            "type": "shell",
            "diagnostic_name": "fuel_plugin_name-1.0.0"
        }
    ],
    "deployment_info": "<Here is regular deployment info>"
}
| Task | Comment |
|---|---|
| pre_deployment | 1st subtask: Generated automatically by Nailgun. Adds a new repository for the node. Repository's path is built according to the following template: http://{{master_ip}}:8080/plugins/{{plugin_name}}-{{plugin_version}}/{{repository_path}} Where:
2nd subtask: Generated automatically by Nailgun.Using rsync, copies plugin deployment scripts on the target nodes. Path to these files is pretty similar to the repository path. The only difference is that the deployment scripts path is taken from deployment_scripts_path that is placed into metadata.yaml file. 3rd subtask: Initiated by user and taken from tasks.yaml file, converted to task executor format. |
| post_deployment | Has only one task which is taken from tasks.yaml file; uids field contains a list of nodes on which user should run a particular task. In this example, tasks.yaml file has "role: ['controller']" and this role is assigned to controller |
| deployment_info | Contains configuration information, required for deployment and not related to plugins. |
Bugs
All bugs for specific plugins are reported in their projects.
The list of already existing LP projects can be found here.
Please note that if your bug is related to Fuel Plugin Framework, you should report it in Fuel project.
Importance criteria
Development bugs
- Critical = can't deploy anything and there's no trivial workaround; data loss; or security vulnerability
- High = specific hardware, configurations, or components are unusable and there's no workaround; or everything is broken but there's a workaround
- Medium = specific hardware, configurations, or components are working incorrectly; or is completely unusable but there's a workaround
- Low = minor feature is broken and can be fixed with a trivial workaround; or a cosmetic defect
- Wishlist = Not really a bug, but a suggested improvement
Documentation bugs
- Critical = following the instructions from documentation can cause outage or data loss
- High = documentation includes information that is not true, or instructions that do not yield the advertised outcome
- Medium = important information is missing from documentation (e.g. new feature description)
- Low = additional information would improve reader's understanding of a feature
- Wishlist = cosmetic formatting and grammar issues
Status
All bugs, both development and documentation can have the following statuses:
- New. When you find a bug, you should file it into your plugin-specific project in Launchpad (if related to Fuel Plugin Framework, please use Fuel instead).
New is the default state assigned to the bug automatically when it was reported. Make sure there is no bug already filed for the same issue (use advanced search filters at LaunchPad), then enter the details of your report.
- Incomplete. The bug report is incomplete and needs more information before it can be triaged.
If you lack information to properly reproduce or assess the importance of the bug, you should ask the original reporter for more information.
- Confirmed. Someone besides the original reporter believes that this report describes a genuine
bug in enough detail that a developer could start to work on a fix. The person must make sure that milestone, importance and assignee are present and set properly. Still the bug could not be reproducible or confirmed as genuine.
- Triaged (optional). The bug supervisor believes the bug report contains all information a developer
needs to start work on a fix. It is clear how to fix the bug and solution can be posted in the comments. Sometimes the implementation of the fix will be straightforward and you would jump directly to bugfixing, but in some other cases, you would just post your complete debugging analysis and give someone else the opportunity of fixing the bug.
- In progress. At this stage, a developer starts working on the fix. During that time, in order to avoid
duplicating the work, this status should be set immediately when developer starts the work on the issue. Note, that when the commit is created (with sending the first patch set out to review) and Closes-Bug tag is put into the commit message, this status is assigned to the bug automatically. If the developer was not specified manually, then his/her name will appear in the bug report after sending out the first patch set for review.
- Fix committed. Once the change is reviewed, accepted, approved by Core Reviewer (with the
subsequent merge to the master branch), it will automatically move to Fix committed status.
- Fix released. Someone besides the assignee has verified that the issue does not manifest after the fix is applied.
The status is left for QA to mark bugs as verified after fix is merged to the master branch.
How to report a bug
- Make sure you're registered at LaunchPad. If not, see the official OpenStack Developer's Guide.
- Report a bug in Launchpad in the Fuel Plugins project: enter https://launchpad.net/fuel-plugins.
- Click Report a bug link:
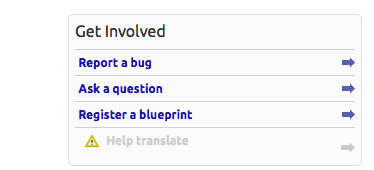
- Fill in Summary field for a bug. It is going to be the headline. The headline must cointain plugin name (for example, EMC Plugin) in square brackets. Please be descriptive but short and to the point:
- Bad - "<plugin-name> doesn’t install"
- Good - "<plugin name> fails to install in HA mode when “Neutron with VLANs” network is selected"
- Enter “Further information”. This is a bug description. Let's focus on every issue it has:
- Description of the environment. Provide enough relevant information:
- Output of http://fuel-master-node:8000/api/version/
- Operating System
- Reference Architecture (HA / non-HA)
- Network model (Nova-network, Neutron+VLAN, Neutron+GRE, etc.)
- Related Projects installed (Savanna, Murano, Ceilometer)
- Steps to reproduce:
- Bad: Run the deployment in HA configuration
- Good:Install the Fuel Master node. Copy the plugin to the Fuel Master node and install it. Create a new cluster.
- Expected result:
- Good: The plugin is deployed, up and running.
- Actual result:
- Bad: Plugin fails to install.
- Good: Plugin installation fails with the error message “xxx”. Please see the attached screenshot which shows the errors on “Logs” tab.
- Workaround:
- Bad: Don’t use “Neutron with VLANs”
- Good: Apply patch/Change configuration from x to y.
- Impact:
- Bad: Needs to be fixed.
- Good: Deployment cannot be completed, because customer requires us to implement a use case for Savanna and “Neutron with VLANs”. Changing configuration to “Neutron with GRE” is not as acceptable option here so this has to be addressed as soon as possible.
- Select visibility for the bug under “This bug contains information that is” field. Either leave it as “Public” by default.
- Add attachments under “Extra Options” section
- Logs
- Diagnostic snapshot
- Screenshots
- Add <plugin-name> tag.
- After everything is entered, select the “Submit bug report” button.

Important note:
please, keep private bugs in internal bugtrackers.
Do not report any of those at LaunchPad.
Common recommendations for bug triage workflow
When triaging bugs, please take into consideration the following:
- Review all New bugs. Plugin development team is responsible for the review. To create a plugin’s team, follow How to create plugin development team in Launchpad.
- Target each New bug to the release milestone under development and set the corresponding bug status.
- Consider changing the bug title to be more specific: replace generic statements like "deployment timeout exceeded" with description of the root cause (if identified) or symptoms that are unique for that bug. Feel free to use tags in the bug title and the report with creating new tags manually when required.
- Assuming all bugs reported in Fuel Plugins project are public, request the missing information, and set the bug status to Incomplete. Add a comment using the following template: We didn't receive required details in order to correctly troubleshoot the problem, so we are setting this bug into Incomplete state. Please provide the requested information and we will investigate this issue further. If you think it was set to Incomplete by mistake, please comment in the bug.
- If there is sufficient information on how to reproduce the bug and milestone, importance and assignee are properly set, set the status to Confirmed.
- If there is sufficient information to start implementing a fix, set the status to Triaged.
- If the root cause of the bug is identified, include it in the bug description.
- Review all Incomplete bugs.
- If an Incomplete bug has new updates, use the same steps as described above for New bugs.
- If an Incomplete bug did not have any updates for 4 weeks, close it as Invalid. Add a comment using the following template: This bug was incomplete for more than 4 weeks. We cannot investigate it further so we are setting the status to Invalid. If you think it is not correct, please feel free to provide more information and reopen the bug, and we will look into it further.
- During new release scoping, review all bugs targeted at that release milestone, make sure it is updated daily by the assignee (or bug reporter if the bug is not assigned to a person).
- Every status change of a bug should be accompanied by a comment explaining the reason why the change was made.
Bug report tags
For tracking bugs better, please, use different tags:
- every plugin should have its own tag that has <plugin name> format.
- every documentation issue should be marged as docs.
How to create plugin development team in Launchpad
To make the bug tracking process for plugins as simple as possible, plugin developers should create their own teams in Launchpad. Here are the step-by-step instructions:
- Enter Launchpad site.
- Click Register a team link:
- Fill in the fields. You should also provide the following links to the plugin repo, README.md file and Fuel Plugins Catalog:
- Select Membership policy:

- Click Create Team button to finish.


For information on adding members and running your team, see the official Launchpad guidelines.
Tutorials
How To: Build and install a plugin from source
These instructions explain how to build a plugin package from the source repository. This is useful when you want to install a plugin's version that isn't available on the Fuel plugins catalog yet.
1. Install the fuel-plugin-builder script.
2. Clone the plugin's repository.
git clone https://git.openstack.org/stackforge/fuel-plugin-neutron-fwaas
3. Go to the plugin's directory and switch to the desired Git branch or tag (optional).
4. Build the plugin's package.
fpb --build ./fuel-plugin-neutron-fwaas
5. The resulting RPM package should be available in the current directory. Follow the rest of the installation procedure as described in the README.md file of the plugin.
How To: Debug UI
UI elements are described in environment_config.yaml file. To check how your built plugin looks on the Fuel web UI, install and create an environment:
1. Enter plugin directory
cd fuel_plugin_name
2. Edit environment_config.yaml file
3. Build a plugin
fpb --build <plugin_name>
4. Install plugin, use "--force" parameter to replace the plugin if you have it installed:
fuel plugins --install fuel_plugin_name-1.0.0.fp --force
5. Create new environment
fuel env --create --release 1 --name test
6. Check that UI correctly shows elements from environment_config.yaml file
How To: Debug deployment
To show how it works, let's create a simple plugin with an error in the deployment script.
1. Create a plugin:
fpb --create fuel_plugin_name
2. Add an error in the default deployment script (fuel_plugin_name/deployment_scripts/deploy.sh):
#!/bin/bash
# It's a script which deploys your plugin
echo fuel_plugin_name > /tmp/fuel_plugin_name
# Non-zero exit code means, that a script executed with error
exit 1
3. If you do not want to run plugin build, but you want to check that plugin format is correct, you can use --check parameter with the following command:
fpb --check fuel_plugin_name
4. Build and install the plugin:
fpb --build fuel_plugin_name/
fuel plugins --install fuel_plugin_name/fuel_plugin_name-1.0.0.fp
5. Use the Fuel web UI or CLI to create an environment:
fuel env create --name test --rel 1 --mode multinode --network-mode nova
6. Enable the plugin on Fuel web UI Settings tab and then add several nodes. The first node has Controller role, the second node has Cinder and Computes roles.
fuel node set --node 1 --env 1 --role controller
fuel node set --node 2 --env 1 --role compute,cinder
7. Check that Nailgun generates correct configuration data that a user can set on Fuel web UI:
fuel deployment --default --env 1
 cat deployment_1/controller_1.yaml
 ...
 fuel_plugin_name:
   fuel_plugin_name_text: Set default value
...
8. Now can see that the file for target node contains plugin data.
NOTE:
The command mentioned above is useful when you do not know how your configuration data from Fuel web UI Settings tab will look like in /etc/astute.yaml file on target nodes.
9. Perform provisioning without deployment for two nodes:
fuel --env 1 node --provision --node 1,2
NOTE:
To reduce the time required for testing, make a snapshot after nodes are provisioned. Note that if you use virtual machines, make snapshots of your target nodes.
10. Now you can run deployment:
fuel --env 1 node --deploy --node 1,2
11. The deployment fails with the following message:
Deployment has failed. Method deploy. Failed to deploy plugin fuel_plugin_name-1.0.0
12. You can see an error in /var/log/docker-logs/astute/astute.log task executor logs:
[394] Shell command failed. Check debug output for details
[394] 13edd324-6a11-4342-bc04-66c659e75e35: cmd: bash deploy.sh
cwd: /etc/fuel/plugins/fuel_plugin_name-1.0.0/
stdout:
stderr:
exit code: 1
13. It fails due to the changes in deploy.sh script that you made in step 2. Let's assume that we do not know what happened and try to debug the problem:
# Go to the first node
ssh node-1
14. All plugin deployment scripts are copied to the separate directory on the target node; in this case, it is /etc/fuel/plugins/fuel_plugin_name-1.0.0/:
cd /etc/fuel/plugins/fuel_plugin_name-1.0.0/
# The directory contains our deploy.sh script, lets run it
bash deploy.sh
# And check exit code
echo $? # Returns 1
NOTE:
If you use puppet for your plugin deployment, run the following command on the target node to check if your puppet manifests work correctly:

puppet apply --debug --modulepath=/etc/fuel/plugins/fuel_plugin_name-1.0.0/puppet/modules:/etc/puppet/modules /etc/fuel/plugins/fuel_plugin_name-1.0.0/puppet/manifests/site.pp
15. Now we can see that deployment fails due to non-zero exit code error. To fix the problem and check that the proposed solution works, edit the /var/www/nailgun/plugins/fuel_plugin_name-1.0.0/deployment_scripts/deploy.sh script on the Fuel Master node. Note that there is no need to rebuild and reinstall a plugin:
#!/bin/bash

# It's a script which deploys your plugin
echo fuel_plugin_name > /tmp/fuel_plugin_name

# Now our deployment script returns 0 instead of 1
exit 0
16. If you run the deployment again, it goes successfully:
fuel --env 1 node --deploy --node 1,2
WARNING:
During the testing of your deployment scripts, make sure that your scripts are idempotent: they should work correctly when applied several times. Run environment deployment at least twice and check that your plugin works properly. The reason for this workflow is the following: Fuel can run deployment of your plugin several times in case the first deployment try failed. Also, your deployment scripts can be executed during OpenStack patching.
17. To make sure that plugin works without errors, revert snapshots which you made in step 6, and run deployment again:
fuel --env 1 node --deploy --node 1,2
18. In the same way with no plugin reinstallation, you can edit /var/www/nailgun/plugins/<fuel_plugin_name>-1.0.0/tasks.yaml file. Note that in this case to make sure that your tasks have a valid format, you should at least run the following command:
fpb --check /var/www/nailgun/plugins/fuel_plugin_name-1.0.0/
Plugin elements in the Fuel web UI
Here is an example of the environment_config.yaml file that contains all possible Fuel web UI elements:
attributes:

  # Text field
  fuel_plugin_name_text:
    type: "text"
    weight: 10
    value: "Default text"
    label: "Text field label"
    description: "Field description"
    regex:
      source: '\S'
      error: "Error field cannot be empty"

 # Select
  fuel_plugin_name_select:
    type: "select"
    weight: 20
    value: "value2"
    label: "Select label"
    description: "Select description"
    values:
      - data: "value1"
        label: "Value 1 label"
      - data: "value2"
        label: "Value 2 label"
      - data: "value3"
        label: "Value 3 label"

  # Checkbox
  fuel_plugin_name_checkbox:
    type: "checkbox"
    weight: 30
    value: false
    label: "Checkbox label"
    description: "Checkbox description"

  # Radio button
  fuel_plugin_name_radio:
    type: "radio"
    weight: 40
    value: "disabled"
    label: "Radio buttons label"
    values:
      - data: "data1"
        label: "Label data1"
        description: "Description data1"
      - data: "data2"
        label: "Label data2"
        description: "Description data2"
      - data: "data3"
        label: "Label data3"
        description: "Description data3"
After plugin is installed, additional elements will appear on the Settings tab of the Fuel web UI. Here are UI elemens for Elasticsearch-Kibana plugin:

Puppet in Fuel
Fuel does not use master Puppet. Task executor copies manifest from the Fuel Master node and runs puppet apply command on each target node. It is recommended that you use puppet tasks in your plugin instead of running puppet in shell tasks. Task executor has code with special logic which handles errors, if puppet apply command returns zero/non-zero exit code. Note that it does not mean that command is succeed or failed. That means, it returns '2' if there were changes during the execution: task executor parses /var/lib/puppet/state/last_run_summary.yaml file to determine the status of puppet run.
How to separate services from Controller with a plugin
Starting with Fuel 7.0, you can create and implement a plugin that allows any role or task to be broken up into sections and deployed on a custom role. This includes the high availability feature enabling as well.
Fuel includes a granular deployment framework that relies on a task based-deployment schema defining how each node role is deployed. To modify the granular deployment framework, you can create a plugin that inserts, overrides, or skips any given task. In addition, you can add any custom role that fulfils a task normally tied to the Controller role. Generally speaking, all Controller services are deployed on the Controller nodes directly.
- Note: In the granular deployment, all dependencies are preserved when skipping a task. A custom role must deploy either before or after the Controller role. For example, you cannot deploy tasks A, B, C, and D on the Controller, pause it, deploy the custom MyRole role, then finish tasks E through Z on the Controller role. For this reason, it is best to deploy your plugin in a self-sufficient way that does not rely on controller services.
If you want to change the deployment configuration, override the default setting using the Hiera tool.
Hiera overview
In spite of Puppet is static in configuration, it can customize deployment based on the metadata fed in from an external data source. In this case, Fuel uses Hiera to define node configuration.
Hiera is a key/value lookup tool for configuration data, but you can configure it to define the priority of the data sources.
Configuration items are stored in 3 different data structures:
- simple key/value,
- arrays,
- hashes.
Examples:
Key/value
role: “controller”
primary_controller: true

Array:
amqp_hosts: [“192.168.0.3:5673”,”192.168.0.4:5673”,”192.168.0.5:5673”]

Hash:
mysql:
 root_password: “OvEuZFyt”
 wsrep_password: “Secr3t”
Hiera also offers a hierarchy of configuration data. It has several layers of precedence in its hierarchy by default. The default /etc/hiera.yaml looks as follows:
---
:backends:
 - yaml

:hierarchy:
 - override/node/%{::fqdn}
 - override/class/%{calling_class}
 - override/module/%{calling_module}
 - override/plugins
 - override/common
 - class/%{calling_class}
 - module/%{calling_module}
 - nodes
 - globals
 - astute

:yaml:
 :datadir: /etc/hiera
:merge_behavior: deeper
:logger: noop
Any values defined in /etc/hiera/globals.yaml takes precedence over values defined in /etc/hiera/astute.yaml. The same is true for any value defined higher up. If a plugin defines a new YAML file and inserts itself in the hierarchy, it can override a given value as well.
Queries to hiera come in three forms:
- priority,
- array merge,
- hash merge.
The defined values can either override or be merged with other values. As an example, you can either merge the array of memcache_roles from astute.yaml and a custom plugin YAML or take the highest priority. The difference is in how puppet calls it:
Merged lookup:
    hiera_array(‘memcache_roles’)
Priority lookup:
    hiera(‘memcache_roles’)
In most cases, array lookups should be done with a priority lookup. In contrast, hash lookups in Hiera should always be done using the hiera_hash function.
Example:
astute.yaml contains:
mysql:
 root_password: “OvEuZFyt”
 wsrep_password: “Secr3t”
plugins.yaml contains:
    mysql:
      enabled: false
The results are vastly different if you do a priority lookup versus a hash lookup:
Priority lookup:
    $ hiera mysql
    {“enabled”=>false}
Hash lookup:
    $ hiera -h mysql
    {“enabled”=>false,“root_password”=>“OvEuZFyt”,”wsrep_password”=>“Secr3t”}
Hash merging in Hiera allows a plugin developer to tweak an individual setting in the configuration without duplicating all of the other values in a hash.
How a plugin can use Hiera
A plugin can modify any Hiera configuration data for a deployment to inform existing tasks how to deploy. For example, if you want to run memcached on a separate my-role role , you can override the memcache_roles array to say my-role instead of primary-controller, controller.
Deploying services into separate nodes
Rabbit and MySQL can be easily turned off on the Controller role by overriding the metadata in Hiera, as described above. This can be accomplished by disabling a service inside its respective service hash, indicated by a value enabled: false. However, some services such as Keystone is not so simple and require more configuration. For the specific details proceed with the sections below.
Defining a custom role in a plugin
If you want to deploy separate services on a different node from the Controller, you need to define a custom role first.
To define custom node roles in a plugin, fill out the node_roles.yaml file in your plugin’s base directory. A custom role that replaces an existing task must contain some particular fields to achieve this objective.
In addition to the default attributes, you need to include the following attributes in the plugin:
-
update_required - Corosync hosts, memcached hosts, and AMQP hosts are enumerated explicitly in configuration. All existing nodes for the specified roles will be refreshed before adding/removing a given node. This list should include all consumers of the service you are deploying.
-
public_ip_required - Internal-only services (like RabbitMQ) should not have a public IP.
-
has_primary - Required for any deployment that includes corosync.
-
conflicts - Roles containing sensitive data should not be combined with Compute. In our example, we also conflict with the Controller role because it could break if there is not a 1:1 mapping of controller and custom_role roles to all other nodes.
See Also:
Configuring Hiera
Database separation
Database separation is intended to be as flexible as possible for various deployment configurations including remote database creation, user creation, and different database servers for different services.
The list of the parameters configurable for MySQL and its metadata is as follows:
- MySQL root password (default is auto-generated)
- db_host or Database VIP
- db_create (defaults to true)
- db_user (defaults to service name)
- db_password (defaults to auto-generated value)
Additionally, for the MySQL hash on the Controller roles, you need to set mysql to enabled: false.
Adding in HA
High availability is key to any production deployment. Each service has HA configured through corosync or haproxy.
The following services are managed by corosync:
- Virtual IP addresses
- haproxy
- MySQL/Galera
- RabbitMQ
- Heat
- Neutron agents
This means that you need to include one or more of the following tasks in your custom role:
- cluster
- cluster-haproxy
- virtual_ips
- openstack-haproxy-SERVICENAME
- Note: Since RabbitMQ only requires corosync and not haproxy or a virtual IP, it only requires the cluster task for high availability. On the other hand, MySQL and Keystone would require all four of these.
The metadata requirements for corosync and haproxy are prepared to accept custom values through Hiera. For corosync itself, you need one key value that is corosync_roles. This is necessary because UDP configuration of Corosync requires all nodes to explicitly allow communication with each other. The value should equal the role name for your plugin as follows:
corosync_roles:
  - primary-standalone-keystone
  - standalone-keystone
- Note: This should only apply when evaluating your custom role. Refer to the detach-keystone plugin as an example.
If the service you want to detach requires HAProxy, include the following arrays to your plugin:
- servicename_nodes
- servicename_ipaddresses
- servicename_nodes_names
See detach-keystone plugin as an example.
If the service being separated requires memcached, specify memcache_roles in your override hiera YAML. This is necessary if your role is evaluated before the Controller role. However, in case your role is deployed after the Controller role, you can use memcached from the Controller role leaving this value unchanged.
RabbitMQ separation
Configure Hiera as follows:
- Set the amqp_hosts array on all nodes. Since the original list of hosts is generated in the globals task of the granular deployment, you need to override this value without merging. As there is no virtual IP to manage, it is the only value to control.
- Set rabbit_hash to enabled: false for the Controller roles.
Keystone separation
To meet a specific use case, decoupling the Keystone service from the Controller role, proceed with the following steps:
- 1. On the Controller node, view the task list for a created environment:
fuel graph --env 1 --download
The tasks we are concerned with for keystone are:
- keystone
- creates the keystone service
- keystone-db
- prepares the DB for keystone
- openstack-haproxy-keystone
- enables haproxy for keystone
- disable_keystone_service_token
- cleanup task for admin_token
- 2. Shift the tasks listed above to a custom keystone role (it is the “standalone-keystone” role in our example):
- Disable original keystone tasks creating a YAML file called deployment_tasks.yaml and defining new tasks with the type
skippedpreventing these tasks from running on the Controller role:
id: original_task_name
type: skipped
- Create a new task that reproduces the original one, but replace the requirements and role for the original task:
Original task
- id: keystone-db
 type: puppet
 groups: [primary-controller]
 required_for: [keystone]
 requires: [database]
 parameters:
    puppet_manifest: /etc/puppet/modules/osnailyfacter/modular/keystone/db.pp
    puppet_modules: /etc/puppet/modules
    timeout: 1800
New tasks
- id: keystone-db
 type: skipped

- id: task-keystone-db
 type: puppet
 role: [primary-standalone-keystone, standalone-keystone]
 required_for: [task-keystone]
 requires: [deploy_start, keystone-hiera-override, netconfig]
 parameters:
    puppet_manifest: /etc/puppet/modules/osnailyfacter/modular/keystone/db.pp
    puppet_modules: /etc/puppet/modules
    timeout: 1800
- 3. Ensure all new tasks depend on each other.
For each new task you create, ensure its dependencies line up with the tasks you marked as skipped. In the example above, task-keystone-db is a dependent task for task-keystone, which is another custom task that performs the same function.
See also:
Verifying changes
- Create an environment to test your task graph with 1 Controller node and 1 node with your custom role.
- Run
fuel plugins --sync - Run
fuel graph --env 1 --download
If successful, these should run without errors. If there is a syntax mistake, it returns a 500 error. For the proper YAML syntax, see the example plugins.
Procedures and limitations
Procedure for RabbitMQ
- Create a new custom role.
- Enable corosync (for HA).
- Override the amqp_hosts array on all hosts that consume AMQP.
- Disable rabbitmq on the Controller role.
Procedure for Galera
- Create a new custom role.
- Enable corosync (for HA).
- Override mysql hash: enable it for the custom role, disable it for the Controller role.
- Provide database_vip and haproxy for your role.
Procedure for Keystone
- Disable Keystone base task, haproxy task, and DB task on the Controller node.
- Create a new custom role.
- Add service_endpoint and public_service_endpoint VIPs in the custom role.
- Enable corosync (for the VIP, but keystone itself is stateless).
- Enable memcached.
- Enable dependency on database plugin.
- For SSL deployments, enable haproxy for Keystone on public VIP
Limitations for Keystone separation
- Keystone cannot run without MySQL and memcached.
- The Controller role provides these roles, but you cannot do a partial Controller deployment, stop, deploy keystone, and continue.
- Keystone public SSL is limited to one hostname.
Useful links
- Examples of plugins:
Creating documentation for Fuel Plugins
Fuel Plugins can provide brand different functionality, that's why you should not only develop a plugin itself, but also write documentation clear to end users.
Documentation package
To give all users the understanding of what you plugins does and how it was tested,
you need to have the following files in the plugin's repo under /doc folder:
- Test Plan - contains information on planned testing activities
- Test Report - contains information obtained during testing
- Plugin Guide - contains installation, configuration and usage instructions.
Please, note that your plugin's repo should also contain:
- LICENSE file with license specified correctly.
- copyright for specific repo files added at the file header. For details, see the corresponding section.
- README file with instructions on how to build your plugin, see the examples here.
- developer's specification - contains design and implementation details and explains which problem can be solved with the plugin. It is put into /specs folder.
When writing, please take style recommendations into consideration.
Following Gerrit workflow
Gerrit workflow provides the following advantages for Fuel Plugin documentation:
- aligns development and documentation writing cycles.
- provides shipping both specific plugin and related documentation at once.
- provides writing in RST (as already works for the specs).
- enables flexible updates for developers.
Documentation files structure and Sphinx usage
To simplify the build procedure, you can use Sphinx.
To enable it in your plugin's repo, follow these steps:
- Make sure you've got a /doc folder in your repo (according to diagram below).
- Consider splitting your Plugin Guide into smaller RST pieces. Sample can be found here.
- Check if you have index file in place. It will serve as the source to build the document. It also needs to be edited to include the RST pieces (check the sample).
- Add a Makefile using the sample. Makefiles are usually left as-is to enable PDF and html build (check the sample).
- Edit conf.py file. This file is in charge of the document's appearance and you can modify it according to your own needs:
- Enable page numbering in a proper manner.
- Get rid of blank pages before and after contents page.
- Commit your change.
- Try getting into /doc folder and running 'make latexpdf' out of it.
As the deliverable of this exercise, you should get a PDF version of your document in the /build folder.
Please, see the recommended file structure for Plugin Guide (as sample):

Style recommendations
- Spell out acronyms and abbreviations when they are first used and avoid using abbreviations that are ambiguous. For example, "OS" could mean either "Operating System" or "OpenStack".
- Do not add many links to external resources in main sections. It is recommended that you put them into Appendix section.
- Each link should have a brief description.Be sure to define any complex concepts and terms that are required to install/use/test the plugin.
- Use step-by-step instructions, structured with an introductory sentence followed by a numbered list of steps to take.
Acceptance criteria
Plugin-related documentation (Test Plan, Test Report, Plugin Guide, specification) should meet the following acceptance criteria:
- the documentation is written in RST and put into the plugin's repo
- the plugin version is specified correctly;it must resemble the one reflected in the plugin's metadata.yaml file
- all links to external documentation/resources should be present and put into Appendix
- all complex concepts are explained in a detailed and clear manner
Please, mind some specific recommendations for the following documentation:
- Plugin Guide should contain 2 main sections for installation and usage.
- The former should focus on 1) how/where to download a plugin 2) how to install a plugin 3) any additional prerequisite procedures (e.g. backend configuration).
- The latter should cover 1) how to use the plugin (e.g. a set of commands) with an example (commands usage with specific values is strongly required) 2) links to external documentation.
- If plugin has its own UI or supposes some actions to take in Horizon, the Plugin Guide must have screenshots with clearly seen UI elements.
- Test Plan and Test Report must have clearly specified prerequisites to make the plugin up and running.
- Plugin's specification must cover design and implementation peculiarities. See the template.
Checklist
| Issue | Tick if done |
|---|---|
| Plugin version is the one specified in the plugin's metadata.yaml file (see the example). | |
| All key terms/acronyms/abbreviations are put into the corresponding table and clearly explained or at least refer to other resources with detailed description. | |
| Plugin name doesn't somehow change within the document (like VPNaaS and vpnaas). Stick to one variant and use it along the text. | |
| If configuration of specific components (if any) is not covered within the document, then there must be a link pointing to the detailed step-by-step instructions. | |
| All UI elements are properly seen in the screenshots and or even highlighted to point at a specific action/element. | |
| All instructions are put into numbered lists to track the task accomplishment and navigate along the document. | |
| All instructions concerning Fuel UI wizard or Fuel web UI refer to the official documentation. |
Add your plugin to DriverLog
Once you plugin is ready, you can add it to DriverLog, following instructions from DriverLog wiki page. Before adding, please make sure that:
License and copyright
Fuel Plugins are licensed under Apache 2.0.
The plugin's repo should contain the following:
- the license as a separate file (LICENSE) - please, use the official license text.
- all files in the repository (except for configuration files and README) must have a copyright, see fuel-library repo.
Note, that configuration files can have the following format:
- yaml (see the example).
- erb (see the example).
- lua (see the example).
The Fuel Plugins can have extra components included.
To provide users with this information, make sure that the Plugin Guide has a separate section with the following table:
| Component | License |
|---|---|
| Component1 | License1 |
| Component2 | License2 |
FAQ
Where can I find Fuel Plugin Builder source code?
fuel-plugin-builder is located in fuel-plugins repository.
Are there any plugins examples?
All plugins for Fuel now have their own repos under Stackforge project.
How can I reuse Puppet modules from Fuel? According to the design, every plugin should have all necessary components to be then deployed. This means, every plugin should have its own copy of Fuel Puppet modules. If you do not want to keep copy of Fuel library manifests in your repository, you can use pre_build_hook to download the required modules during the plugin build. To do that, add the following code into your hook:
#!/bin/bash
set -eux
ROOT="$(dirname `readlink -f $0`)"
MODULES="${ROOT}"/deployment_scripts/puppet/modules
mkdir -p "${MODULES}"
REPO_PATH='https://github.com/stackforge/fuel-library/tarball/f43d885914d74fbd062096763222f350f47480e1'
RPM_REPO="${ROOT}"/repositories/centos/
DEB_REPO="${ROOT}"/repositories/ubuntu/

wget -qO- "${REPO_PATH}" | \
    tar -C "${MODULES}" --strip-components=3 -zxvf - \
    stackforge-fuel-library-f43d885/deployment/puppet/{inifile,stdlib}
The code then copies inifile and stdlib modules from fuel-library repository.
WARNING
To reuse existing Puppet manifests you can also specify several Puppet modules in your task with colon separator: for example, puppet_modules: "puppet/modules:/etc/puppet/modules". Note that we do not recommend using this approach, because Fuel puppet modules can be changed during OpenStack update procedure; this can lead to compatibility failures.
How can I download the packages which are required for a plugin? Use wget in your pre_build_hook script to download packages in the required directories:
#!/bin/bash
set -eux

ROOT="$(dirname `readlink -f $0`)"
RPM_REPO="${ROOT}"/repositories/centos/
DEB_REPO="${ROOT}"/repositories/ubuntu/

wget -P "${RPM_REPO}" http://mirror.fuel-infra.org/fuel-plugins/6.0/centos/glusterfs-3.5.2-1.mira2.x86_64.rpm
wget -P "${DEB_REPO}" http://mirror.fuel-infra.org/fuel-plugins/6.0/ubuntu/glusterfs-client_3.5.2-4_amd64.deb
It downloads two packages in your plugin's directories before Fuel Plugin Builder starts building repositories.
Why is there no /etc/astute.yaml file, when I run pre_deployment task?
If you have task with "stage: pre_deployment" parameter set, you will not find /etc/astute.yaml file on the target node during the task execution. The file /etc/astute.yaml is a symlink that is created before Fuel deploys a role.
Target node can have several roles and each role contains its own file with deployment data.
Here is the example of a node with ID 2 and two roles, Controller and Cinder:
root@node-2:~# ls -l /etc/ | grep yaml
-rw------- 1 root     root      8712 Nov 19 12:48 controller.yaml
-rw------- 1 root     root      8700 Nov 19 12:48 cinder.yaml
Let's assume that we need deployment data file for Controller role. We can use '/etc/controller.yaml' file directly in deployment script.
What is the user context that fuel plugin hooks are invoked as: root or fuel user? Plugins hooks are executed under the root.
Are the keystone IP addresses and user name or password available to the fuel plugin post_deployment hook? Keystone admin_token, admin_password are in /etc/astute.yaml and can be used in the post_deployment hook. For connection to keystone we should use management_vip:5000. management_vip is also in the astute.yaml. Also keystone url can be fetched from /root/openrc (OS_AUTH_URL), but this is hackish way.
Do multiple openstack controller nodes mean multiple neutronserver nodes?Neutron server is installed on each controller node. Are all the controller nodes' private IP (not VIP) available and accessible to the postdeployment hook?(because we want to run the avicontroller, network etconly once, but we have to run the plugin install on all neutronserver nodes)? Since there are multiple controller nodes, then fuel infrastructure automatically runs the plugin postdeployment hook on each of them.
The private IP is referred to the IP of VM, or what we call management IP - all people in OpenStack name it differently. On the post_deployment step all networks, controllers, e.t.c. are configured and run.
In pre-deployment, the astute.yaml is a symlink to the role specific yaml (controller, cinder etc) before the role is deployed, but in post-deployment how is astute.yaml organized - merged from all role yamls? The astute.yaml files are not merged during deployment process. Result file just astute.yaml for last deployed role. Specific astute.yaml can be found by role name.
How can I add a custom role? Current Plugin Architecture does not provide a way to define role. Starting with Fuel 6.1 you can use the Operating System role as a workaround.
In the tasks.yaml file use the base-os string to specify which task should be used for the role deployment.
- role: ['base-os']
  stage: post_deployment
  type: shell
  parameters:
    cmd: bash deploy.sh
    timeout: 42
When creating documentation for your plugin, ask the user to assign the Operating System role on the required node and specify the name to give this node, such as zabbix-01. In the deployment script you can query the user_node_name variable and decide if the script should deploy Zabbix related packages on the node.
...
user_node_name: zabbix-01
...
Channels of communication
If you have some questions left, feel free to use the openstack-dev mailing list (use [fuel][plugin] prefix). For instructions on mailing list usage, see openstack-dev mailing list instructions.