Meteos/ExampleNativebyes
Contents
Detect a Spam Mail using Meteos
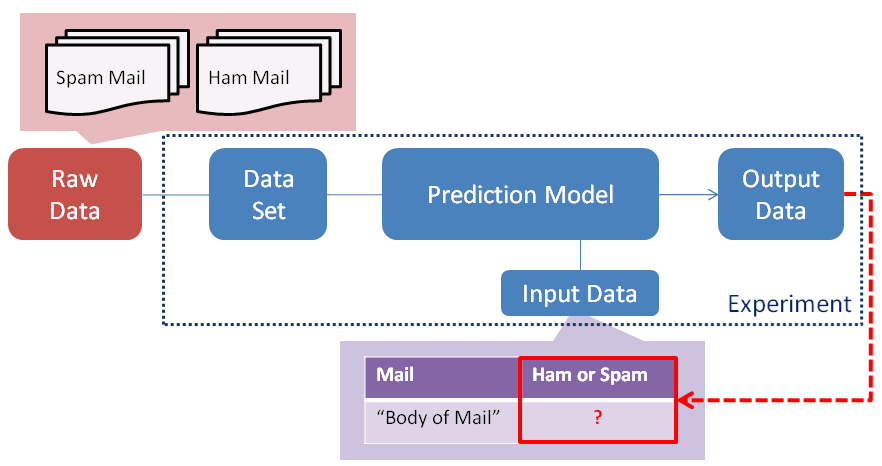
In this example, you create a prediction model which predict it is a spam mail or not by using Native byes Model.
1. Create a experiment template
Create template of experiment.
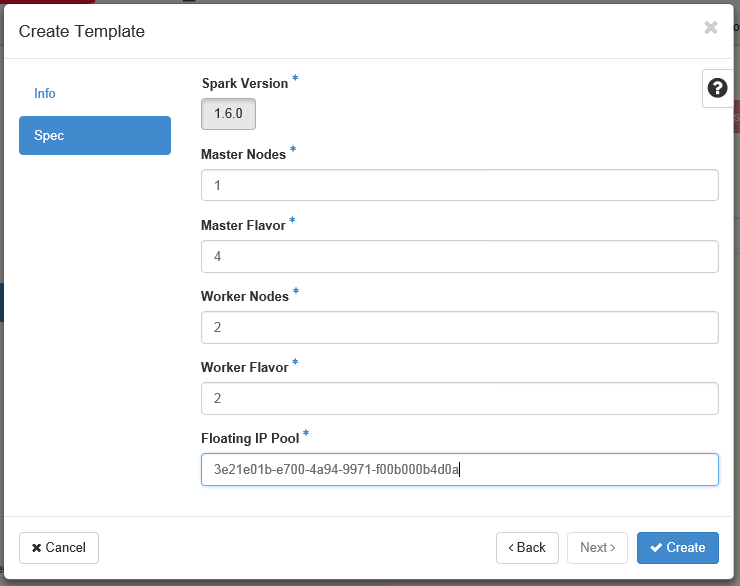
Select a Template panel and create template with below parameters.
Floating IP Poll differs depending on environment.
2. Create a experiment from template
Create a experiment by using template created in the above step.
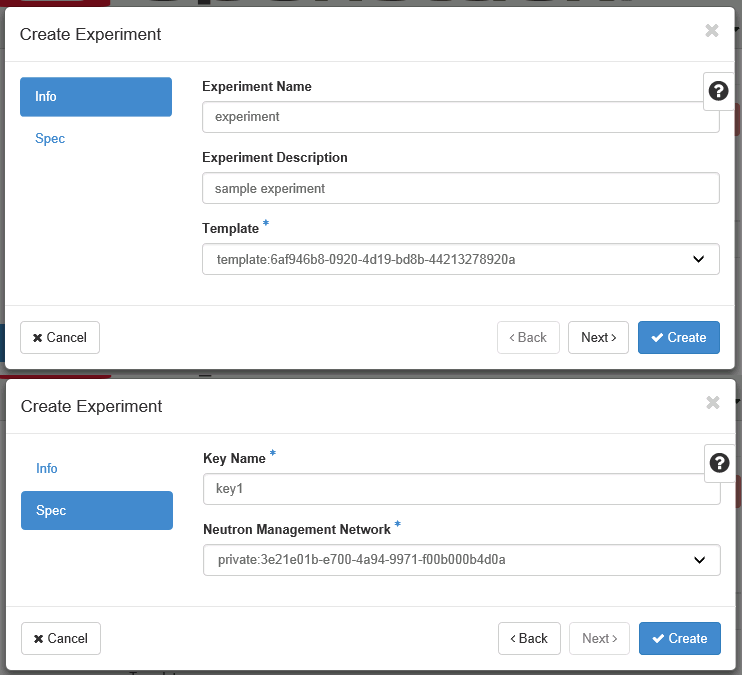
Select a Experiment panel and create experiment with below parameters. You have to create a keypair in advance.
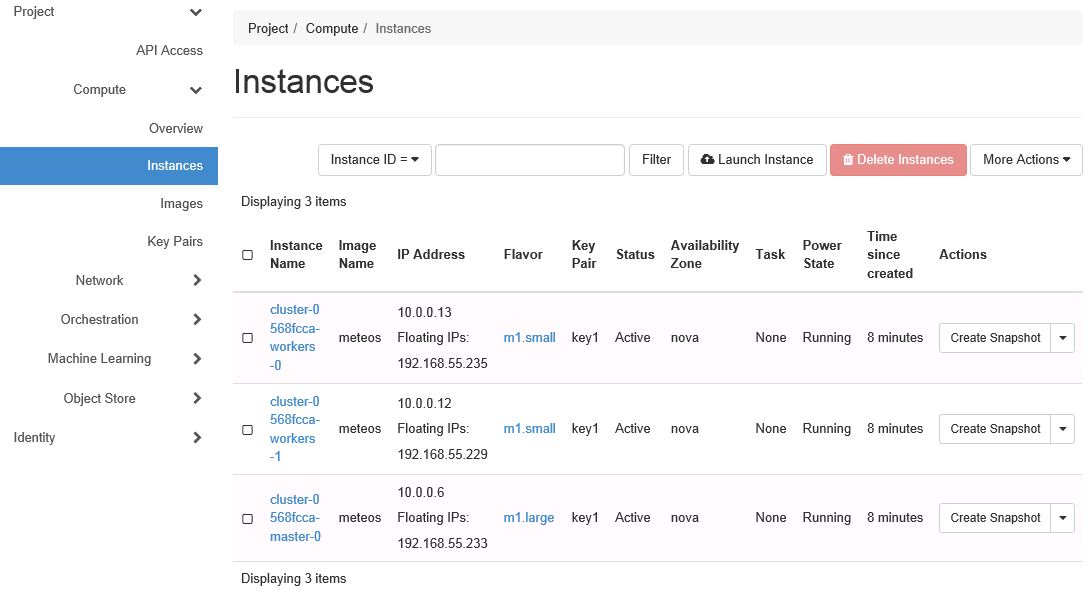
Experiment consists of virtual machines created by nova.
So, you can see virtual machines in Instance panel. A created experiment consists one m1.large master node and two m1.small worker nodes as you have specified in template.
3. Upload a raw data
Upload a raw data (in this example sample mail data set) to OpenStack Swift.
You can download a spam collection dataset from | here.
$ wget https://archive.ics.uci.edu/ml/machine-learning-databases/00228/smsspamcollection.zip
$ unzip smsspamcollection.zip
$ swift upload meteos SMSSpamCollection
SMSSpamCollection
4. Parse a raw data
Parse a raw data to enable Meteos to handle it.
As you can see in below, uploaded dataset begin with "[ham|smap] [TAB] [body of the mail] "
$ head -n3 SMSSpamCollection
ham     Go until jurong point, crazy.. Available only in bugis n great world la e buffet... Cine there got amore wat...
ham     Ok lar... Joking wif u oni...
spam    Free entry in 2 a wkly comp to win FA Cup final tkts 21st May 2005. Text FA to 87121 to receive entry question(std txt rate)T&C's apply 08452810075over18's
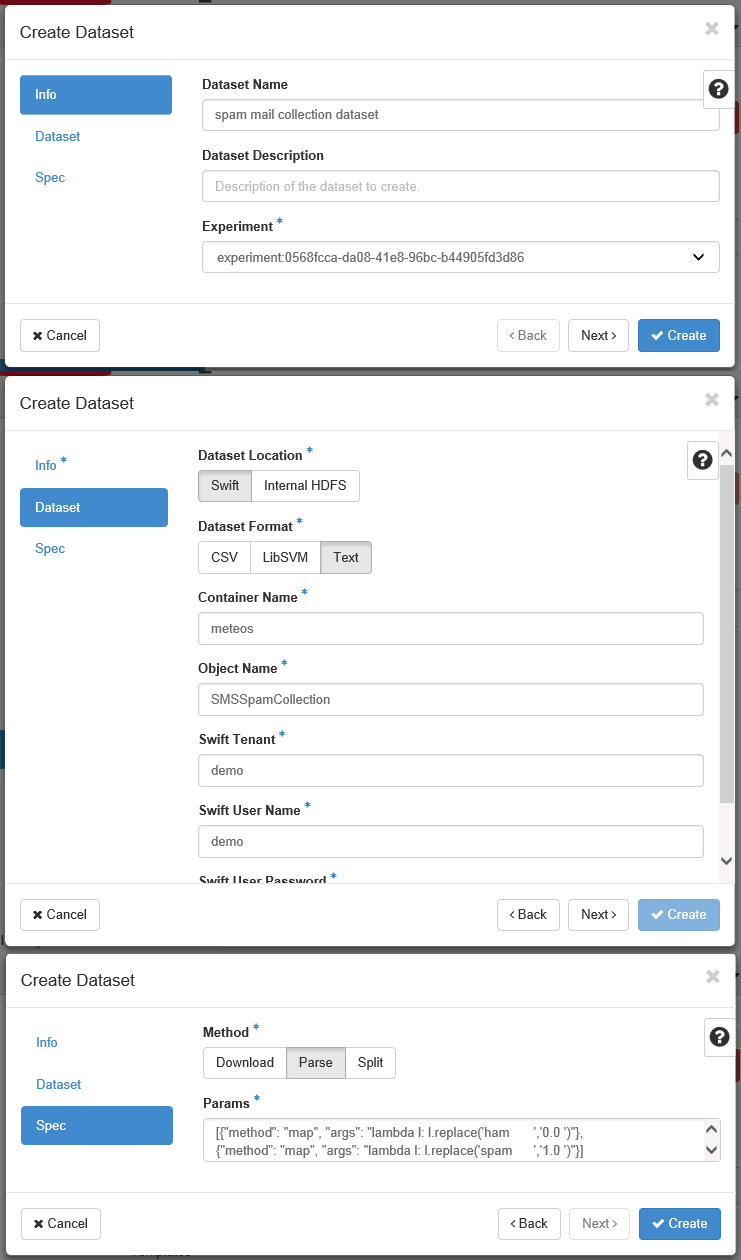
For using Classification Model of Meteos, dataset must begin with "[flag] [space] [value]...". And flag must be integer string.In this case, flag indicate whether it is a spam mail or not.
Select a Dataset panel and create dataset with parse method to enable Meteos to handle it.
5. Split a Dataset
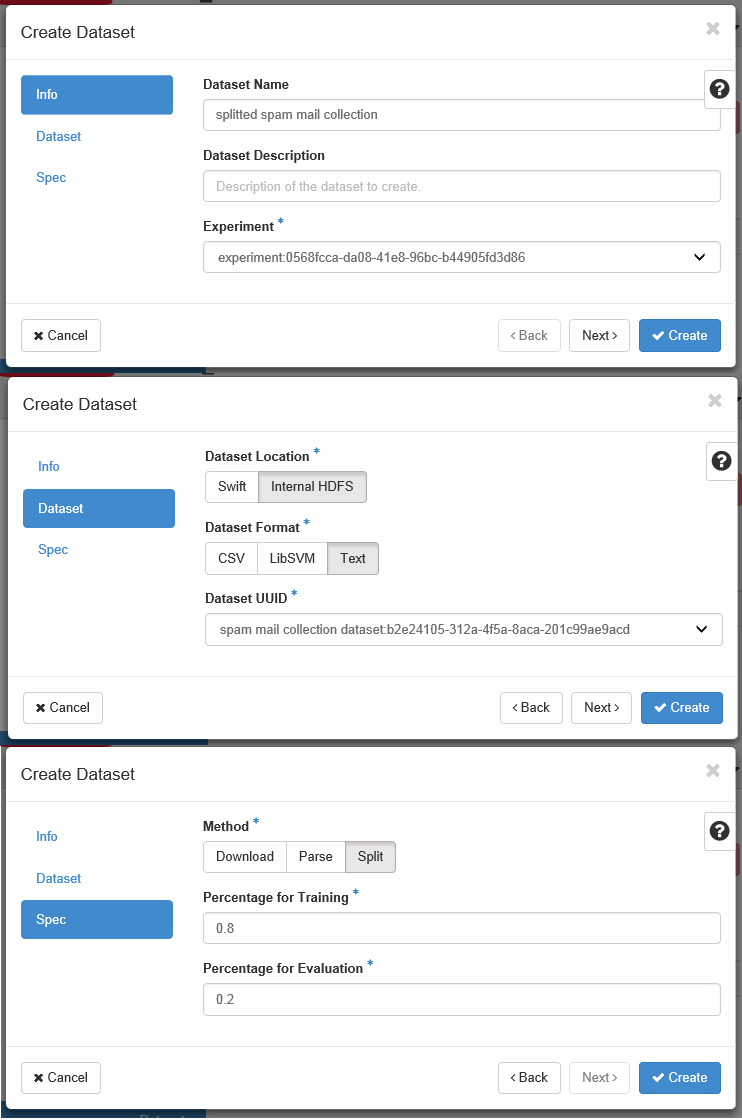
Split a dataset for creating model and evaluating model.
Select Dataset Panel and create dataset with split method as below.You can specify the percentage of split.
6. Create a prediction model
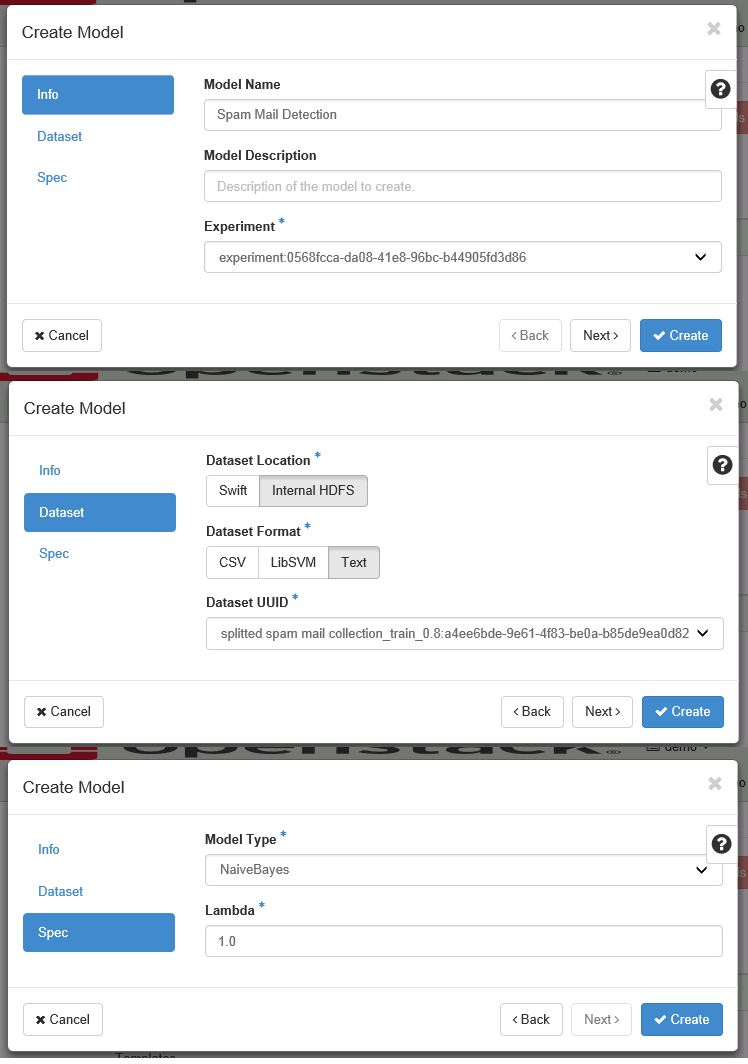
In this example, User creates a Model from splitted dataset for creating model.
Splitted dataset has been already distributed in hdfs of experiment environment.
So, you select "Internal HDFS" in "Dataset Location" parameter and select dataset UUID of training dataset.
7. Evaluate a prediction model
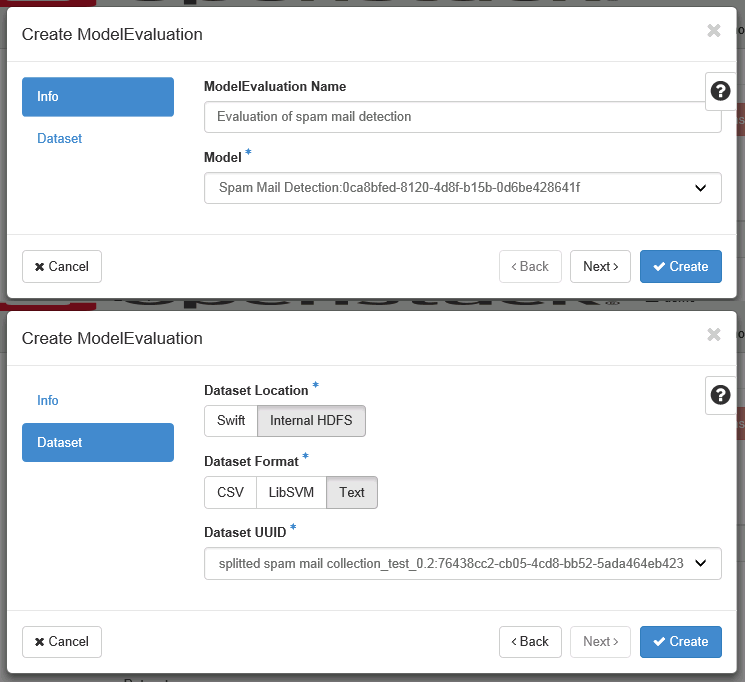
Evaluate accuracy of prediction model which you have created by using test dataset.
Select Model Evaluation panel, and create evaluation with below parameters.
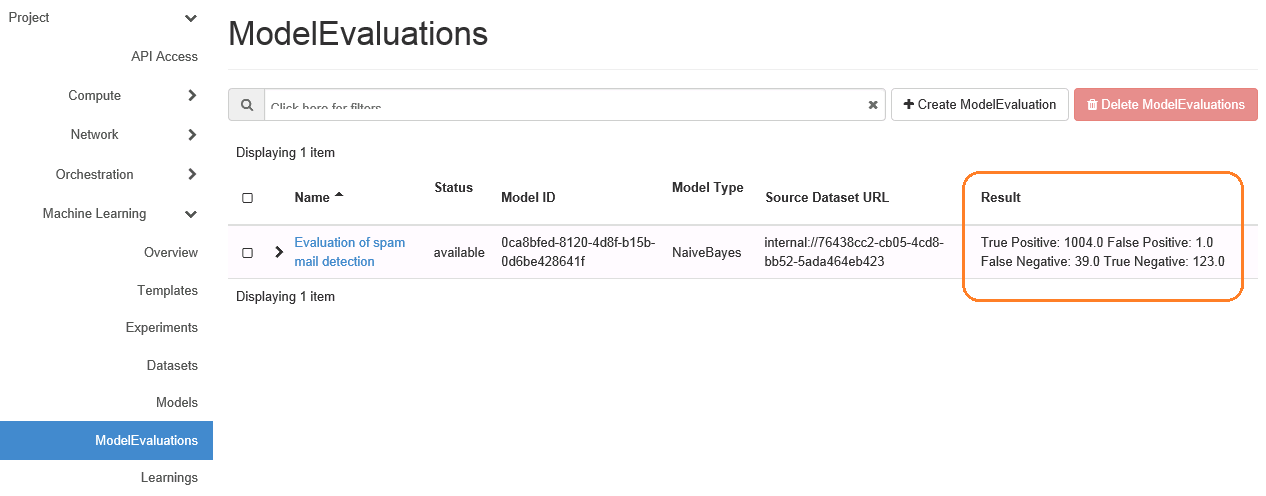
You can see the evaluation score in Result. Items of evaluation score differs depending on Prediction Model.
The following are the details of items of evaluation score in Binary Classification:
- True Positive - count of results which actual result is positive and predicted result is also positive.
- False Positive - count of results which actual result is positive and predicted result is negative.
- True Negative - count of results which actual result is negative and predicted result is positive.
- False Negative - count of results which actual result is negative and predicted result is also negative.
8. Predict
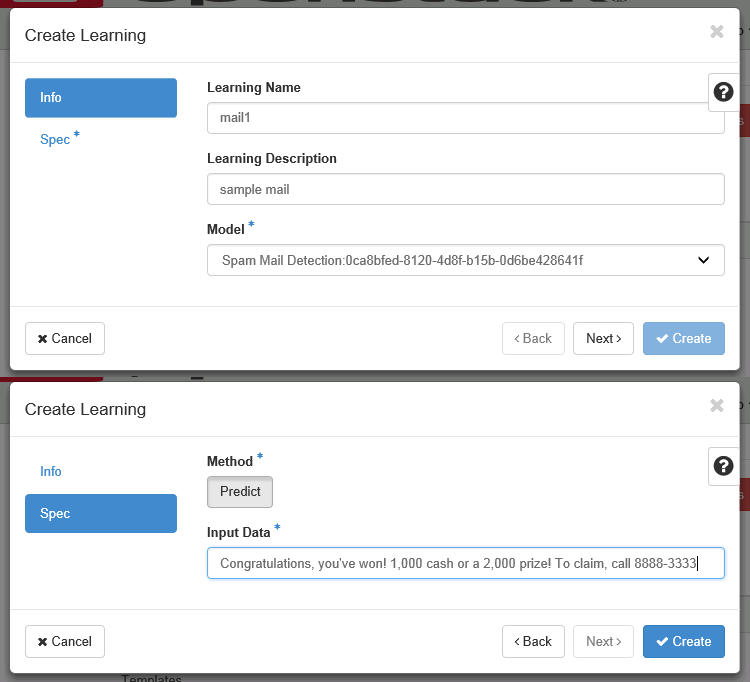
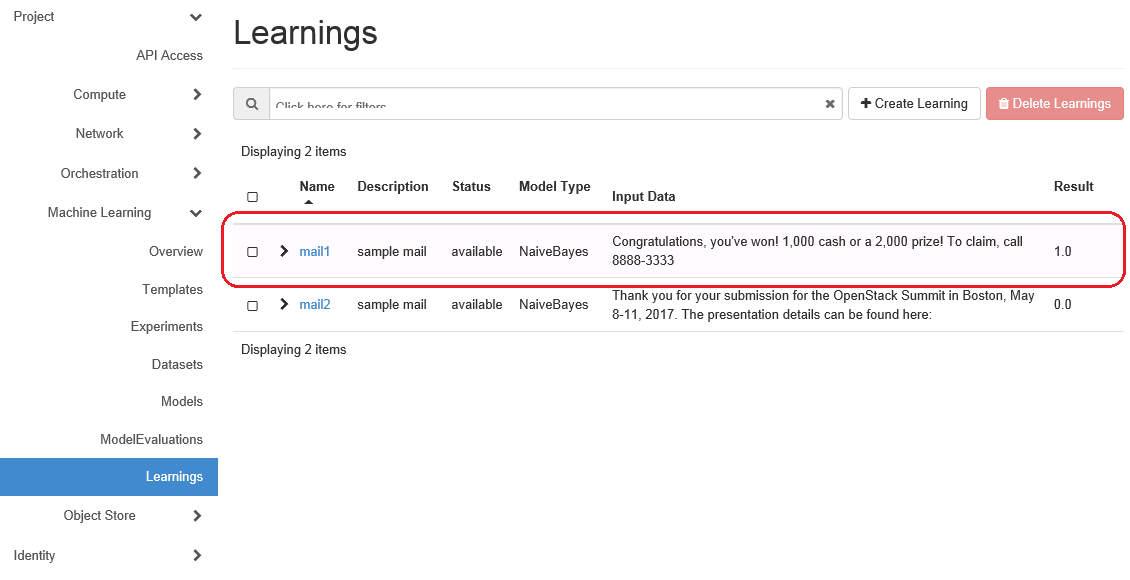
Create a learning job predicting whether it is a spam mail or not.
Specify the input value as "args" parameter. In this case, you specify the body of mail in args parameter.
Retrieve a predicted data as a stdout of job execution.
9. Online Prediction
You can load a Prediction Model in advance for online prediction by using "meteos-load" command.
In online prediction, user can retrieve a predicted data immediately.
You can get a predicted data as a response of REST API.

