Difference between revisions of "Use StarlingX as DevOps Infra"
(Created page with "The scalability of StarlingX is awesome, that it can be functional with only 3 nodes and scale to 100+ nodes in the future. This is perfect for devops use case. A new project...") |
|||
| Line 1: | Line 1: | ||
| − | The scalability of StarlingX is awesome | + | The scalability of StarlingX is awesome. It can be functional with only 3 nodes and scale to 100+ nodes in the future. This is perfect for devops use case. A new project might only have a few servers at the beginning and need to scale it in the future. |
This wiki assumes that the user already deployed a StarlingX and wants to practice devops for their projects. It will share some BKMs and provide an example StarlingX App for such use case. | This wiki assumes that the user already deployed a StarlingX and wants to practice devops for their projects. It will share some BKMs and provide an example StarlingX App for such use case. | ||
Revision as of 13:58, 1 December 2019
The scalability of StarlingX is awesome. It can be functional with only 3 nodes and scale to 100+ nodes in the future. This is perfect for devops use case. A new project might only have a few servers at the beginning and need to scale it in the future.
This wiki assumes that the user already deployed a StarlingX and wants to practice devops for their projects. It will share some BKMs and provide an example StarlingX App for such use case.
Contents
Install StarlingX
Refer to: StarlingX R2.0 Installation
CephFs Setup
DevOps App will use Cephfs for persistent volumes. It needs to setup CephFS on starlingx before install App.
- Create Ceph user and key
ceph auth get-or-create client.stx-devops mon 'allow r' mds 'allow r, allow rw path=/stx-devops' osd 'allow rw'
- Create Cephfs pools
ceph osd pool create fs_data 2048
ceph osd pool create fs_metadata 256
ceph fs new cephfs fs_metadata fs_data
- Start mds manually
# on controller-0
/usr/bin/ceph-mds --cluster ceph --id controller-0 --hot-standby 0
# on controller-1
/usr/bin/ceph-mds --cluster ceph --id controller-1 --hot-standby 0
- init folders for stx-devops
sudo mkdir -p /mnt/mycephfs
sudo mount -t ceph controller-0:6789:/ /mnt/mycephfs
sudo mkdir -p -m 777 /mnt/mycephfs/stx-devops/jenkins-master
sudo mkdir -p -m 777 /mnt/mycephfs/stx-devops/pub
sudo mkdir -p -m 777 /mnt/mycephfs/stx-devops/registry
sudo mkdir -p -m 777 /mnt/mycephfs/stx-devops/docker-io-mirror
Extend ephemeral-storage
ephemeral-storage is much faster than cephfs and can be used as local disk for CI/CD. By default, it is about 9G on every node.
Create extend-cgts-vg.sh script as below:
#!/bin/bash -e
source /etc/platform/openrc
set -x

HOST_NAME=$1
PV_NAME=cgts-vg
EXT_DISK=$2

EXT_DISK_UUID=$(system host-disk-list $HOST_NAME --nowrap | grep ${EXT_DISK}  | awk '{print $2}')
EXT_PARTITION_SIZE=$(system host-disk-list $HOST_NAME --nowrap | grep ${EXT_DISK}  | awk '{print $12}' | awk '{print int($1-1)}')
EXT_PARTITION=$(system host-disk-partition-add -t lvm_phys_vol $HOST_NAME ${EXT_DISK_UUID} ${EXT_PARTITION_SIZE})
EXT_PARTITION_UUID=$(echo ${EXT_PARTITION} | grep -ow "| uuid | [a-z0-9\-]* |" | awk '{print $4}')

echo ">>> Wait for partition $EXT_PARTITION_UUID to be ready."
while true; do
    if system host-disk-partition-list $HOST_NAME --nowrap | grep $EXT_PARTITION_UUID | grep -E "Ready|unlock"; then
        break
    fi
    sleep 1
done
Lock host and run extend-cgts-vg.sh to extend cgts-vg:
extend-cgts-vg.sh <hostname> <disk e.g. sda, sdb>
Unlock the host and run below command:
system host-fs-modify $HOST_NAME kubelet=<num of GB>
Install StarlingX DevOps App
Download it from stx-devops App v1.0.0
system application-upload stx-devops-1.0.0.tgz

system helm-override-update stx-devops stx-devops stx-devops \
    --set images.tags.registry="<local_registry/docker.io>/registry:2.7.1" \
    --set images.tags.nginx="<local_registry/docker.io>/nginx:1.16.0" \
    --set images.tags.jenkins="<local_registry/docker.io>/jenkins/jenkins:lts" \
    --set images.tags.jenkins_slave="<local_registry/docker.io>/jenkins/jnlp-slave:3.35-5-alpine" \
    --set images.tags.docker_build="<local_registry/docker.io>/starlingxabc/docker-build" \
    --set ingress.base_url="<ingress url>" \
    --set ceph.user="client.stx-devops" \
    --set ceph.key="<key>" \
    --set proxy.enabled=true \
    --set proxy.http_proxy="http://<hostname>:<port>" \
    --set proxy.https_proxy="https://<hostname>:<port>"

system application-apply stx-devops
Build docker image
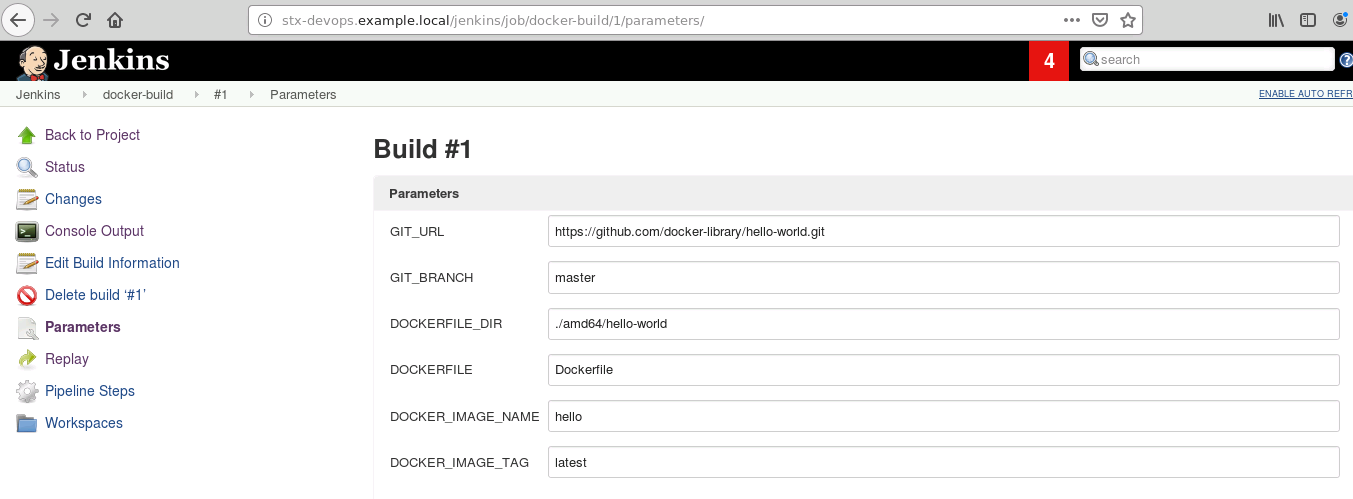
Open "http://<ingress_url>/jenkins" with browser and run "docker-build" as below:

When the build is completed, the docker image will be uploaded to registry "ingress_url".

An image tarball will also be saved to "ingress_url/pub/docker-build" as below:

