Difference between revisions of "Neutron/LBaaS/UI"
m |
|||
| Line 1: | Line 1: | ||
| − | |||
== User Scenarios == | == User Scenarios == | ||
| Line 27: | Line 26: | ||
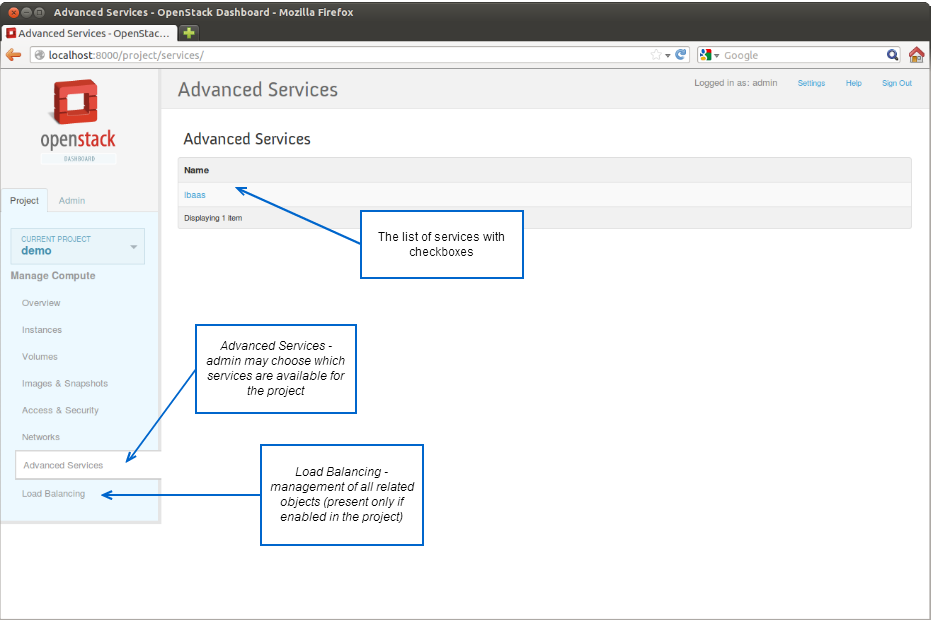
=== Advanced Services screen === | === Advanced Services screen === | ||
| − | [[Image: | + | [[Image:horizon-advservices.png]] |
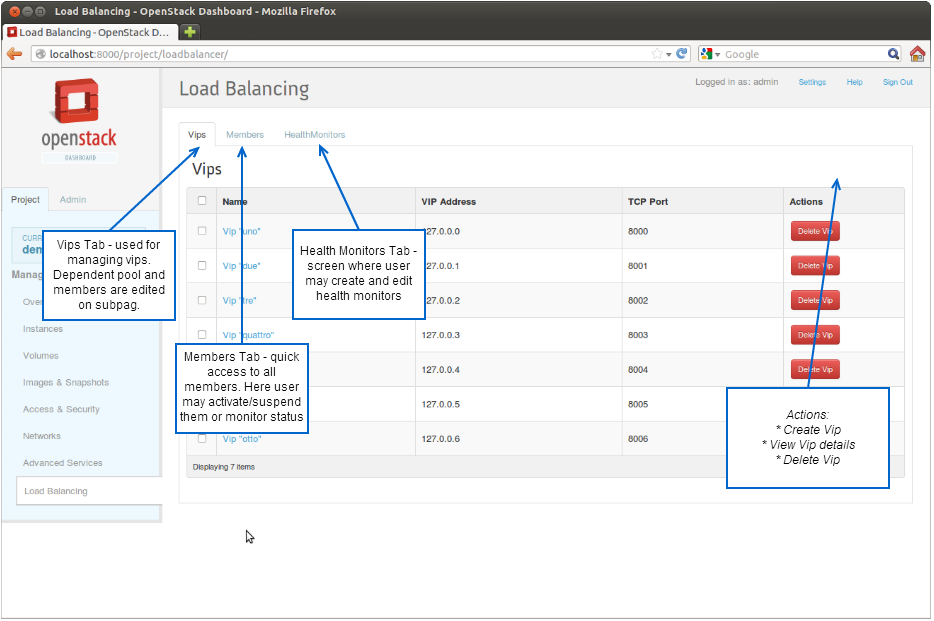
=== Load Balancing screen === | === Load Balancing screen === | ||
| − | [[Image: | + | [[Image:horizon-loadbalancing.png]] |
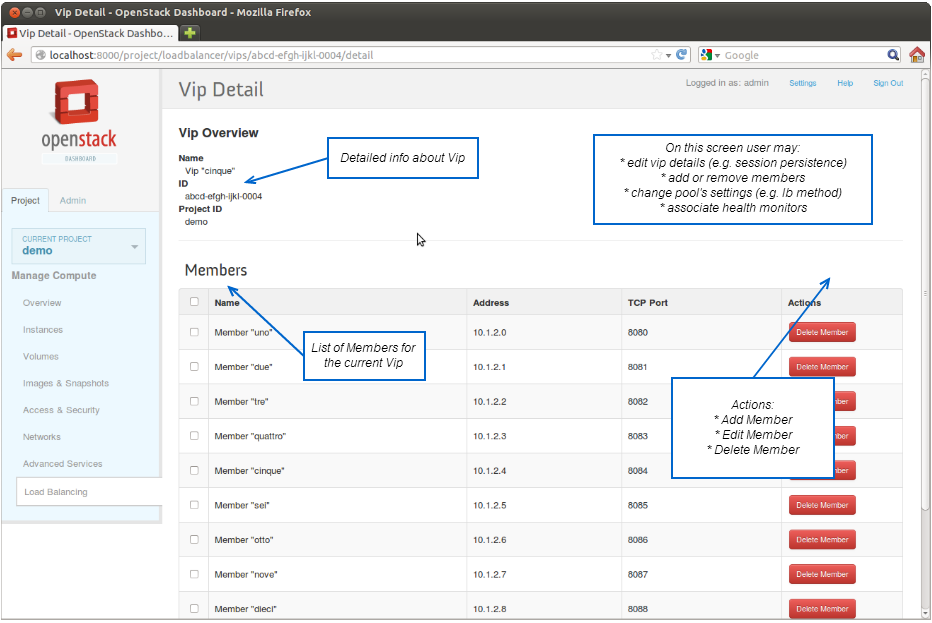
=== Vip Management screen === | === Vip Management screen === | ||
| − | [[Image: | + | [[Image:horizon-loadbalancing-vip.png]] |
Revision as of 21:38, 16 February 2013
Contents
User Scenarios
Scenario 1. Enable load balancing for tenant
- Log in as admin
- Go to Advanced Services screen and enable Load Balancing service for Project
- Go to Service properties and add Device into the list of available devices
Scenario 2. Create new balanced service
- Log in as user
- Go to Load Balancing screen. In Vips tab (it opens by default) click Create Vip
- Provide Vip name, click Ok. The screen switches to Vip Overview
- Add members, change balancing method, health monitors, etc.
Scenario 3. Put member (backend server) out of service
- Log in as user
- Go to Load Balancing screen, Members tab
- Find the member by address
- In the commands selector choose Put Offline, confirm
Scenario 4. Create custom health monitor
- Log in as user
- Go to Load Balancing screen, Health Monitors tab
- Click Add New Monitor, provide details. Added monitor will be available in selector in Vip editor


